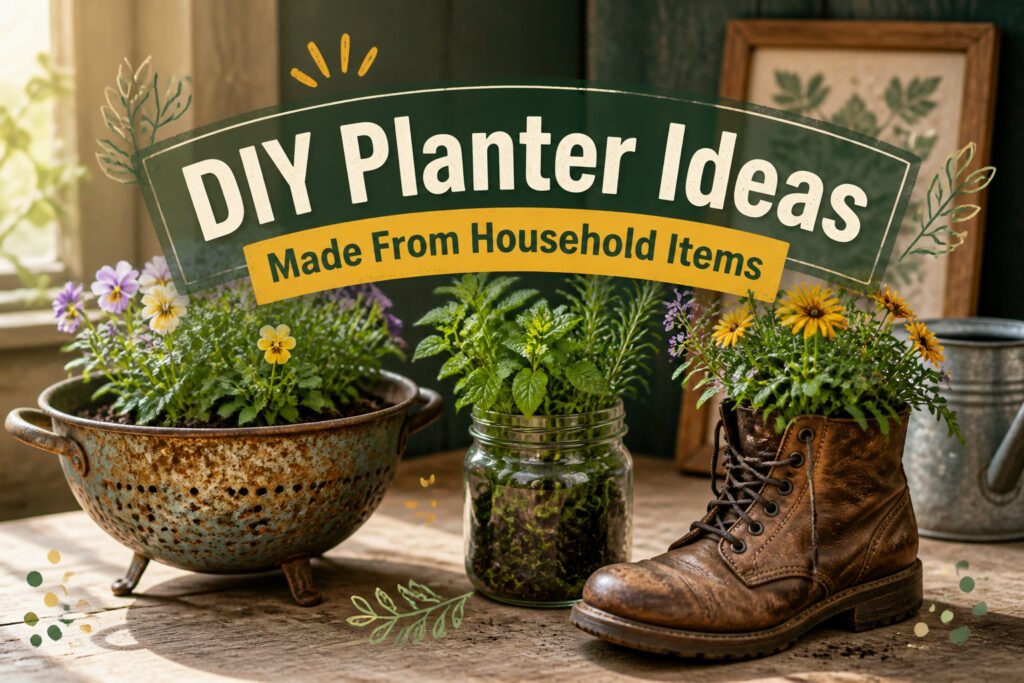
The best diy planter ideas cost nothing and take an afternoon, but only if you already have the item. A rusted colander from your kitchen drawer works straight away because its holes are drainage built in, though you’ll need window screen to keep the soil from washing through with every watering.
1. Recycled Aluminum Frames for Succulents
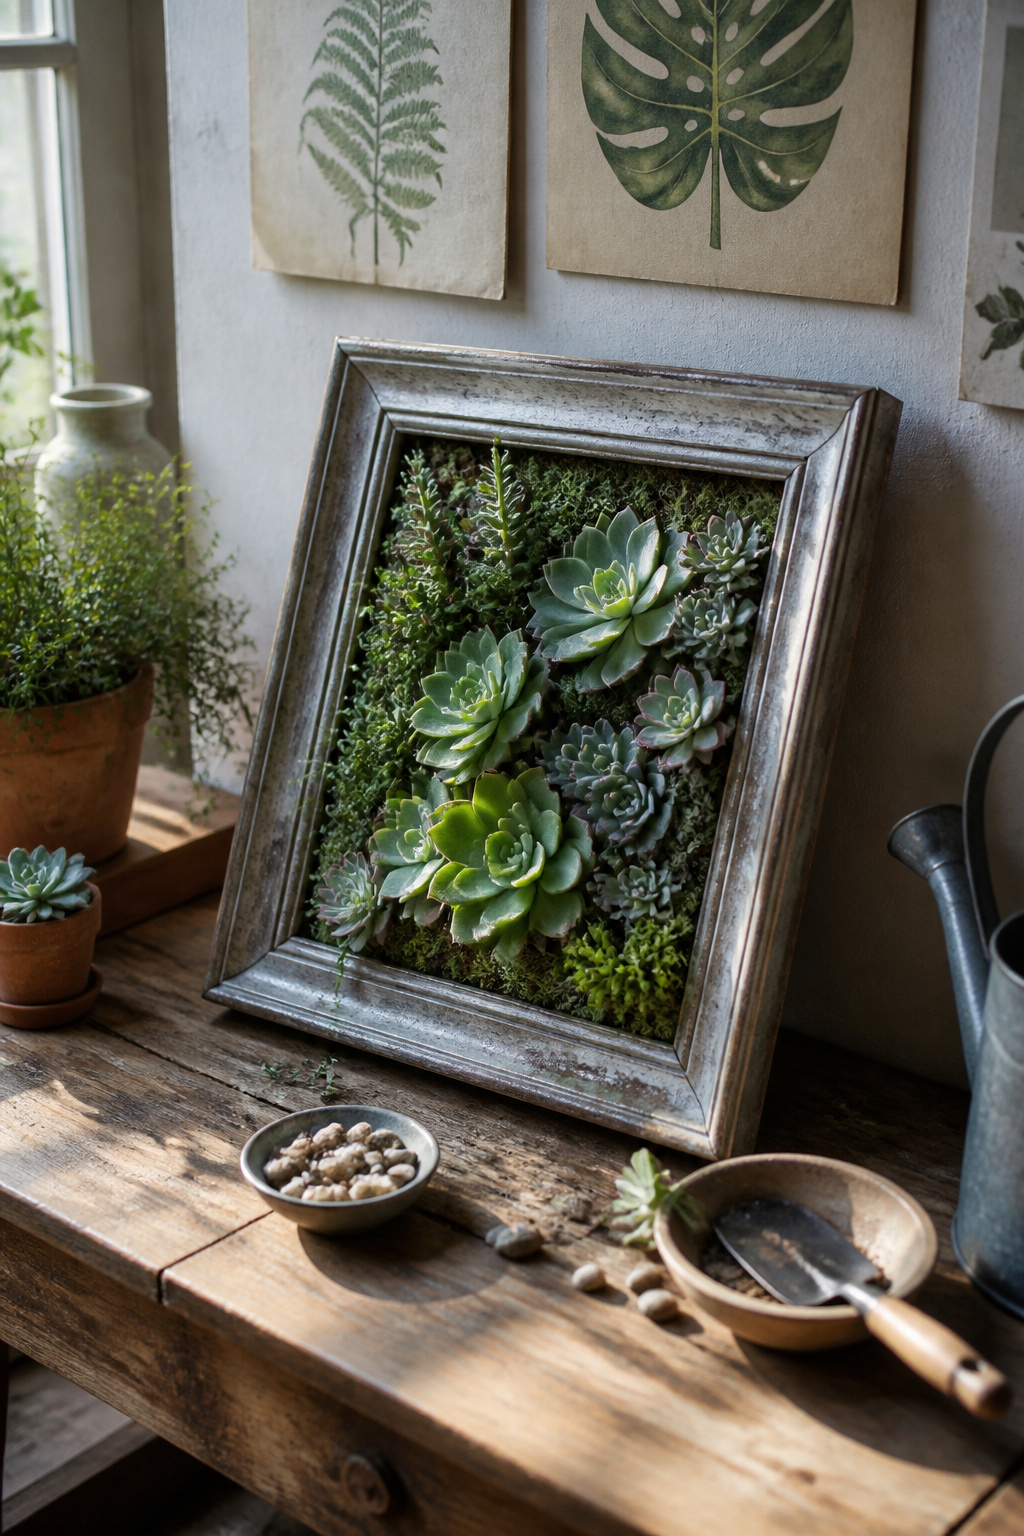
Old picture frames collect in every closet, and the aluminum ones are rigid enough to hold soil without warping. I pull the glass and backing out, staple a piece of aluminum window screen across the opening, and that mesh becomes the floor of a shallow planter. Succulents need only 1–2 inches of soil depth, which matches what a standard frame can give without looking bulky. The screen drains well on its own, though I set the frame at a slight tilt or prop one edge so water runs off rather than pooling. Shallow soil suits these plants because their roots spread wide rather than deep, and soggy centers are what kill them. A coat of spray paint on the frame hides scratches and rust spots if the look matters to you. I have left mine raw, and the aluminum dulls to a soft gray that disappears behind the plants.
2. Vertical Shoe Holder Planter
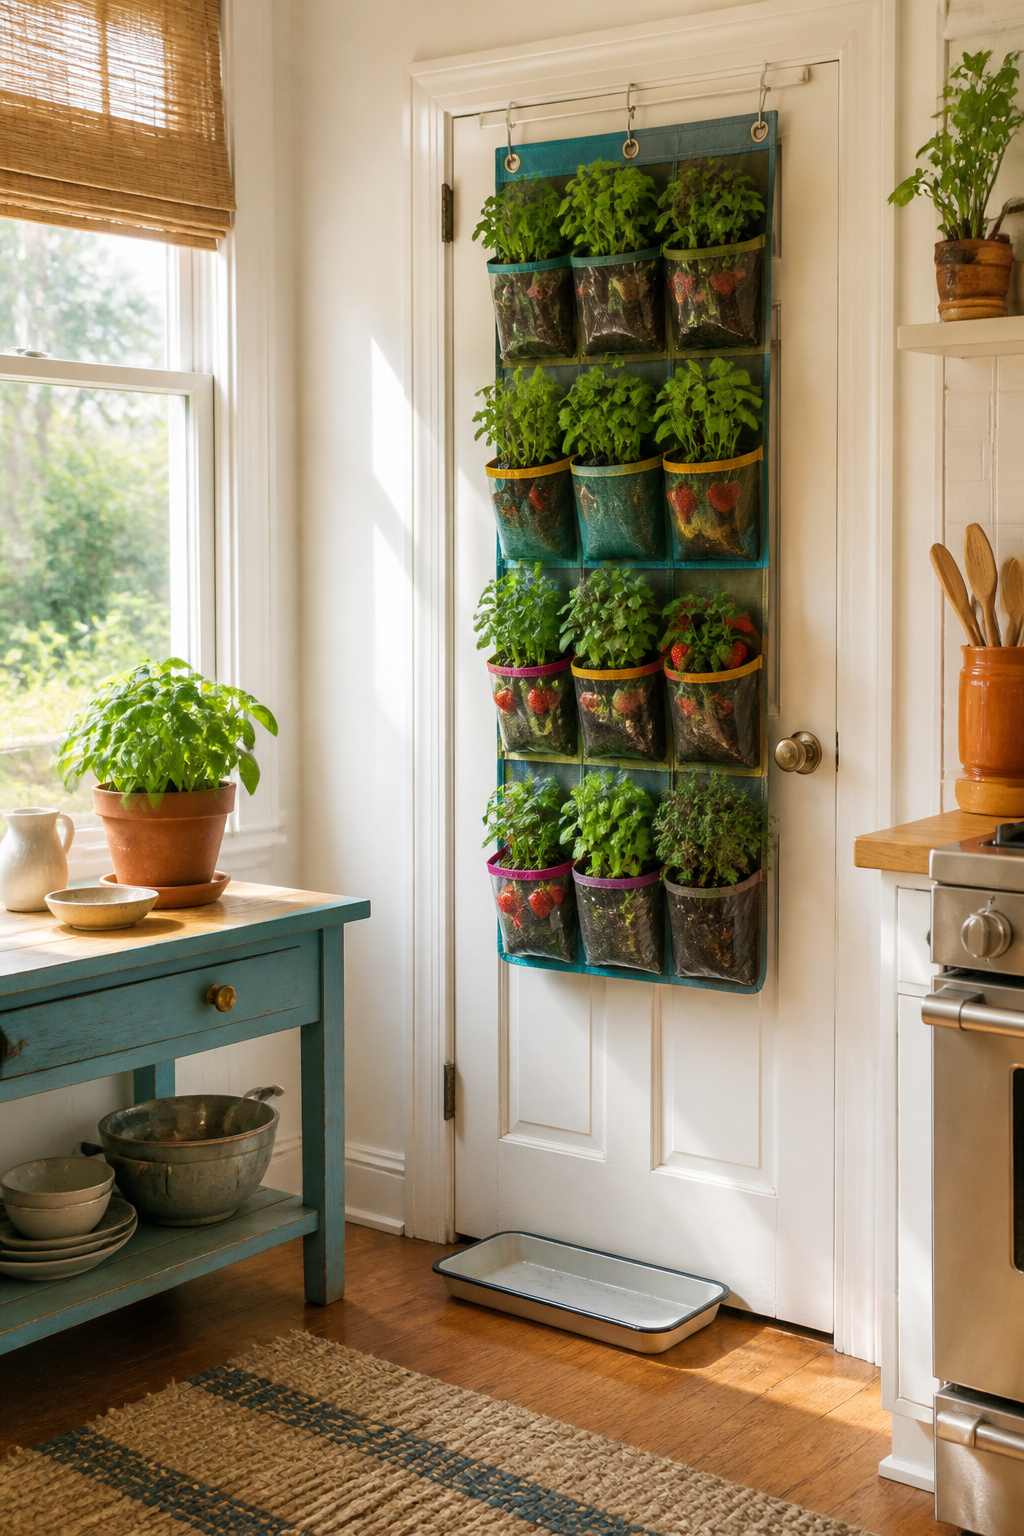
An over-the-door shoe organizer with clear pockets turns into a vertical herb or strawberry garden with almost no construction. Each pocket holds one plant, which keeps roots from competing and makes it obvious when something needs water. The fabric breathes, but that same porosity means water seeps straight through. Without some form of lining or a drip tray tucked behind, you’ll stain whatever sits below. Direct watering with a narrow spout, or slipping a small plastic cup inside each pocket, controls the runoff better than spraying from above. Strawberries work especially well here because the fruit hangs clear of the soil and rots less. Herbs want more root space than you’d think; basil and parsley fill a pocket fast, while thyme and oregano stay manageable longer. The whole thing hangs on a door you already have, so the only space it costs is the swing radius. Move it before you open the door hard into a wall, though. The hooks hold weight fine until momentum snaps a plastic hanger.
3. Coffee Can Planters with Stencils
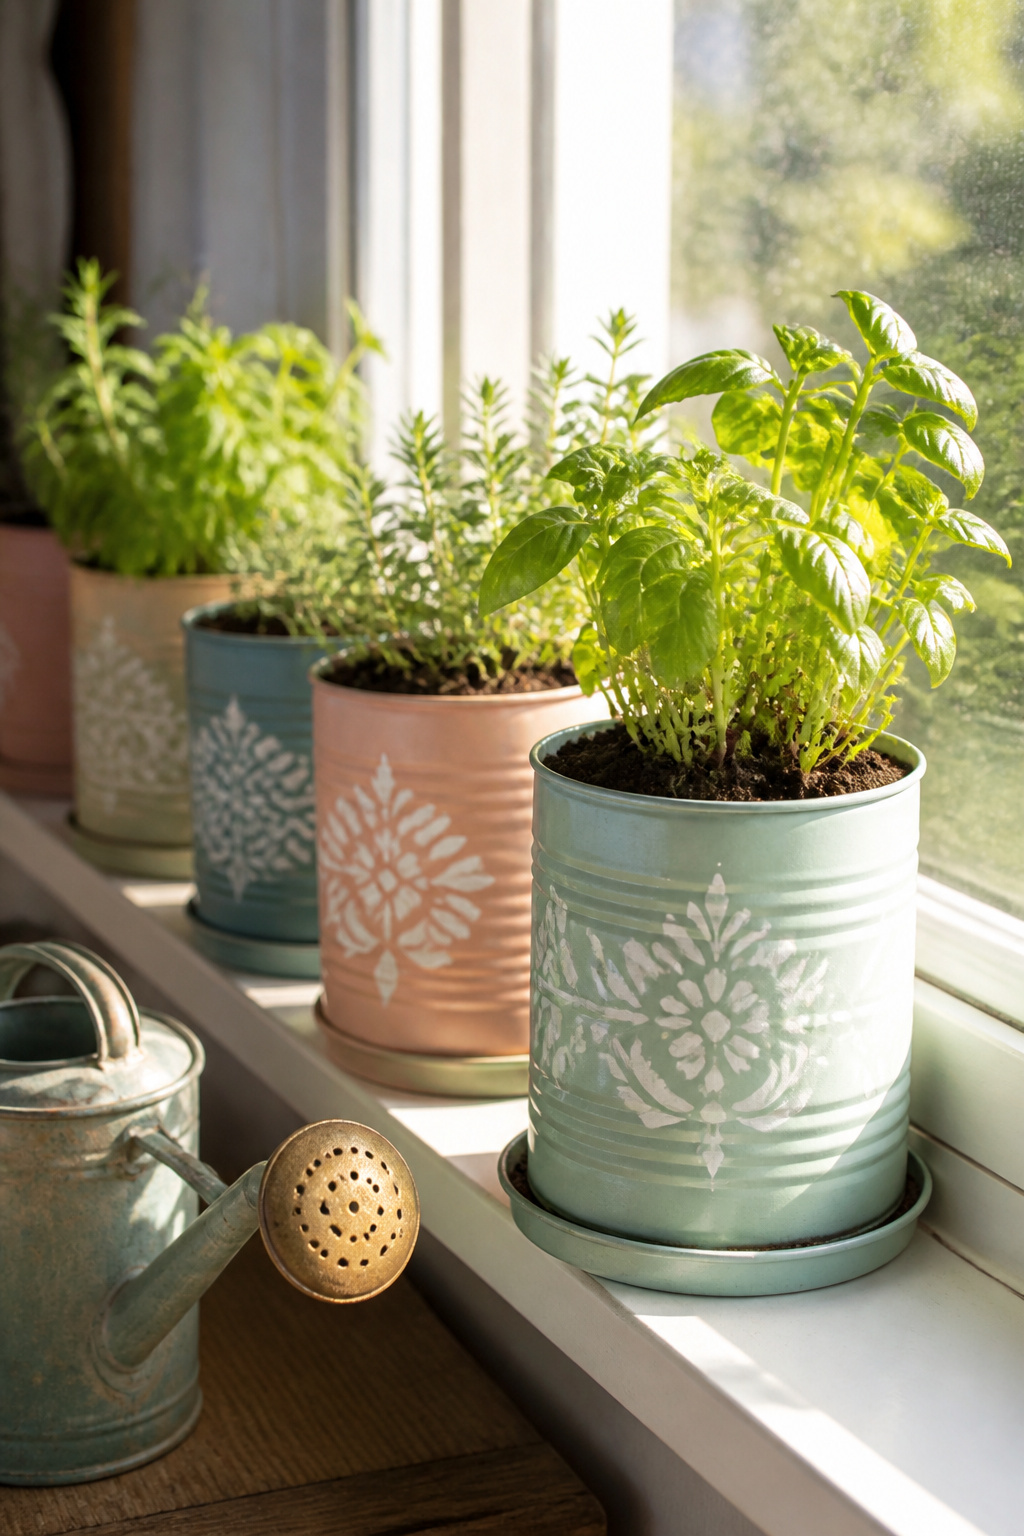
Coffee cans need a full scrub with dish soap before anything else. The oils cling to the metal even after the label peels off, and residue left behind will fight whatever paint or adhesive you put on next. A 39-ounce can holds one small herb or annual, which is about right for a windowsill row. Drill three to five holes in the bottom with a bit sized for drainage, not so large that soil washes through with every watering.
Stencils work better on metal than freehand painting because the surface is slick and unforgiving. Spray adhesive on the back of the stencil keeps it from sliding, and two light coats of acrylic cover better than one heavy pass that pools at the edges. Let it dry between coats; impatience here costs you the clean line you wanted.
The finished can sits nicely on a saucer or hangs with wire threaded through holes punched just below the rim. Either way, weight it with a little gravel in the bottom before adding soil. A full can of wet dirt is heavier than it looks, and a hook that holds an empty will sag once planted.
4. Old Jeans Pocket Planter
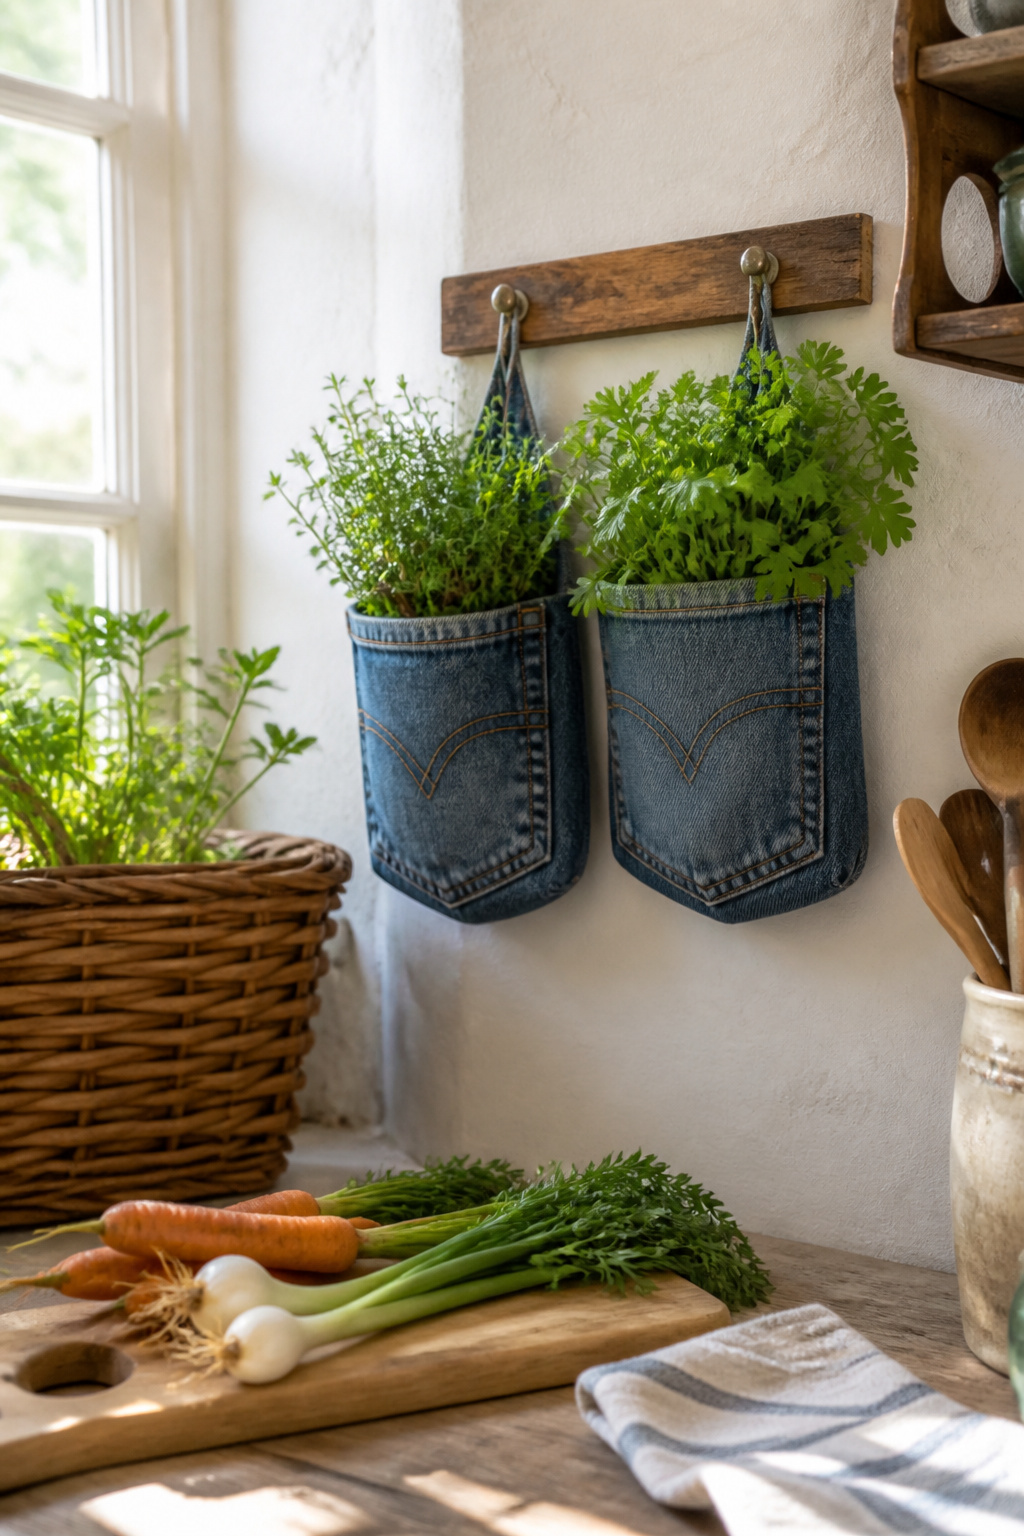
The pair of worn jeans sitting in the mending pile for three months finally found its purpose when I cut the back pockets free. A seam ripper works, but sharp fabric scissors straight through the waistband save time. Each pocket needs its top edge folded twice and stitched down so the denim does not fray where the hanger cord threads through.
A single pocket holds roughly enough soil for a shallow-rooted herb like thyme or a small succulent. Anything deeper, and the roots hit the folded seam within a week. I learned that with a parsley attempt that dried out fast and never thrived.
Cotton denim fades to that dusty sky color within one summer outside, and the fabric weakens where it stays damp against a wall. These planters last longer hung under a covered porch where rain hits them only at an angle, or used indoors on a kitchen window where the herb stays within arm’s reach of a cutting board. Plan on replacing the pocket every season if you leave it fully exposed.
5. Upcycled Fabric Planters
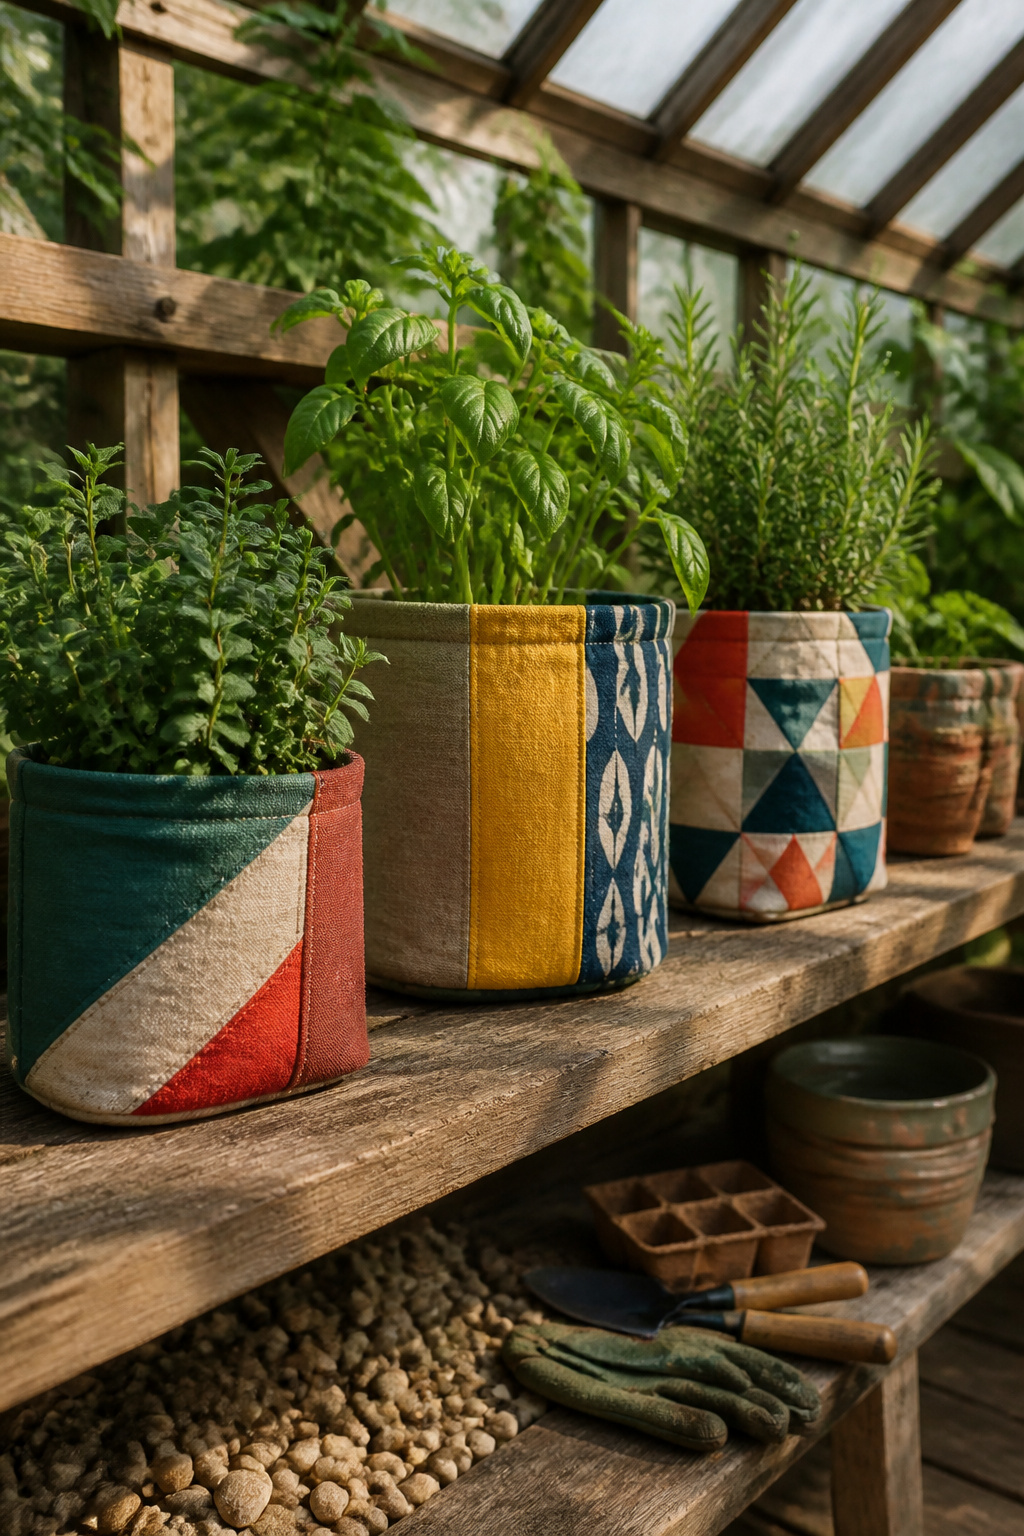
Canvas scraps and upholstery sample books that show up at estate sales or get tossed during redecorating make surprisingly decent soft planters, if you build them with the understanding that fabric rots the second it stays wet. A single layer of cotton or linen will hold soil for maybe one watering before it turns to compost itself, so the build has to account for that from the start.
The approach that actually lasts is a plastic liner nested inside a fabric shell, or three to four layers of heavy canvas sewn together so the outer faces stay dry while the inner ones take the hit. A heavy-duty trash bag works in a pinch, though it looks cheap through the weave; better is a flexible planter liner from the garden store, or a thick contractor bag turned inside-out so the printed side hides against the soil. The fabric becomes the visual element, the thing that reads "handmade" on a shelf or porch rail, while the plastic does the actual work of holding moisture.
Drainage still matters. Punch a few holes through the plastic where it sits lowest, or the roots drown in their own bathwater. The fabric outer layer then wicks just enough to look lived-in without falling apart, and when the seasons turn you can fold the whole thing flat instead of finding storage for a stack of rigid pots.
6. Old Colander Planter
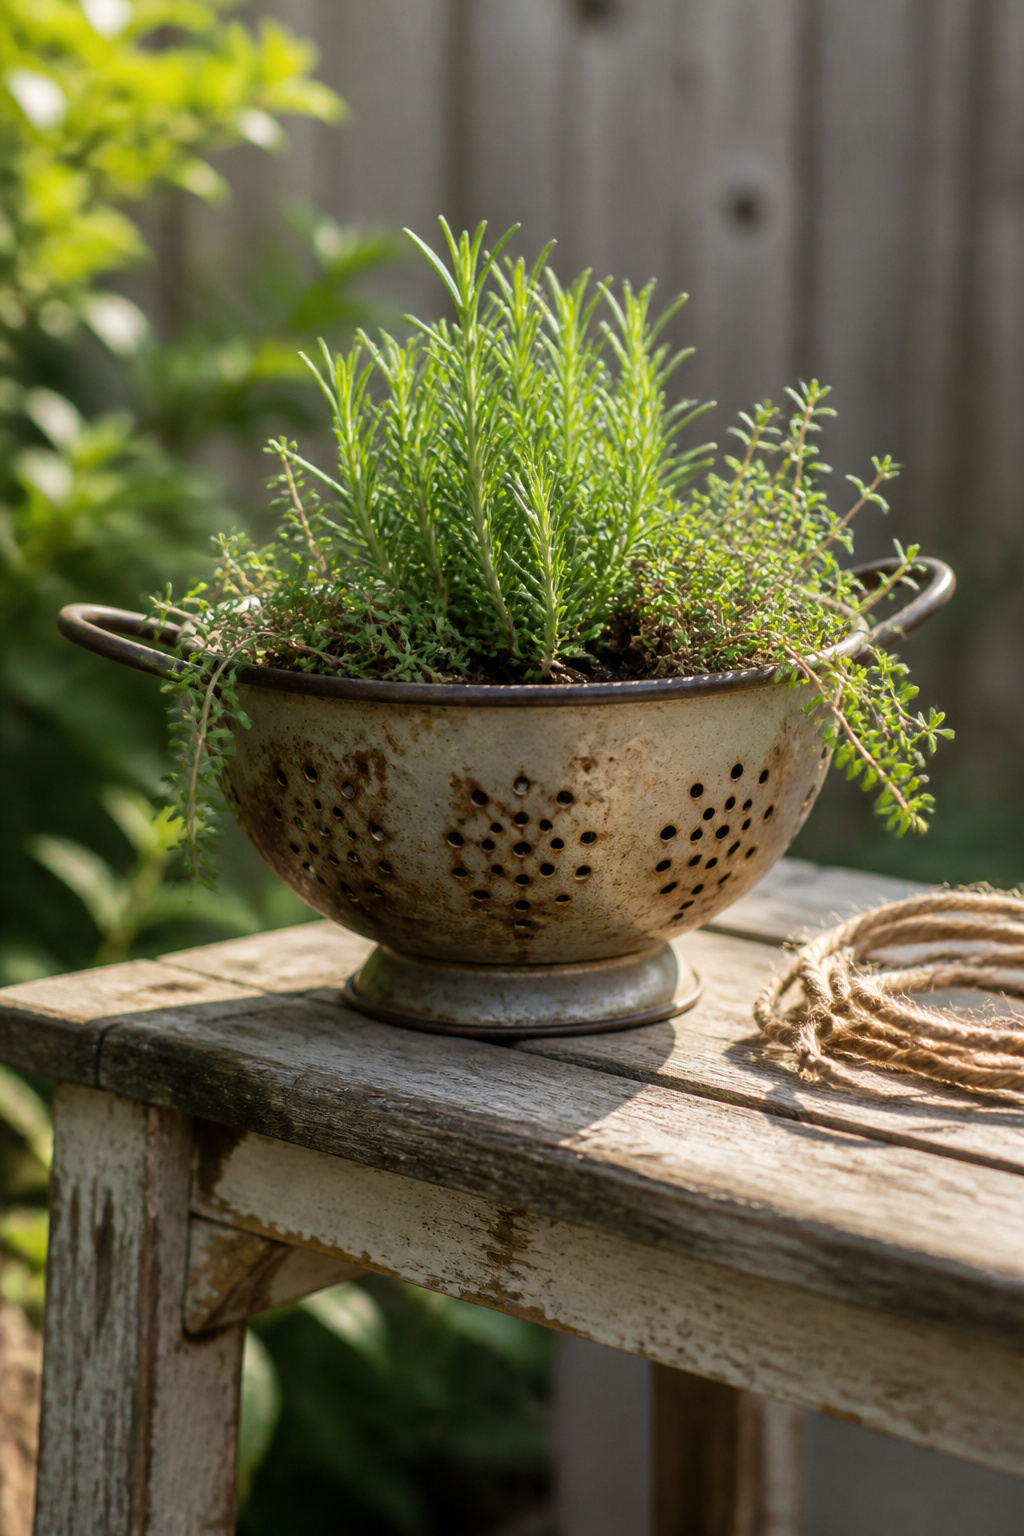
A rusted colander in the back of your kitchen drawer has one job already built in: those holes are the drainage most store-bought planters charge extra for. Soil slips through, though, so a single layer of fiberglass window screen or hardware cloth cut to fit the bowl keeps everything in place without blocking water. Herbs that rot in standing water, rosemary especially, do noticeably better in this setup than they do in pots where I have to remember to drill holes myself.
The handles mean hanging takes about two minutes of work with a length of chain or even sturdy twine looped through the existing loops. A 10-inch colander holds enough soil for a single mature rosemary or a tight cluster of thyme and oregano. The metal heats up in full afternoon sun, so morning light placement works better if your summers run hot. Enamel-coated colanders chip eventually, but the bare steel ones just weather to a dull patina that reads as intentional.
7. Vintage Toolbox Planter
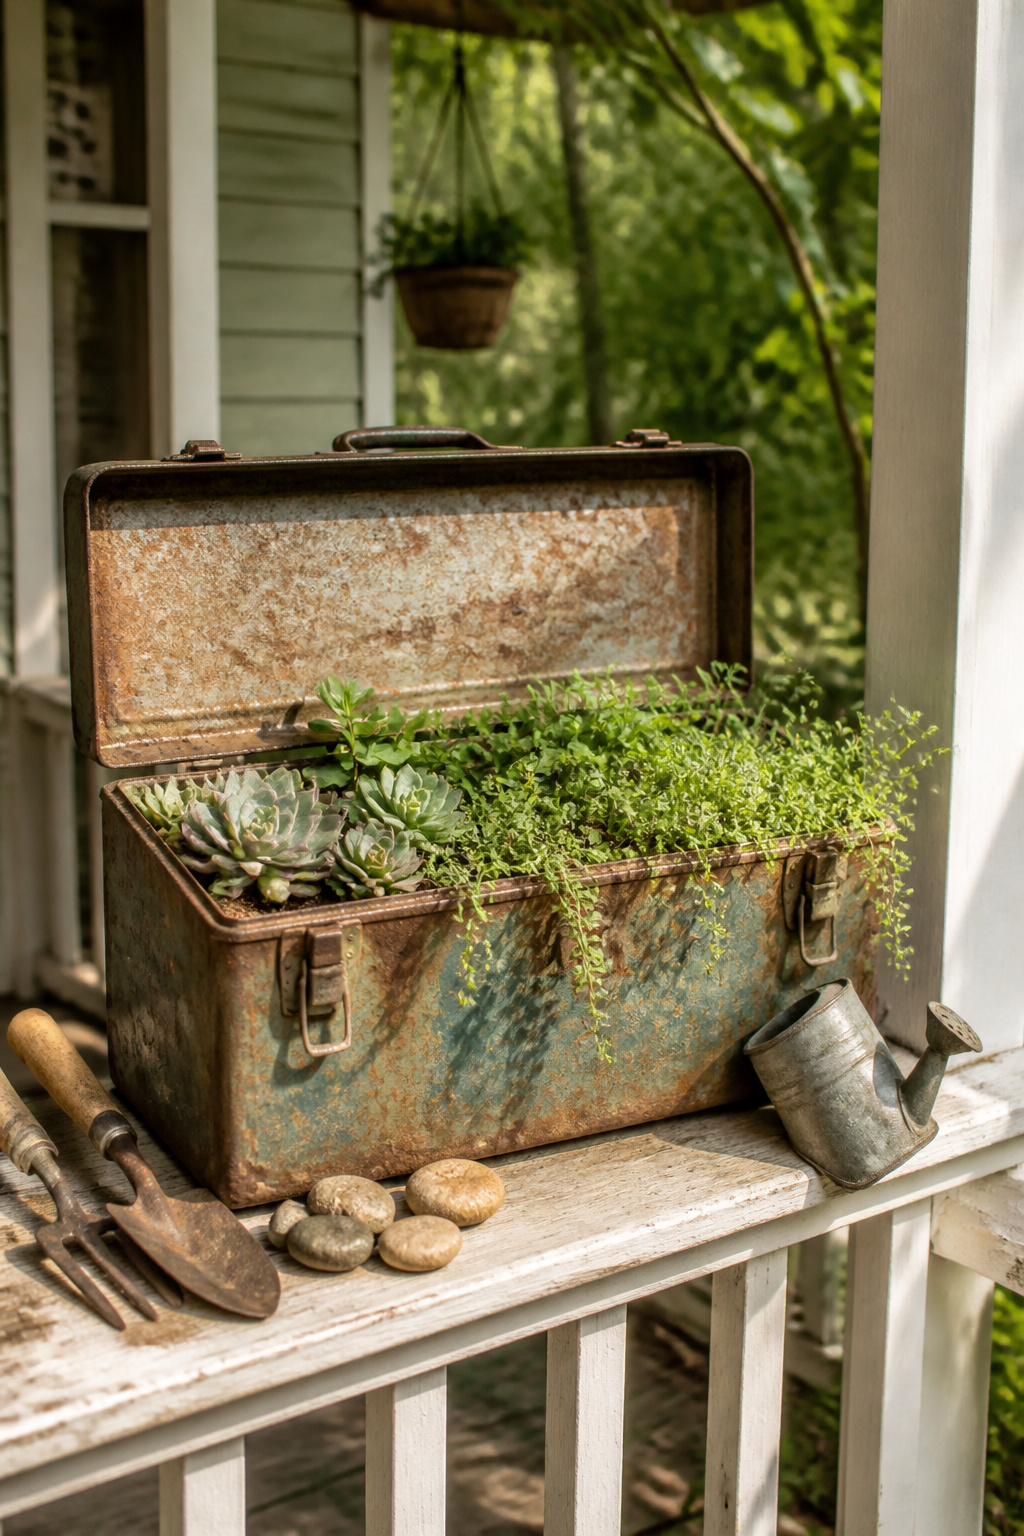
A rusty toolbox with the latch still working makes one of the more satisfying planters to set on a porch railing. The patina reads as history rather than neglect, though that same rust will eat through the bottom in a season or two if you let it. Drilling a half-dozen quarter-inch holes across the lowest point gives water somewhere to go; metal dulls standard bits fast, so a step drill handles the thin steel without grabbing. Wood bottoms are kinder to work with and hold up longer, but either way you want a sheet of heavy plastic between the soil and the surface. Leave enough slack to fold up the sides like a liner, then trim the excess an inch below the rim so it does not show.
Shallow-rooted plants are the match here: sedum, hens-and-chicks, or a tight cluster of creeping thyme will fill the footprint without drowning in the depth that a toolbox provides. Pack the bottom two inches with gravel before the soil goes in, or that plastic pool will backfire and hold water instead of releasing it. I have seen someone skip the liner to let the rust show through faster; it photographs well for about six weeks, then the bottom gives out and the whole thing warps.
8. Old Bucket Planter
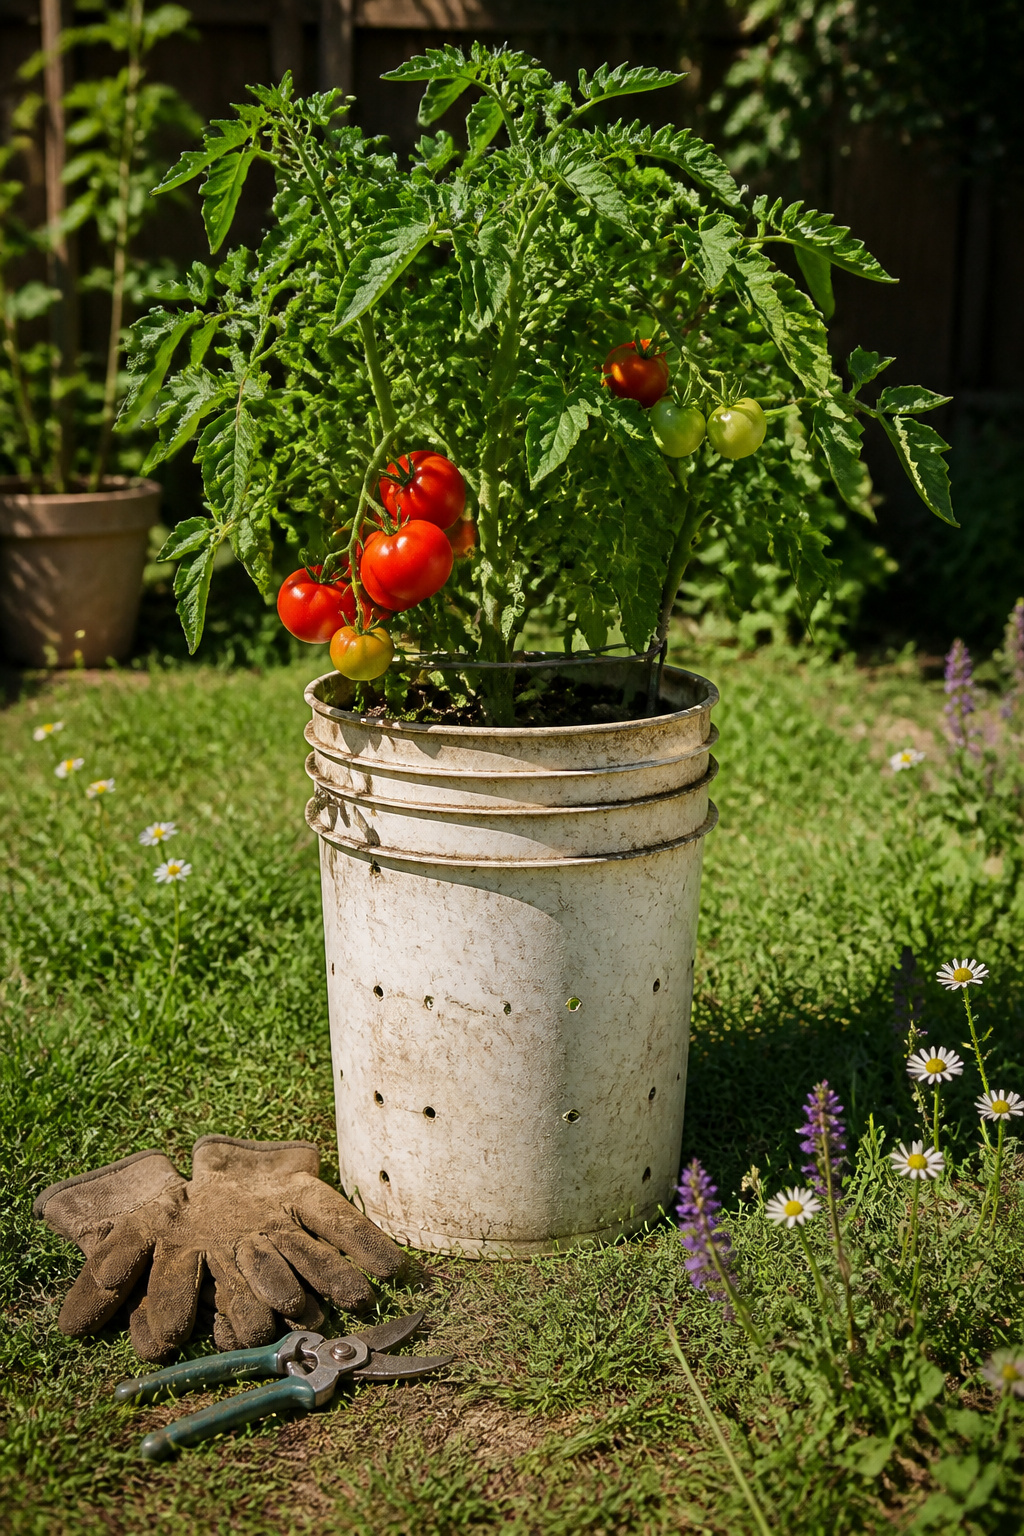
A five-gallon bucket with holes drilled in the bottom handles one tomato or pepper plant through a full season. Black and dark green plastic heat up fast in afternoon sun; the soil can climb past what roots tolerate, so afternoon shade or a lighter-colored bucket keeps production steady. I learned that after watching a cherry tomato wilt every July afternoon despite steady watering. Moving the bucket to the east side of the house fixed it in a day. Drill drainage holes at least a quarter inch across, or the thing turns into a pond every time it rains. Paint helps with heat, but a quick wrap of scrap burlap or an old white grocery bag works too and costs nothing. The handles make late-season moves easier when the plant gets top-heavy.
9. IKEA Kitchen Sink Caddy for Herbs
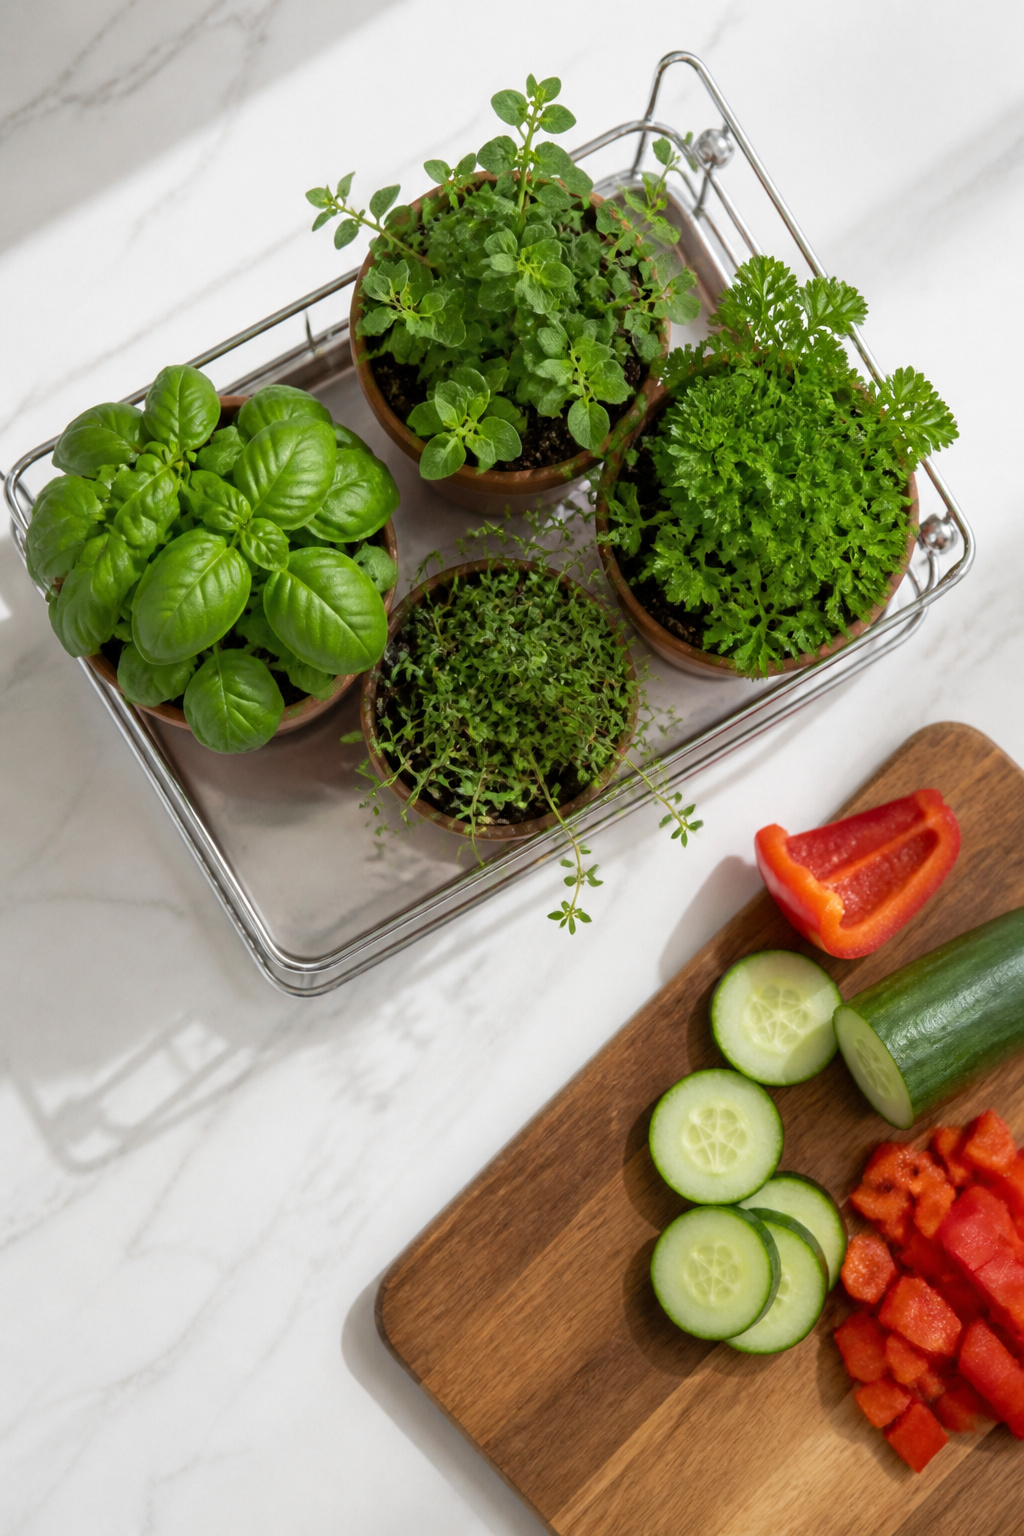
The VURM four-pot caddy sits flat on a windowsill with its wire frame holding small terra cotta pots upright and the shallow tray underneath catching drips. Three to four inch pots fit depending on whether you have the three- or four-slot model, which matters because basil and parsley need more root room than thyme. I set mine up after the third cactus died from sitting in water, and the drainage tray solved that outright. The compartments keep herbs from tipping toward the glass, and the whole unit lifts off for wiping. A four-inch pot is the largest that clears the wire loops without wedging. The chrome finish rusts eventually near the sink, so the black powder-coated version lasts longer in a steamy kitchen. For renters, nothing gets drilled into the sill, and the caddy returns to holding sponges if the herbs fail.
10. Old Tire Planter
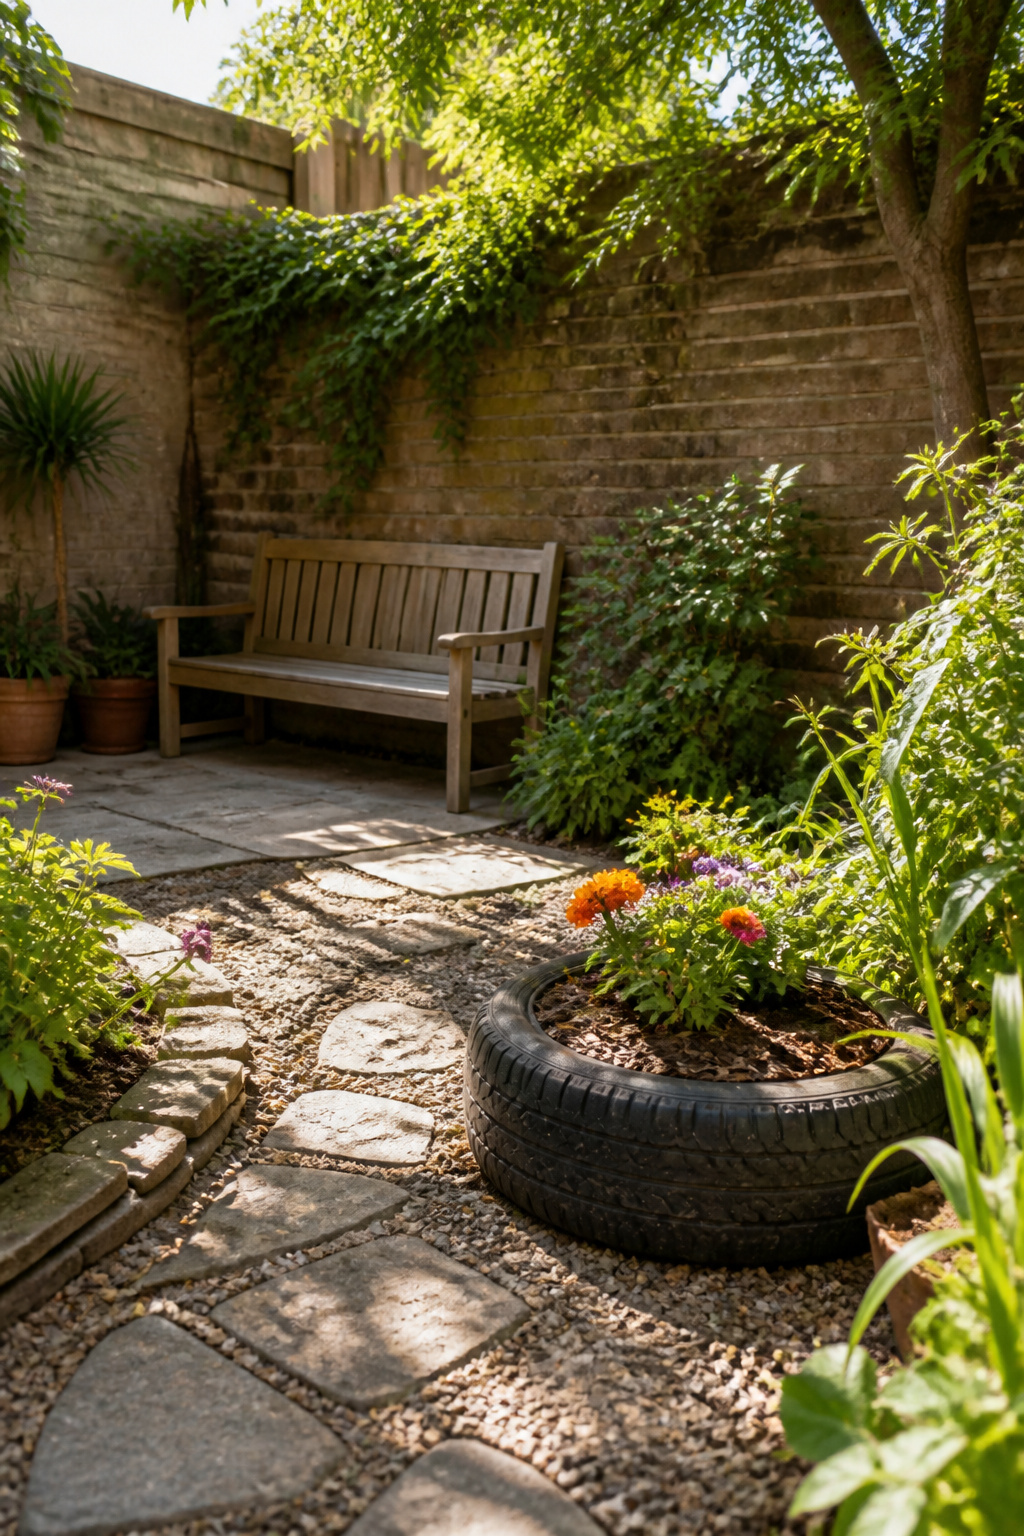
A worn tire in the corner of the garage usually means a trip to the recycler, but it also has the right depth for plants that need room to spread. Cutting the sidewall out takes a sturdy knife and some patience; the rubber fights back. Once that ring is open, flipping the tire inside-out is the trick that changes its shape from a bowl to a planter with flared walls. Some people leave the black rubber as-is, others hit it with exterior paint so it reads as garden rather than roadside.
The cavity holds a surprising amount of soil, enough for potatoes or any flower that sends roots deep. That same depth is something to watch, because tires pull double duty in the sun: they soak up heat and hold it into the evening, which starts the season earlier and stretches it later. The downside is the soil dries faster than it would in a wooden box or the open ground, so checking moisture by hand every morning matters more here than with most planters. A layer of mulch on top buys you a little margin.
11. Hanging Shoe Organizer for Herbs
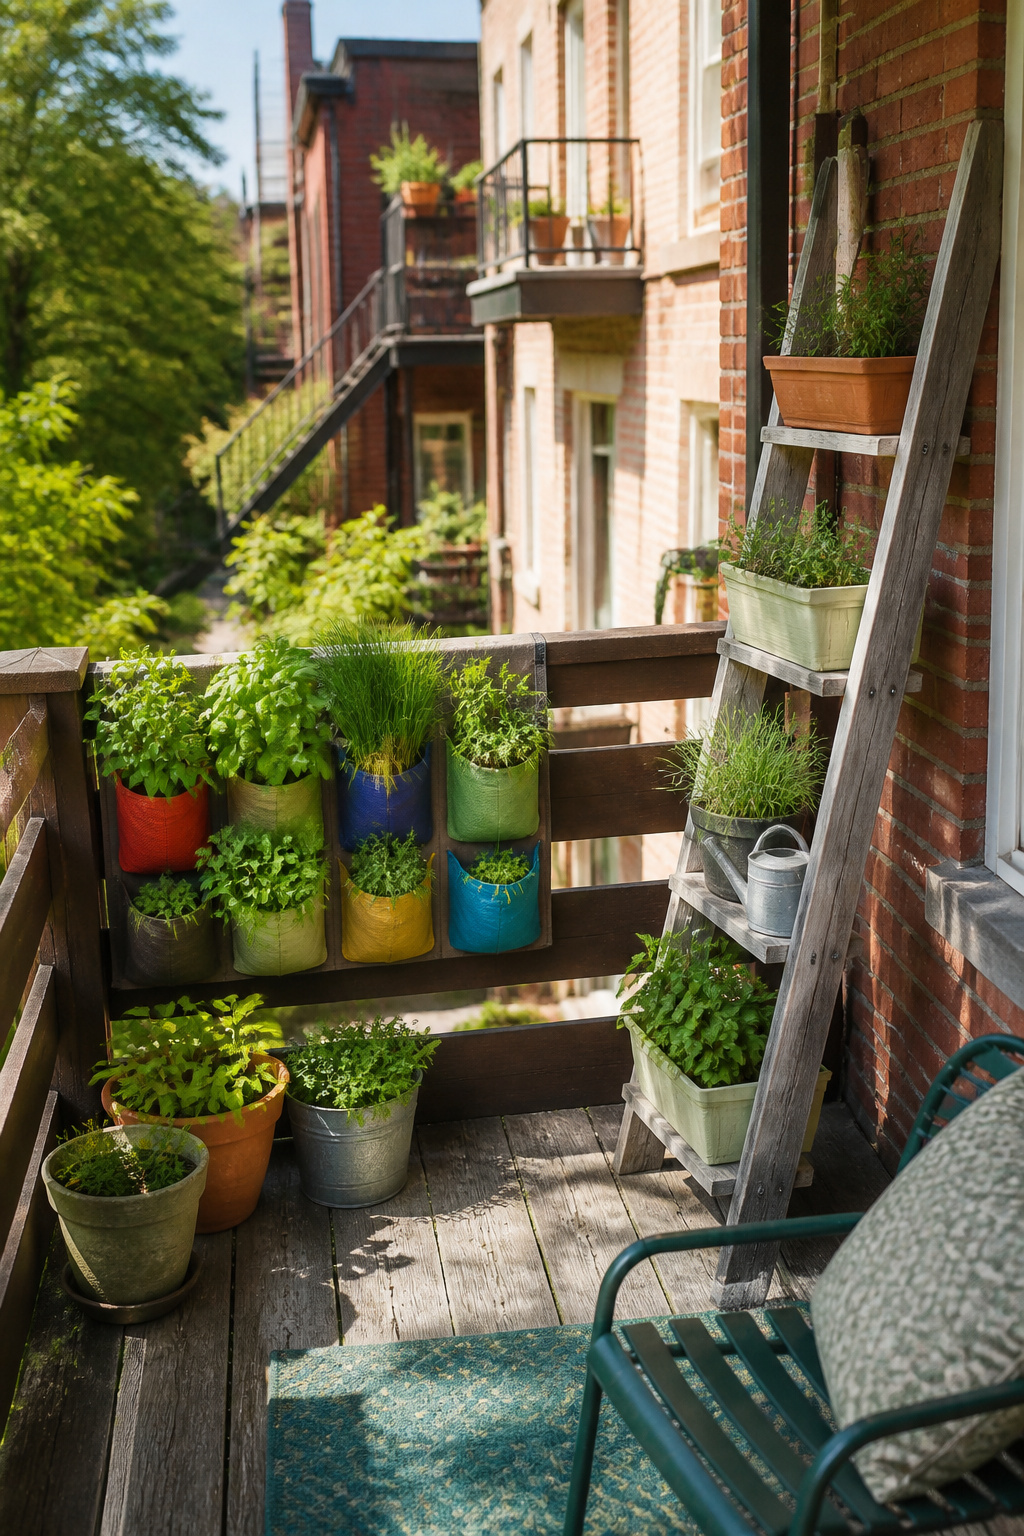
A hanging shoe organizer laid flat against a balcony rail gives you a single row of pockets that face outward, which is a different beast from the vertical wall version. The pockets are shallow, usually four to six inches deep, so you are working with herbs that do not need much root room: basil seedlings, parsley, chives, maybe a compact thyme. Anything that wants to go deep, like rosemary or a determinate tomato, will sulk and then die.
The grommets at the top are the failure point. Those metal-rimmed holes are built for closet rods, not wind load and wet soil combined. The fabric tears through faster than you would expect. What convinced me, reading through a dozen of these builds, is that you need to back up every grommet with a washer on a bolt or run a strip of wood behind the top edge so the rail carries the load across the full width instead of pinching at two points. Without that reinforcement, the organizer sags and the pockets dump soil on whatever is below.
Drainage is the other headache. Most of these have solid bottoms, so you are either punching holes and hoping the rail does not rot, or slipping a plastic pot inside each pocket so you can lift it out to water properly. The second option wins if your railing sits above anything you care about.
12. Candle Container Planter
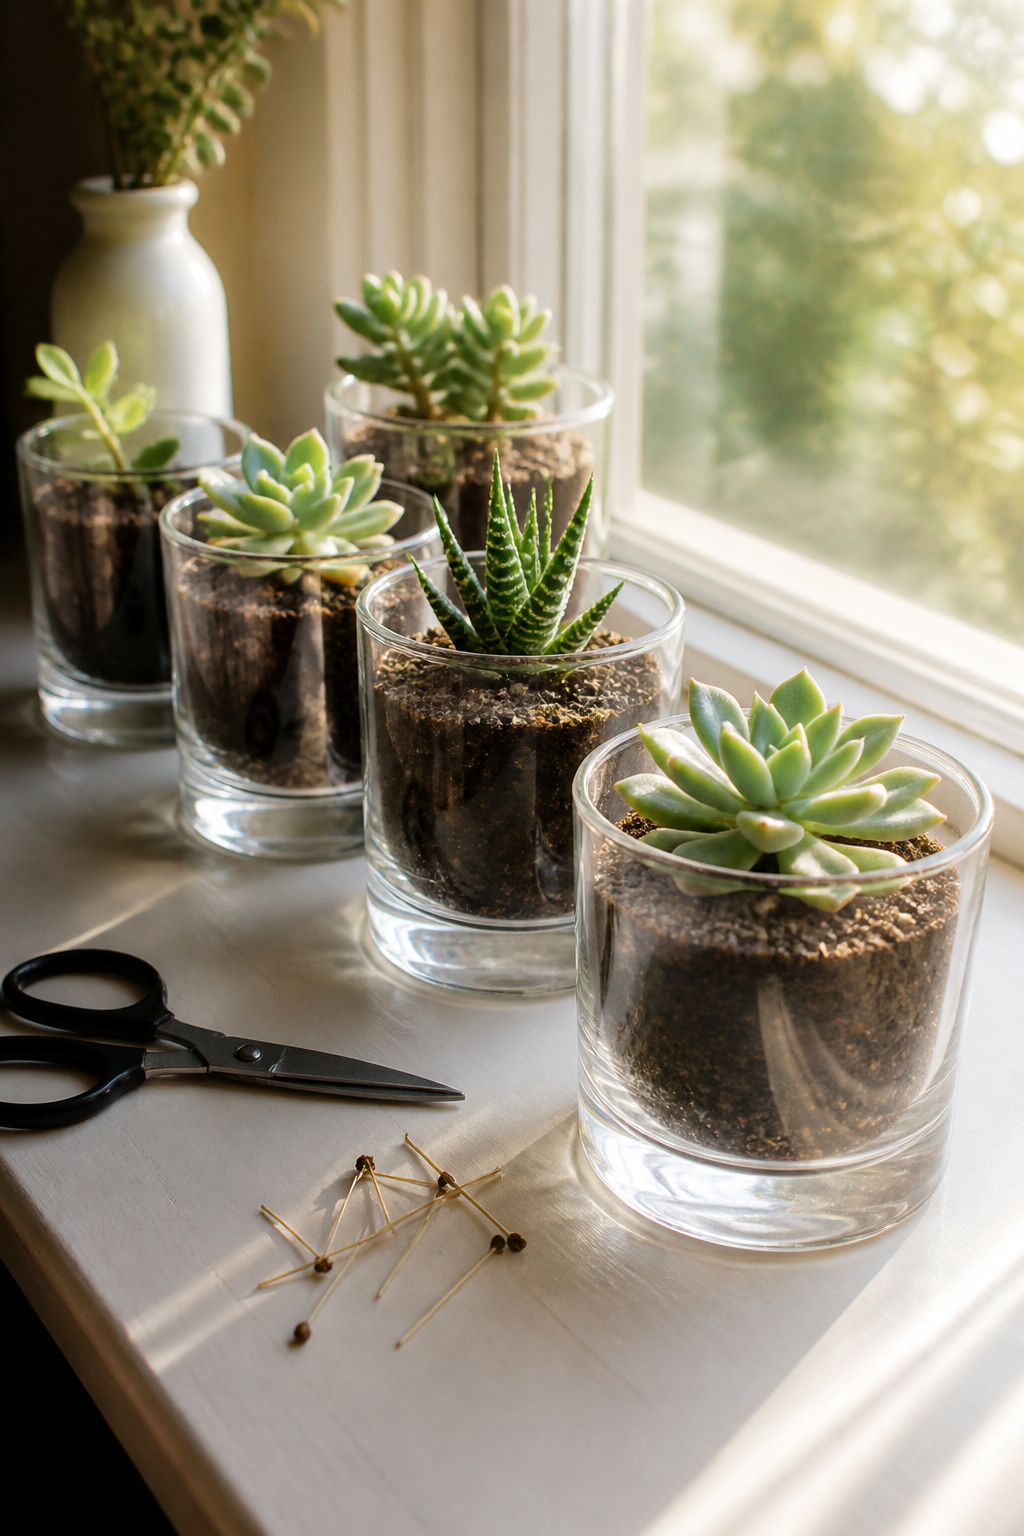
Empty glass candle jars sit on bathroom shelves for months because the last inch of wax seems like more trouble than it is worth. Boiling water changes that: pour it straight in, let the wax soften and float to the surface, then lift the cooled disk out once the water goes cold. The wick base usually scrapes free with a butter knife.
Two paths split from here. Drill a drainage hole with a glass bit if you are planting anything that hates wet feet, herbs especially. Succulents survive without one, but the soil depth matters more than people think. A shallow layer, maybe two inches, dries fast enough that root rot stays unlikely. Pack in six inches and the bottom stays damp for weeks; the plant looks fine until it suddenly does not.
These jars suit windowsills where a full terracotta pot would crowd the space. The glass shows the soil line, which turns out to be useful. You see exactly when dryness hits, no guessing through ceramic.
13. Upcycled Pickle Buckets
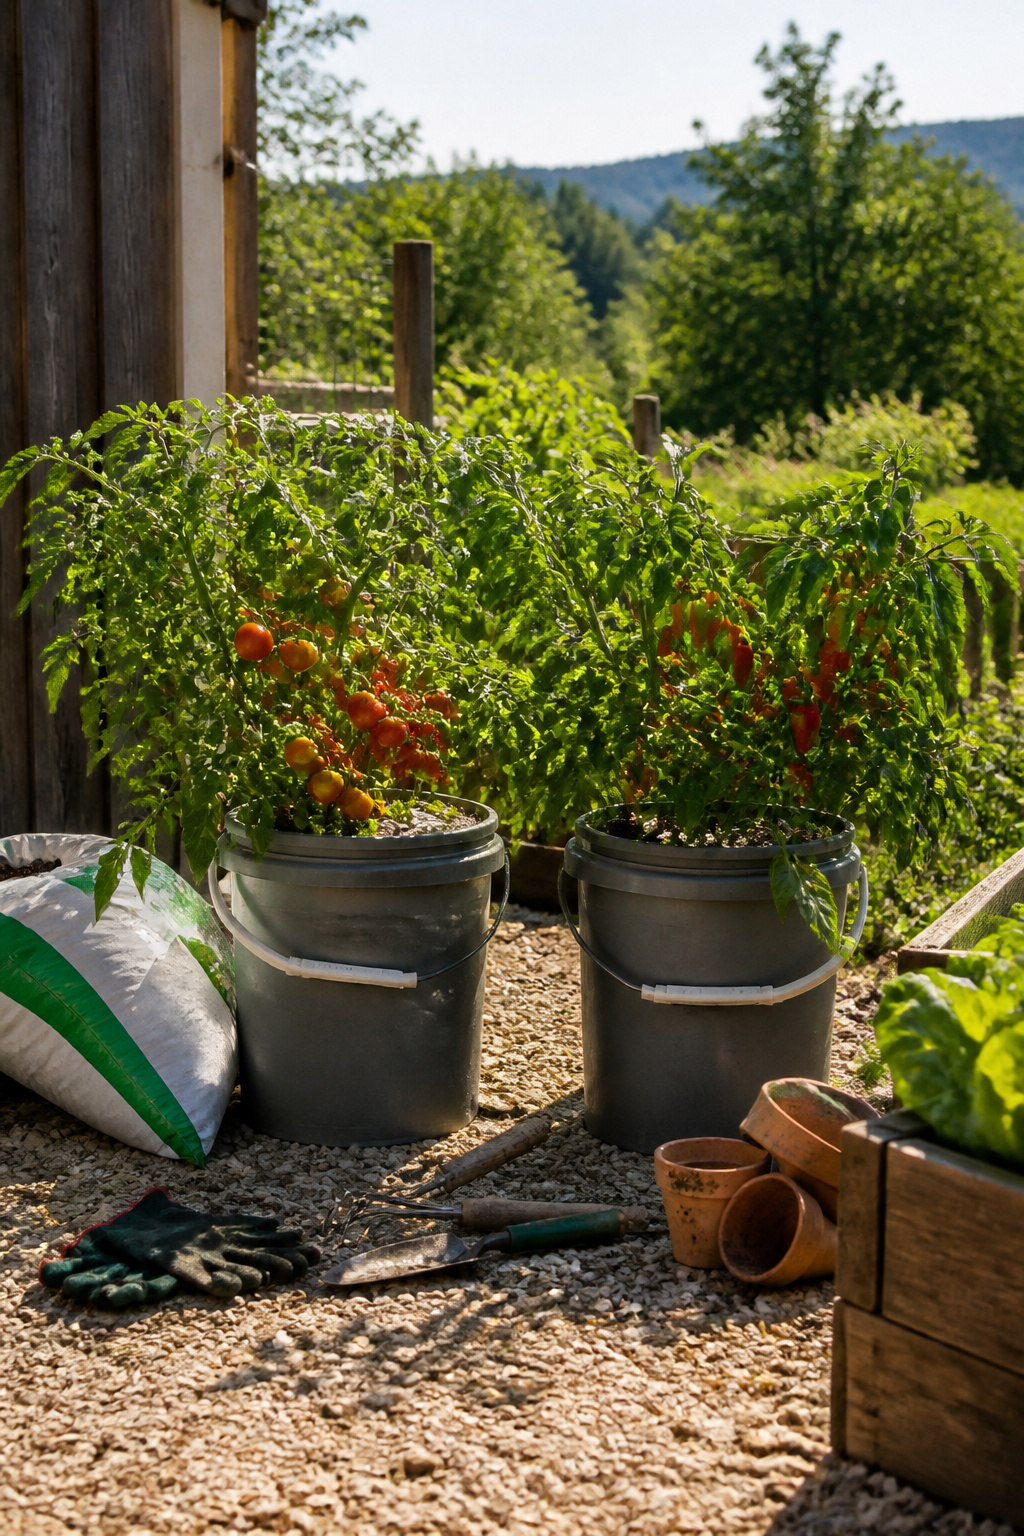
Grocery stores and restaurants get pickles in four or five gallon buckets, and those buckets usually head back to the distributor or straight to the trash. Asking the manager first keeps you out of trouble; once the bucket is actually bound for the dump, it is fair game.
The size is what makes these useful. A single pickle bucket holds enough soil for a serious tomato plant or a cluster of peppers, and the plastic stands up to seasons outside better than the thin pots you would pay for. Drill drainage holes in the bottom if you want the standard setup, or nest a second bucket below with a wick of cotton rope running between them for self-watering. The lower bucket becomes a reservoir, the rope draws water up, and the plant takes what it needs between your visits.
Food-safe plastic means you are not guessing what leached into the soil before your lettuce went in. That matters more for vegetables than for flowers, though both grow fine. The only real downside is the look, which is exactly like a pickle bucket. Paint helps, or a fast wrap of cedar fence pickets if you want to hide the source.
14. Large Cans as Planters

A #10 can from a restaurant supply runs about six inches across, which is just enough soil for a single pepper plant or a tight cluster of herbs. The paper label scrubs off with hot water and a little baking soda, though the adhesive sometimes needs a second pass. What matters more is the rim. The cut edge stays sharper than you’d expect, and a quick pass with a metal file keeps you from slicing a knuckle when you’re repotting or moving things around in the sun.
Three or four of these lined up on a windowsill give you a small kitchen garden without the commitment of building a raised bed. Drill drainage holes in the bottom or the roots will rot in anything but the driest summer. I have seen people cluster them inside a wooden crate to hide the industrial look, but the bare metal has its own thing going if you let the copper rust run. Paint works too, though it chips where the can flexes.
The real limit is weight once they’re watered. A full can is heavier than it looks, so plan the spot before you fill it.
15. Troughs or Barrels for Larger Crops
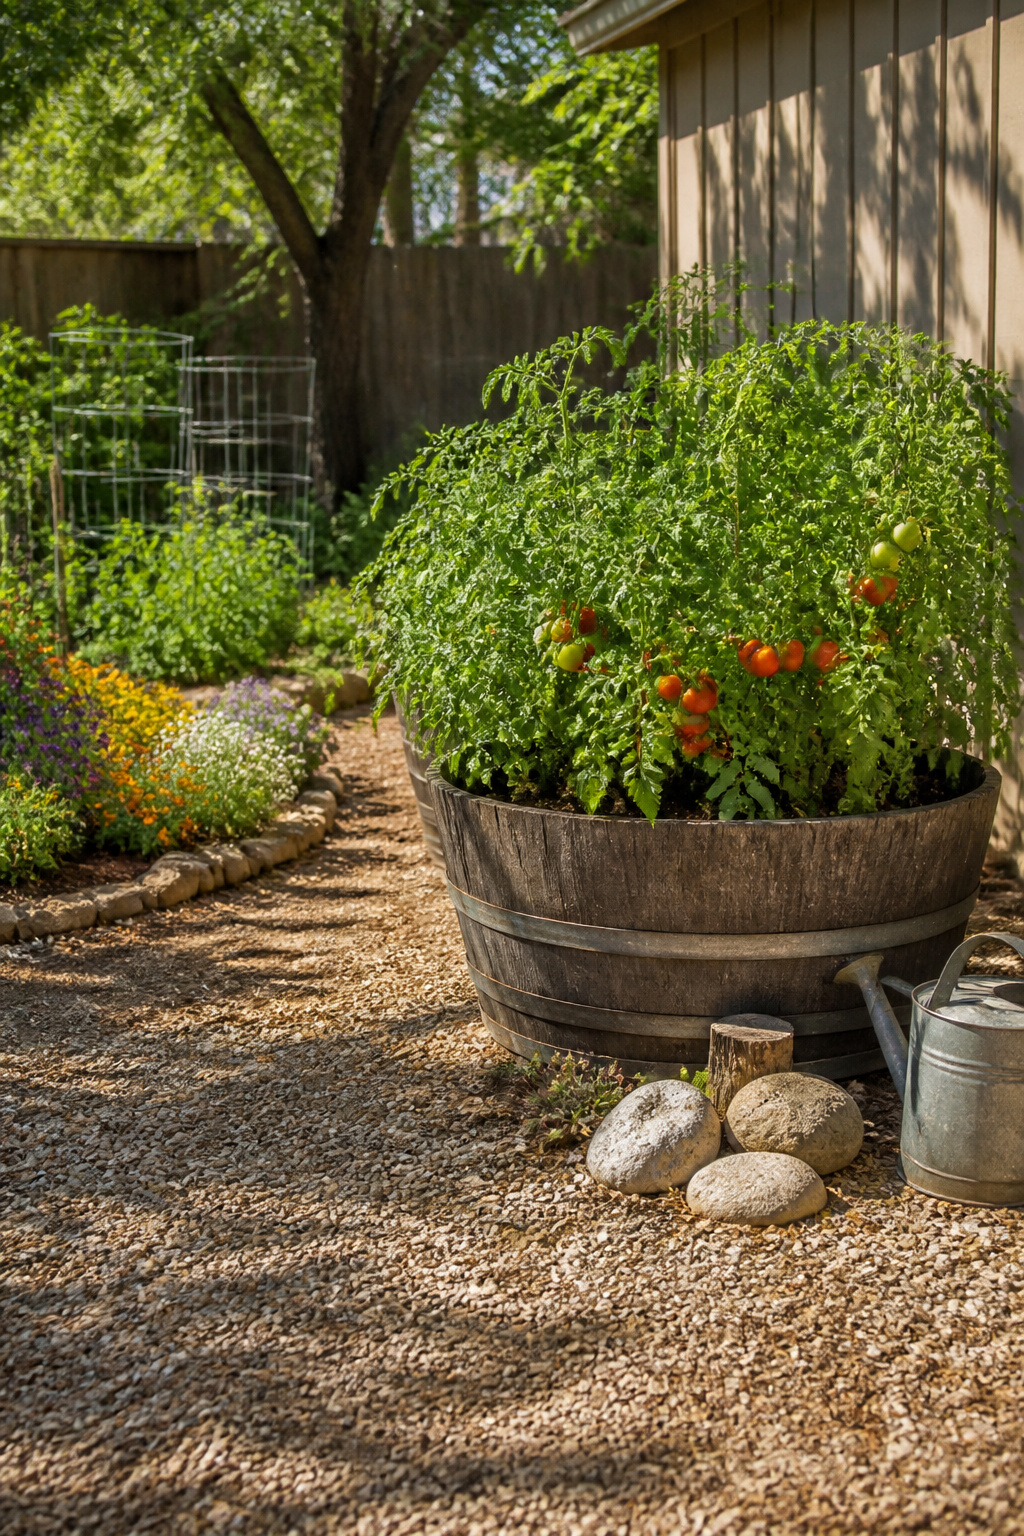
Half a wine barrel gives you roughly 4 cubic feet of soil, enough room for a dwarf apple tree or a dense cluster of tomato and pepper plants. The curved sides keep the roots from circling the way they would in a plastic pot, and the wood insulates against sudden temperature swings.
Galvanized stock tanks work the same way at ground level or raised on a simple frame of 4×4 legs. A 2-foot height saves your back and still holds enough depth for carrots or bush beans. The zinc coating lasts years outside, though drainage holes drilled through the bottom are non-negotiable; standing water rusts through even heavy gauge steel in two seasons.
The legs matter more than they look. Ground-level barrels warm faster in spring but sit where every slug in the yard lives. Raising the tank even 18 inches cuts that problem in half and keeps the metal from wicking cold into the root zone on April nights. My own preference runs to the raised version for vegetables, ground-level only for the dwarf citrus that needs the thermal mass to survive a zone-pushing winter.
16. DIY Concrete Planters

Concrete planters start with two containers, one nesting inside the other. The gap between them shapes the walls, and 1 inch of space gives you a sturdy pot that still lifts without a forklift. Cooking oil sprayed on both surfaces keeps them from bonding permanently.
Mixing the concrete is straightforward: add water until it looks like thick oatmeal, then pour it into the outer container before pressing the inner one down. The inner form will want to float, so weigh it with a brick or a bag of rice. Tap the sides hard to release trapped air; bubbles weaken the walls and leave ugly pits.
Patience is the real material here. The mix needs 24–48 hours to set enough for demolding, but that is not the same as ready to plant. Concrete keeps curing and leaching lime for days after, and that chemistry will burn roots if you rush it. Let it sit another week, then soak it in water changed daily for a few days to draw out the alkalinity.
I have cracked one by popping it out too early, and I have killed a sedum by planting in a fresh pour. Both mistakes were preventable with a calendar instead of enthusiasm.
17. Wooden Ladder Plant Stand
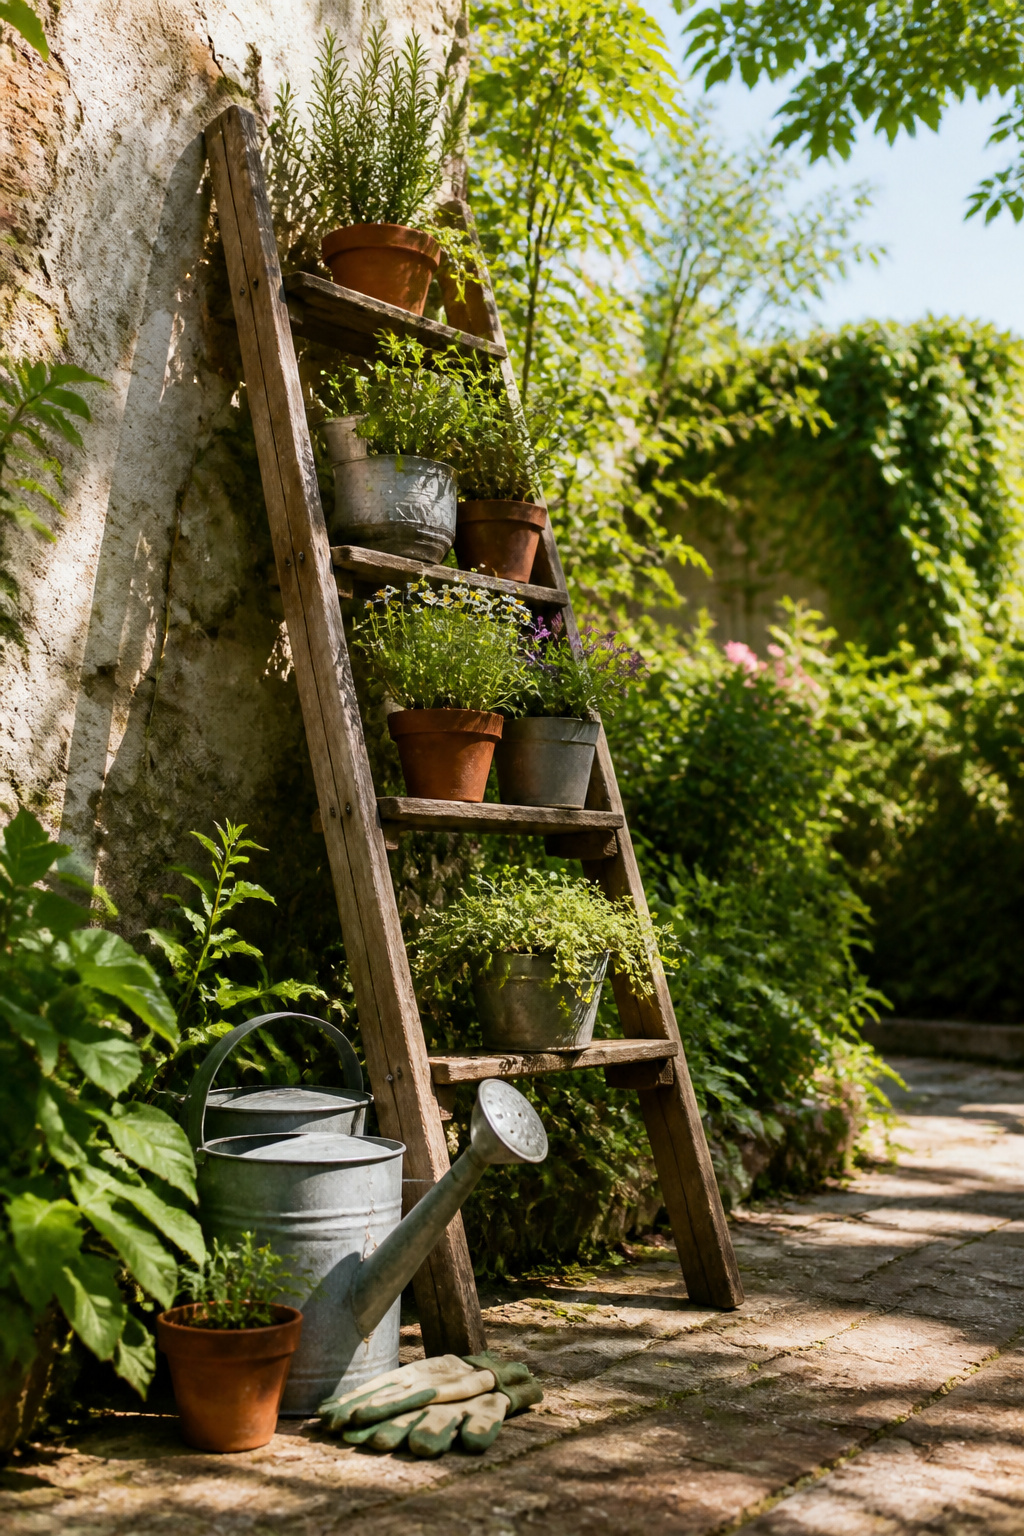
An old wooden stepladder leans against a wall and suddenly you have three or four shelves ready for pots. The treads hold more weight than most people guess, but a single tread tops out around 50 pounds before the wood starts complaining. Spread that load across the width rather than stacking one corner, and stick to lighter containers if you are using a painter’s ladder with thin pine rungs.
The top wants attention. A ladder planted on carpet or an uneven patio will walk itself sideways the first time you water something heavily. A strap or a small L-bracket where the top rail meets the wall keeps it from tipping forward when you bump it reaching for the basil. A rubber foot pad underneath stops the slide on smooth floors.
Paint or stain the ladder first if it is going inside, or the old grease and splatter will transfer to your wall. Leave it bare for a porch where weathered wood fits the look. Either way, check the spreaders underneath. A stepladder that wants to fold will fold, and your terra cotta goes with it.
18. Cinderblock Plant Shelves
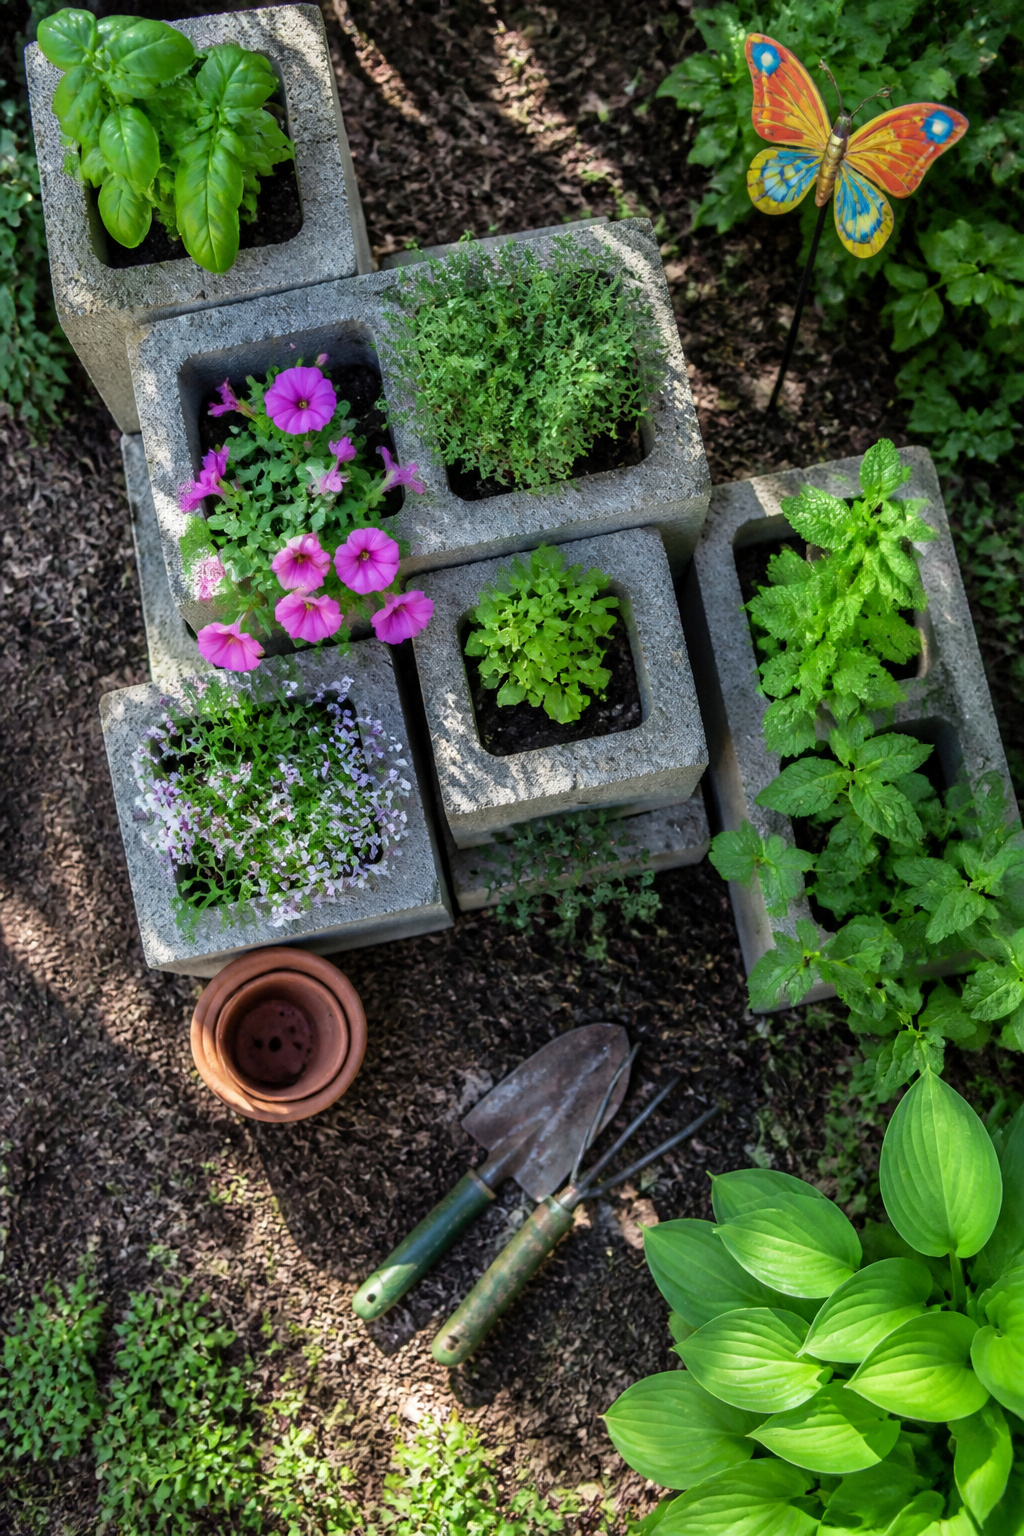
Concrete blocks stack into shelving that actually earns its floor space. Each hole in a standard cinderblock holds roughly 0.1 cubic feet of soil if you plant directly into it, which is enough for shallow-rooted herbs or a single compact annual. I like running them two or three high in an offset pattern so the openings face alternating directions; the wall stays stable without mortar, and you get cubbies at different heights.
The weight is both the appeal and the catch. A stack of eight blocks runs close to 140 pounds, so you are not sliding this around once it is placed. Set it on level ground or a concrete pad, because any tilt gets worse as you add wet soil. Fill the bottom holes with gravel first if your yard drains slowly; the blocks will wick moisture otherwise, and the front row of plants ends up sitting in water.
Paint fades fast on raw concrete, so leave them bare or seal them with a masonry coating meant for exterior use. Unsealed block will raise the soil pH slightly over a season, which suits lavender and rosemary fine but can yellow basil leaves by late July.
19. Raised Garden Beds
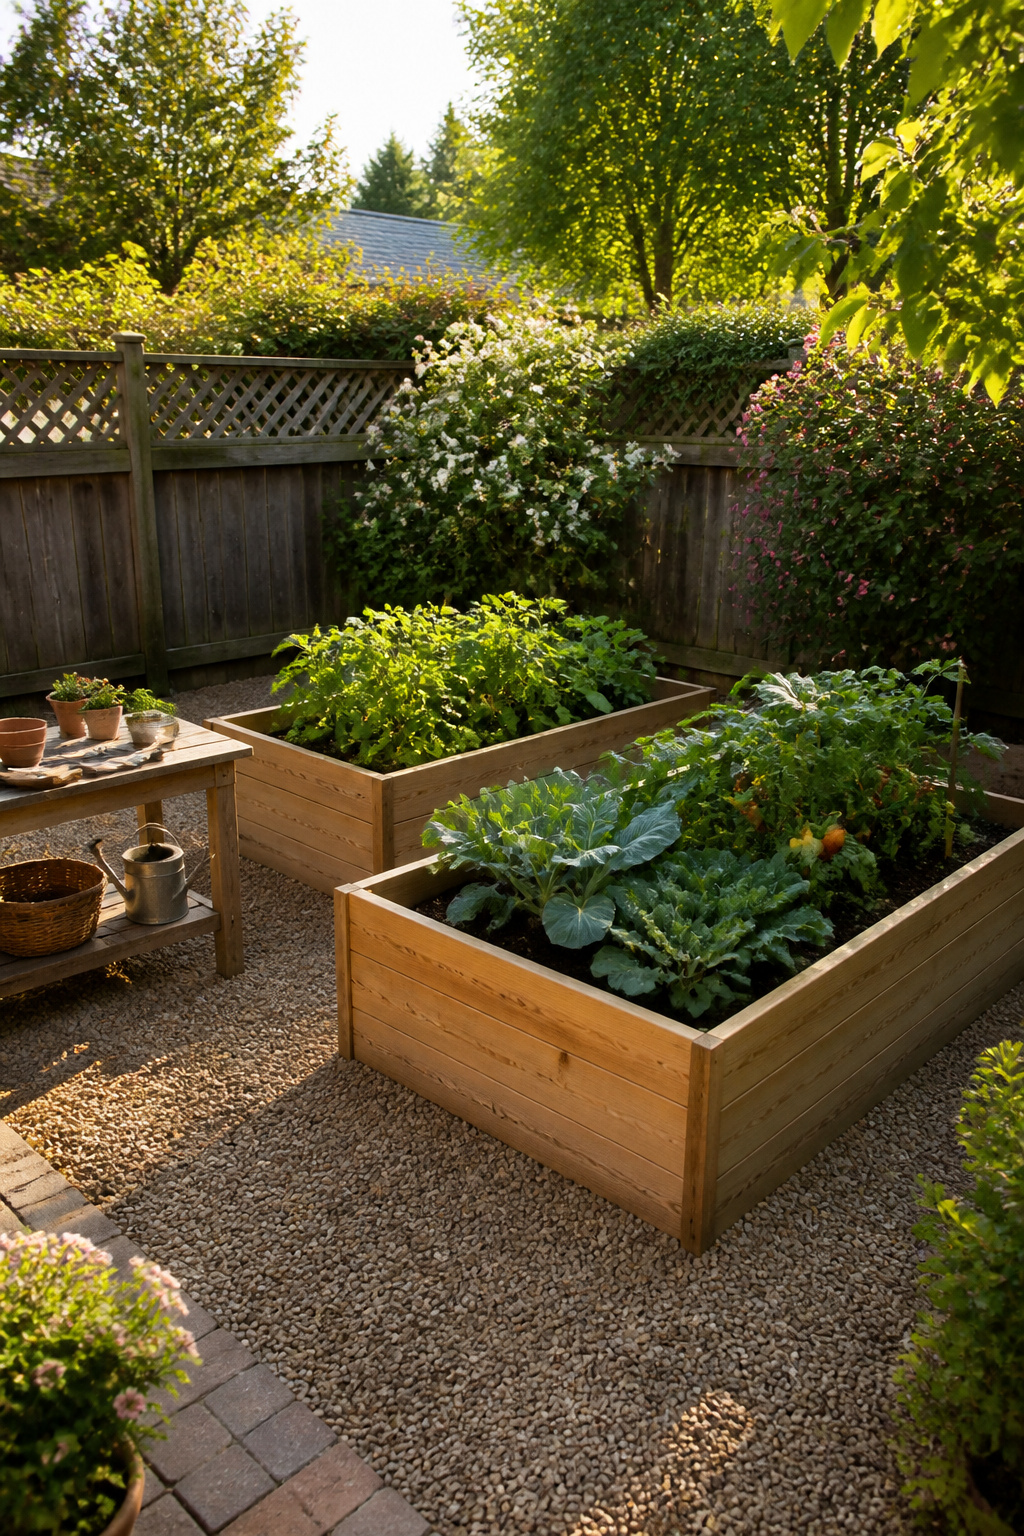
Wooden frames built directly on native soil handle vegetables that need more root room than a pot allows. Eight to twelve inches of depth hits the workable range for lettuce through peppers, and the soil underneath does the rest once roots punch through. The fill is a mix of topsoil and compost; straight garden soil stays too dense in a box and compost alone collapses by midsummer.
A span of four feet, never wider, lets you reach the center from either side without stepping in. That last part matters more than people expect. Compacted soil from a single footprint can take a season to recover, and the whole point of a raised bed is loose, workable ground. Wider builds look efficient on paper until you are stretching across tomatoes in July, one knee on the frame, wondering why the center plants look stunted.
Untreated three-by-twos or two-by-eights last five or six years in my climate; pressure-treated buys you longer but the old arsenic formulas still make some growers pause. Cedar splits slower, costs more, and usually wins out if the bed sits somewhere visible from the house. Screws beat nails once the wood starts to check.
20. DIY Tiered Planter Box
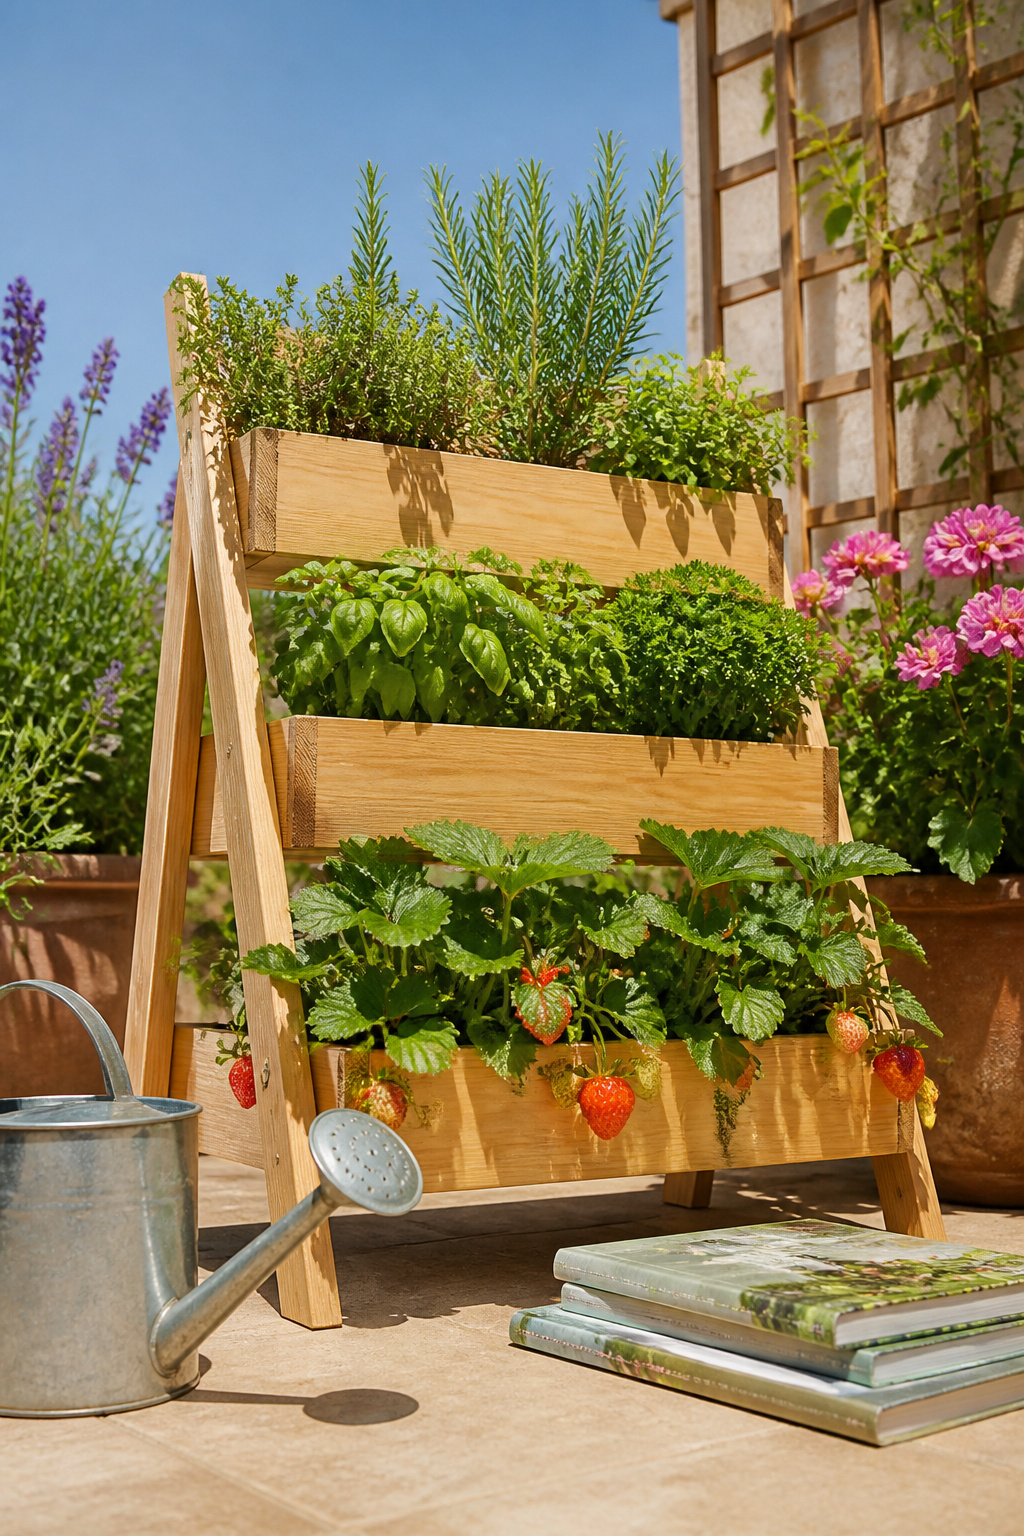
Stacked boxes shrink as they rise, and the gap between each tier is what sells the pyramid look. I built mine from scrap pine, nothing fancy, just three rectangles stepping down by two inches per side. Each box sits six to eight inches deep, enough room for herbs on top, strawberries in the middle, trailing thyme at the bottom.
The drainage is where this project lives or dies. Water from the top box has to pass through, not pool. I drilled half-inch holes in the base of each tier and set them on a slight inward angle so runoff dripped toward the center, not the edges. Without that planning, the bottom box turns into a swamp. A layer of gravel helps, but the slope matters more. I skipped the liner on the lowest tier so excess could seep into the ground.
Upcycling Basics and Safety
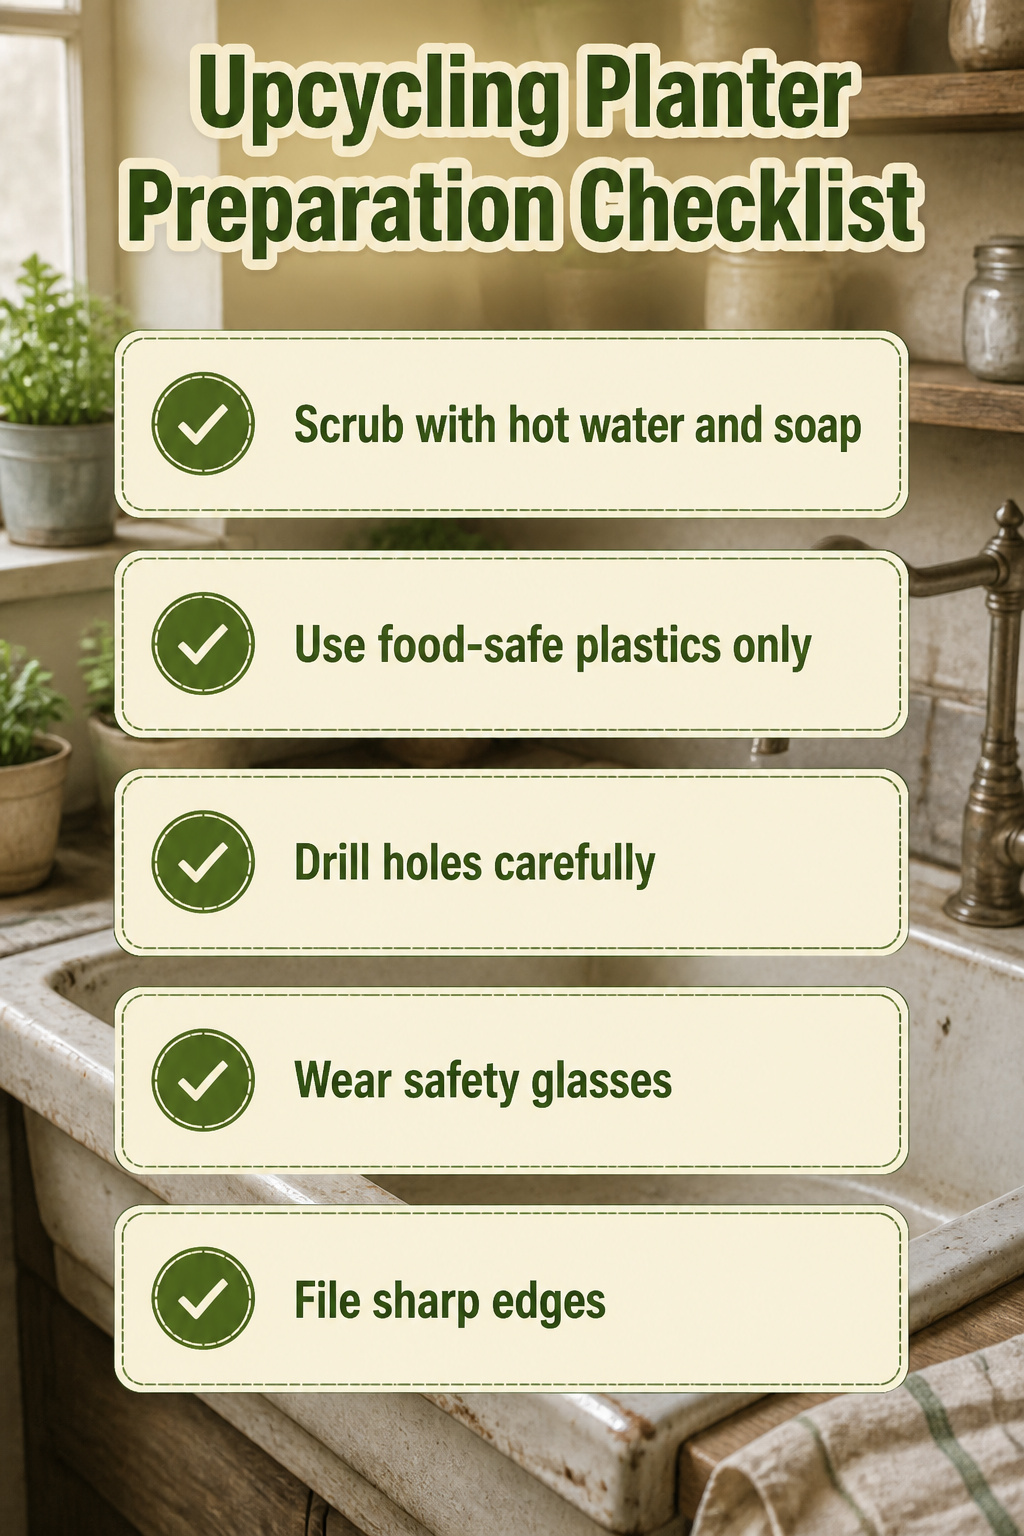
Every planter project starts with the same question: what was this container holding before? Residue from soap, motor oil, or last week’s takeout will harm soil and roots, so hot water and a drop of dish soap get the first scrub, then a rinse clean enough that you’d drink from it. Food-safe plastic matters if you’re growing edibles; that faded yogurt tub works fine for basil, but the bucket that held driveway sealant belongs to flowers only.
Drilling drainage holes without spiderwebbing the material is mostly about patience. A sharp bit, light pressure, and letting the tool do the work keeps glass jars and ceramic mugs intact. Metal cans are more forgiving, though the burr left behind snags fingers and roots alike, so a quick pass with a file saves trouble later. Safety glasses are non-negotiable; the afternoon you spend flushing a chip of glazed ceramic from your eye is not the kind of story worth telling.
Vertical Gardening for Small Spaces

Vertical gardening turns the one surface every rental has, a wall, into growing space that ground-level beds never touched. Light falls off fast as you climb, so the top row needs sun-hungry herbs like basil or rosemary while lower pockets shade lettuce and spinach just fine. Weight matters more than people guess; a fully watered pocket planter can pull a railing down or tear drywall, which is why freestanding leaning frames or over-the-door systems beat anything that screws in. Watering asks for a tray or a closed reservoir, not an open drizzle, because the neighbor below your balcony has a right to dry laundry. A pump sprayer with a long wand reaches high pockets without dismounting the whole column, and morning watering gives leaves time to dry before evening rot sets in. For renters, the beauty is the take-it-with-you part; one friend moved her shoe-organizer herb wall three apartments in five years and the thyme outlived every lease.
Plant Selection and Pairing

A 3-gallon hydrangea needs enough soil to sit high in its pot, which is why I now place the nursery container directly on the loose dirt, pack soil around it, then lift it out. The hole left behind is exactly the right size, and the root ball stays level with the surface. Bury it deeper and it suffocates. Ask me how I know.
Root ball depth determines container depth, but the tag tells the rest of the story. Mature width matters more than nursery size. A thriller-filler-spiller combo works for visual drama, though I usually skip it for something simpler. Herbs tolerate sharing space if water needs match. Succulents do not; they want their own pots and dry feet. Full-sun tags mean full sun. Shade means shade. Guessing wastes an afternoon and a plant.
Seasonal Timing and Rotation
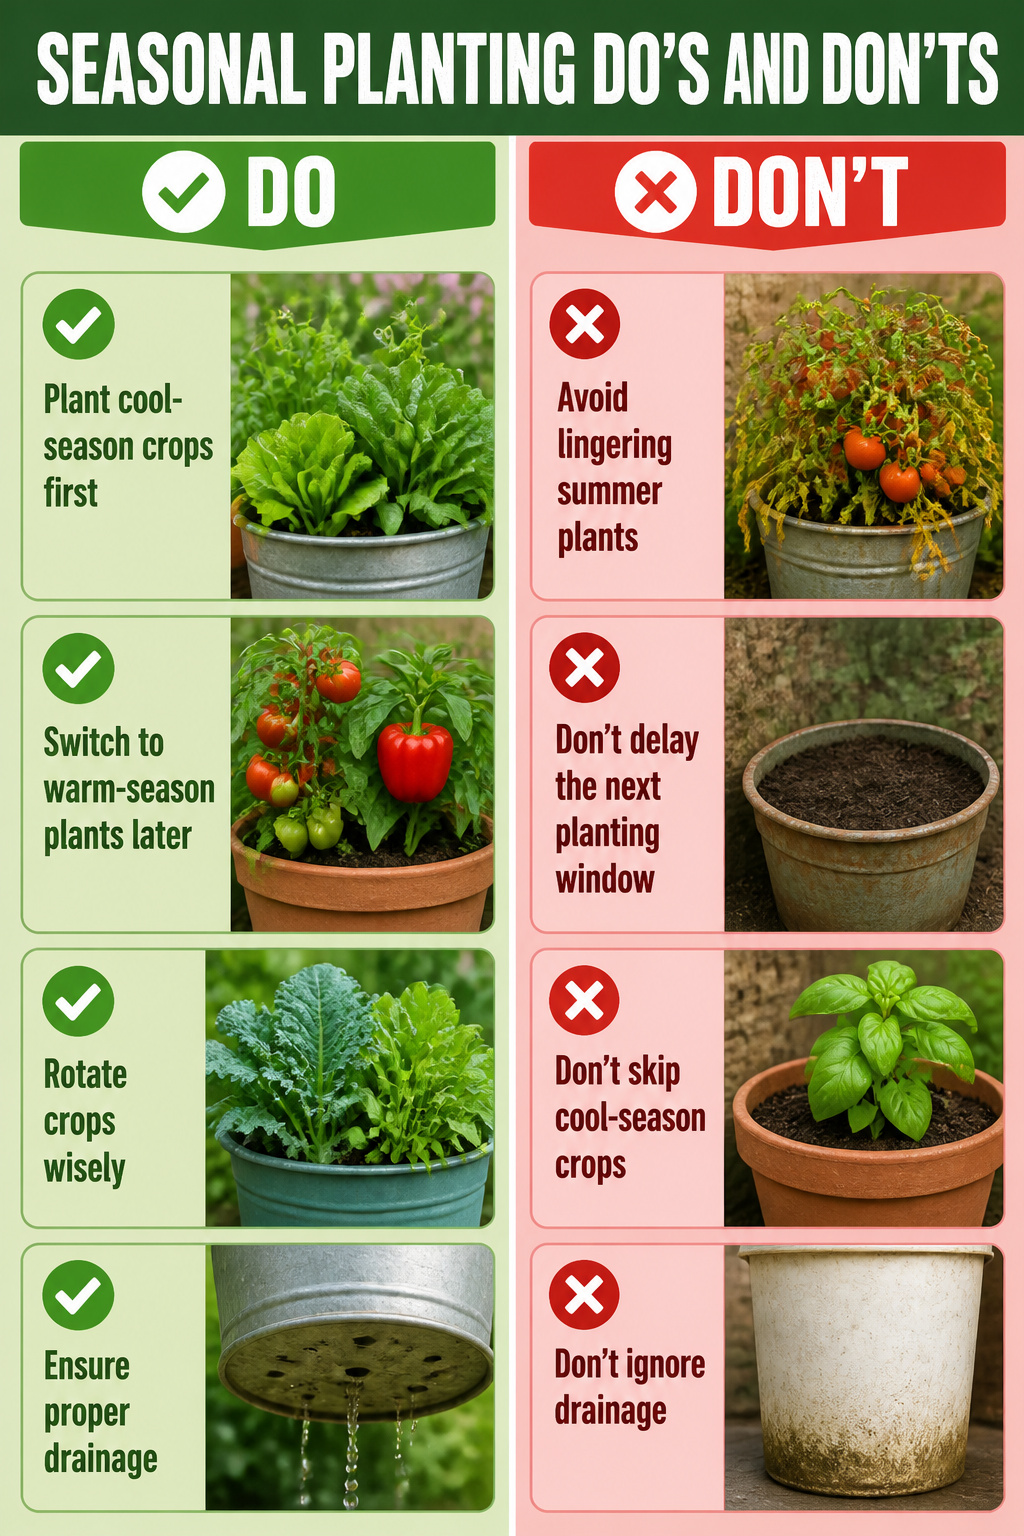
Spring containers hit the ground running with lettuce, spinach, and peas while the soil is still cool; those same planters rotate into tomatoes or peppers once the nights stay above fifty. The window is tighter than it looks. A lettuce crop goes from seed to bowl in about six weeks, which means one container can carry three rounds in a single season if you time it right.
Fall planting flips the order: start with a quick bush bean or basil harvest in late summer, then slide in kale or arugula as the days shorten. The trick is not letting the summer crop linger. I learned that the hard way when a determinate tomato kept producing through October and shaded out the spinach I had waiting.
Cool-season crops need the container first and last, with warm-season plants taking the middle slot. That rhythm works in almost any household vessel that holds six inches of soil. The only real limit is drainage; a coffee can or old bucket without holes will rot the roots of whatever follows.
Frequently Asked Questions
What are some unique DIY planter ideas?
You can turn old picture frames into shallow succulent planters, repurpose coffee cans for windowsill herbs, use worn jeans pockets for thyme or small succulents, and transform pickle buckets into self-watering containers for tomatoes or peppers. Other options include colanders for drainage-loving herbs like rosemary, vintage toolboxes for shallow-rooted sedums, and concrete forms you cast yourself with nested containers.
How do I make a vertical garden?
An over-the-door shoe organizer with clear pockets becomes a vertical herb or strawberry garden with no construction needed. Each pocket holds one plant, which prevents root competition and makes watering needs obvious. Reinforce the grommets with washers or a wood strip behind the top edge so the rail carries weight across the full width rather than pinching at two points, or the organizer will sag and dump soil.
What plants are best for DIY planters?
Match the plant to the planter’s depth and drainage. Succulents and sedums suit shallow frames and pockets with just 1–2 inches of soil because their roots spread wide rather than deep. Herbs like rosemary and thyme need excellent drainage, so colanders and well-drained cans work well. Deep containers like pickle buckets or half barrels handle tomatoes, peppers, and dwarf fruit trees. Strawberries do well in vertical shoe pockets because the fruit hangs clear of soil and rots less.





