
A diy bathroom makeover can run from $20 in leftover paint and coffee-stained knobs to five weekends of plywood joinery and borrowed tools. The deciding factor is not budget or ambition but how long the bathroom can stay out of service: peel-and-stick wallpaper and a hardware swap finish by Sunday night, while a built-from-scratch vanity needs dry-fit days and cure time that stretch into weeks. That same $250 figure covers either a full cosmetic refresh or barely the thin-set and backer board for a single permanent floor.
1. Refreshing Walls with Moisture-Resistant Paint

Acrylic latex paint holds up in bathrooms because the resin stays flexible when it dries, so the film can expand and contract through steam cycles without cracking. Flat paint does not forgive that movement. In my last rental, the previous owner had used a matte finish above the tub, and within two seasons the surface was mottled with water stains and peeling at the corners where shower steam collected. The lesson stuck.
For a new coat that survives, satin or semi-gloss finishes are the practical choice. The higher sheen lets water bead and wipe away instead of soaking in, and scrubbing scuffs off without lifting the color. A gallon runs anywhere from $16 for recycled or mistint stock to $40 for standard retail. That range puts a full wall refresh inside most afternoon-project budgets, and the brighter surface alone makes a small bathroom feel larger.
2. Installing Peel-and-Stick Vinyl Floor Tiles
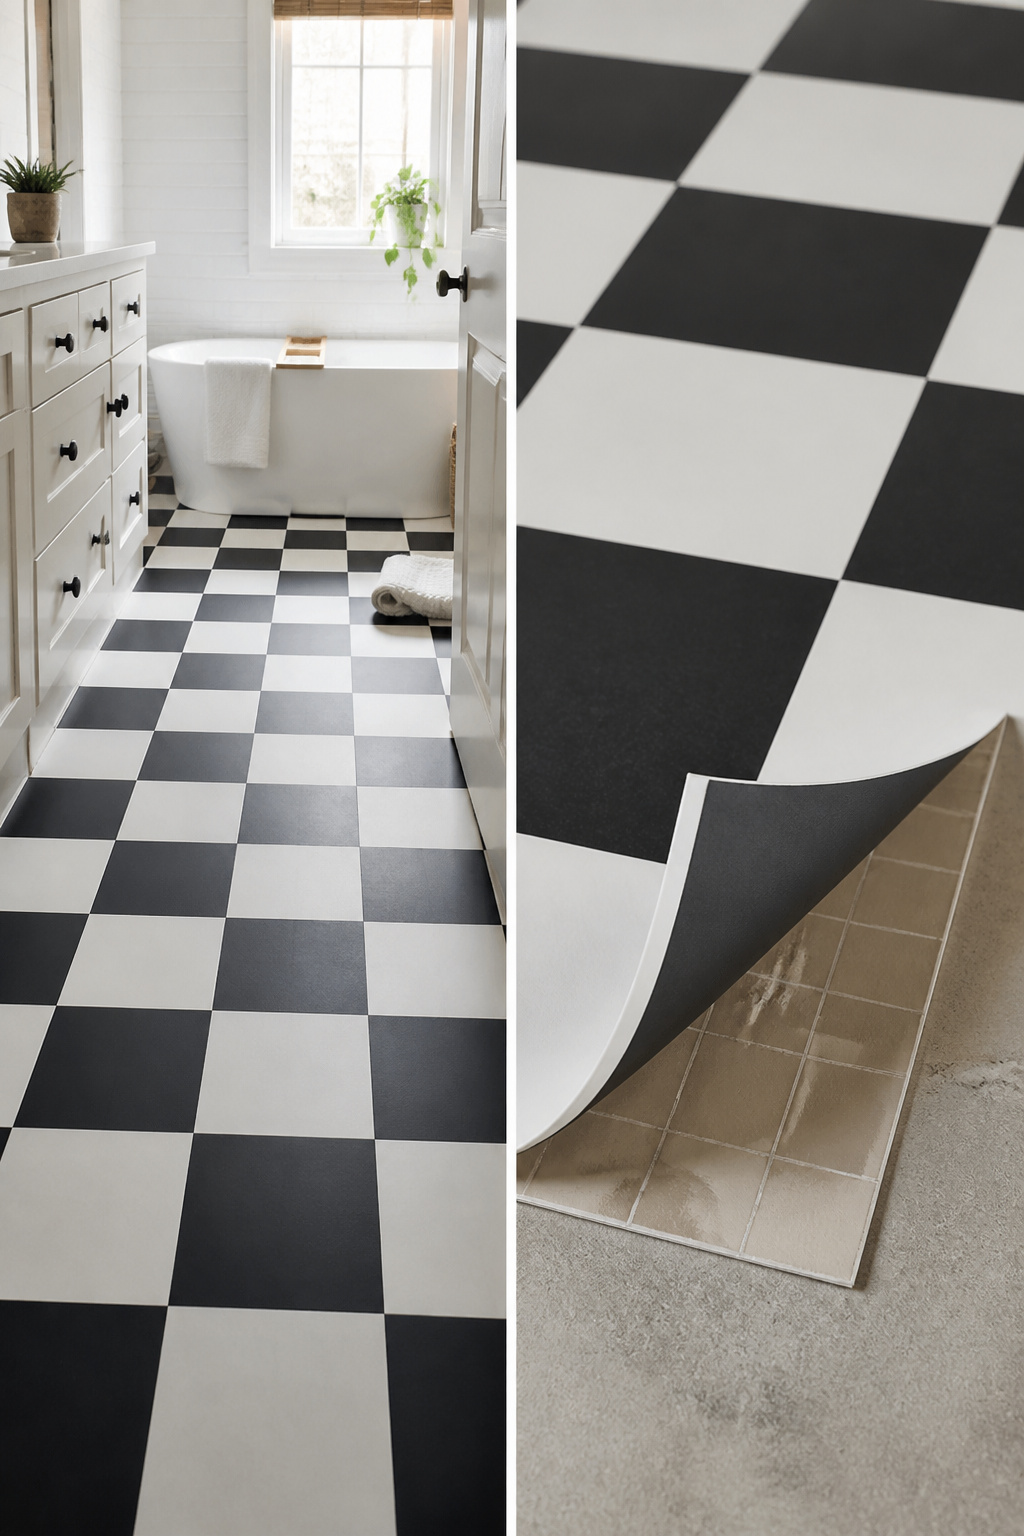
- Measure the floor twice, then snap a mason’s chalk line perpendicular to the longest wall so your first row stays straight through the whole room.
- Peel-and-stick vinyl forgives a lot: crooked starter lines, small gaps, even the occasional reposition. Pressure-sensitive adhesive buys you time to adjust before it locks down.
- Start laying from the center and work outward. Standard 12-by-12 tiles cover the flat areas fast, which is how this stays afternoon work instead of bleeding into Sunday.
- Where it fails is the cuts. Toilets with their curved bases, radiator pipes, any wall that bows even slightly, vinyl shows every hack job. The material lies flat or it telegraphs the problem forever.
- For something more permanent, Edward Martin’s Leona 12×12 Checkerboard Matte Porcelain Tile in Marfil and Amani Bronze needs cement backer board, polymer-modified thin-set mortar, and spacers. Same checkerboard look, heavier commitment.
- Luxury vinyl plank runs thicker and sturdier than basic peel-and-stick if you want the extra lifespan. Either way, a clear varnish top coat over existing wood or tile is the lazier option when the subfloor is already sound.
3. Refinishing Existing Bathtubs
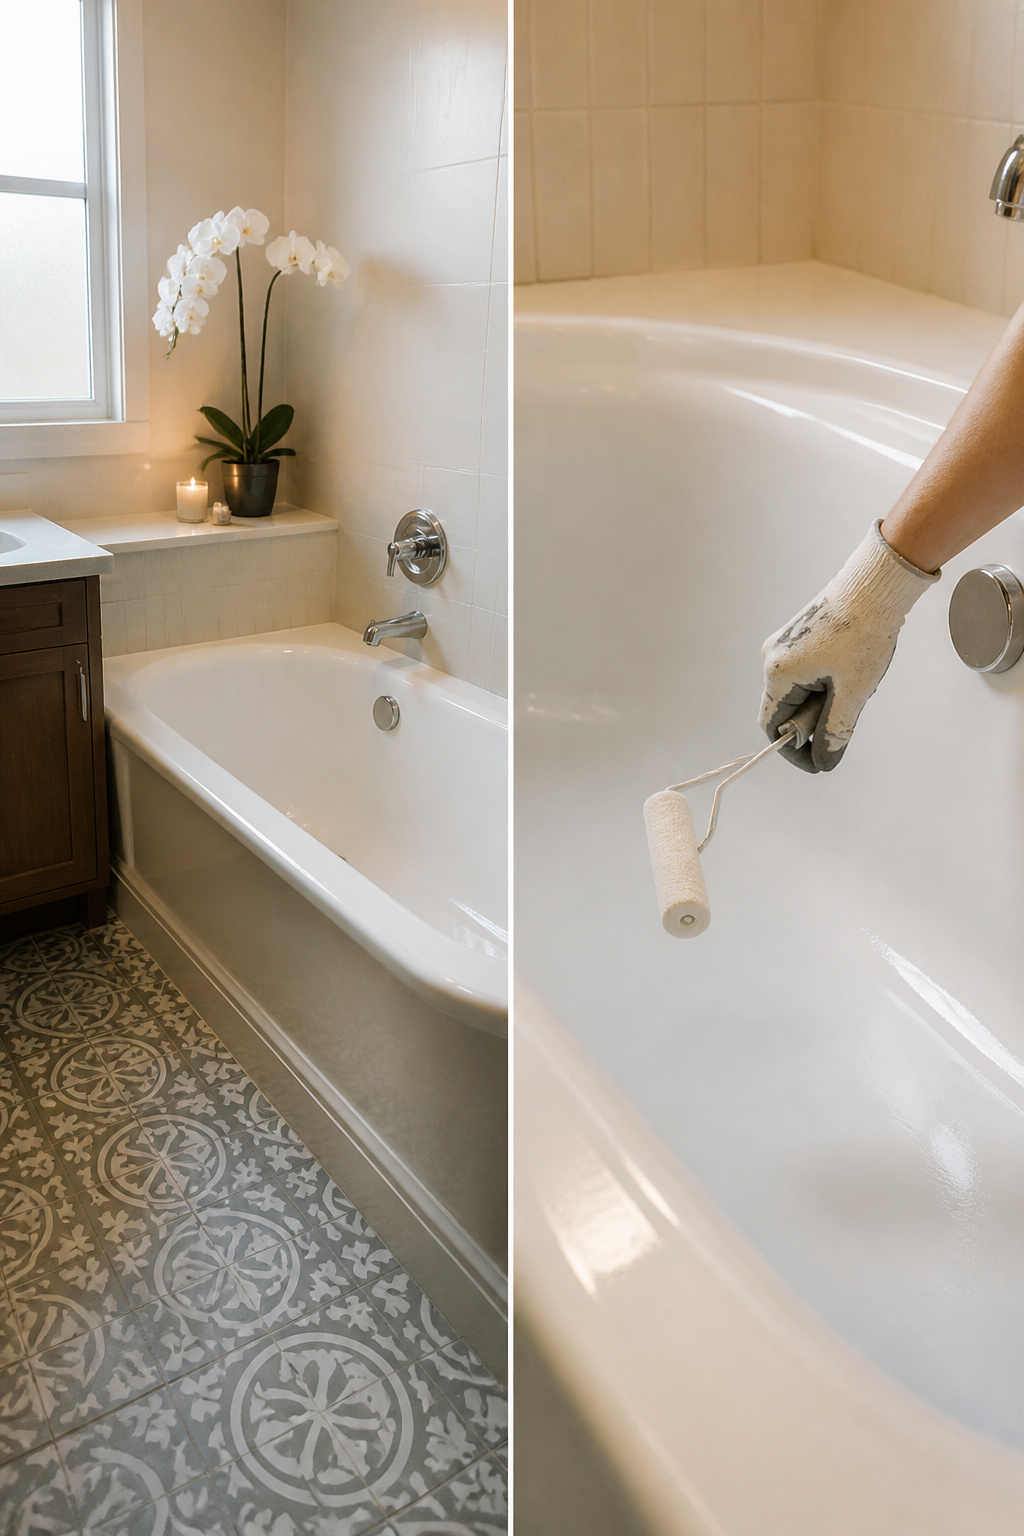
A tub replacement tears out walls, floors, and usually the wallet along with it. Reglazing kits with epoxy or polyurethane coatings let you keep the fixture and restore worn porcelain or fiberglass without touching a pry bar. The catch is surface prep: etching and degreasing have to be thorough or the new coating flakes within months.
Ventilation matters more than the box admits. These coatings off-gas heavily while they cure, and a bathroom fan cycling on a humid afternoon does not move enough air. I cracked a window and ran a box fan pointed outward, which still left the room unusable for two days. High humidity can stretch a two-day cure into a full week, and that is where weekend projects become weeklong projects. The same epoxy paint works on tile surrounds, though the grout lines drink it and need extra attention. Skip the fixtures if you are renting; this finish chips at edges and needs a touch-up plan.
4. Upgrading Bathroom Lighting with LED Fixtures
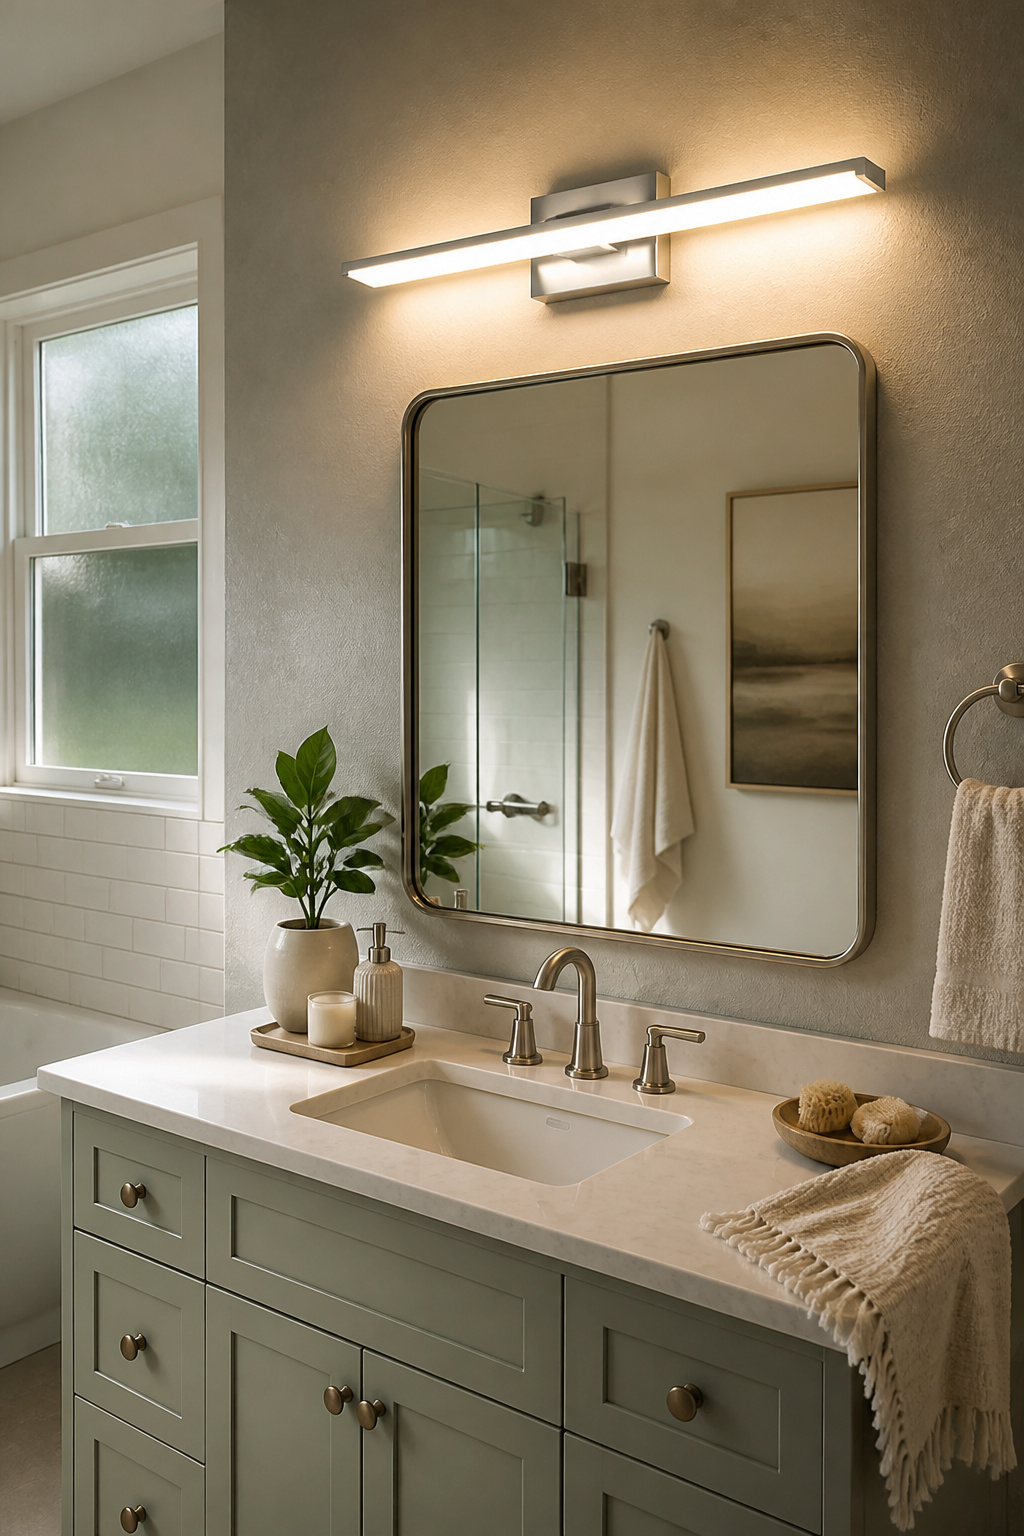
Swapping a bathroom light fixture for an LED version takes maybe twenty minutes if the box is already there and the breaker is off. The real decision happens before you buy: 2700K gives you the warm glow most people expect near a mirror, while 4000K reads cleaner but can feel clinical in a small space. I lean warm in bathrooms under fifty square feet, cool in larger ones where you actually need to see what you’re doing.
Color rendering matters too. Anything below 90 CRI makes skin tones look flat, which defeats the purpose of the room. Most decent fixtures list this now; the cheap ones at the big-box stores often don’t, and that silence is your answer.
The stopping point is honest and short. If the existing box isn’t grounded, or if you’re fishing wire through plaster you didn’t expect, that’s when a licensed electrician earns their fee. Local codes vary enough that I won’t pretend to quote them; call your city inspector’s office and they’ll tell you what’s required for a swap versus new work. The fifteen-minute phone call beats the redo.
5. Updating Vanity with Paint or New Top
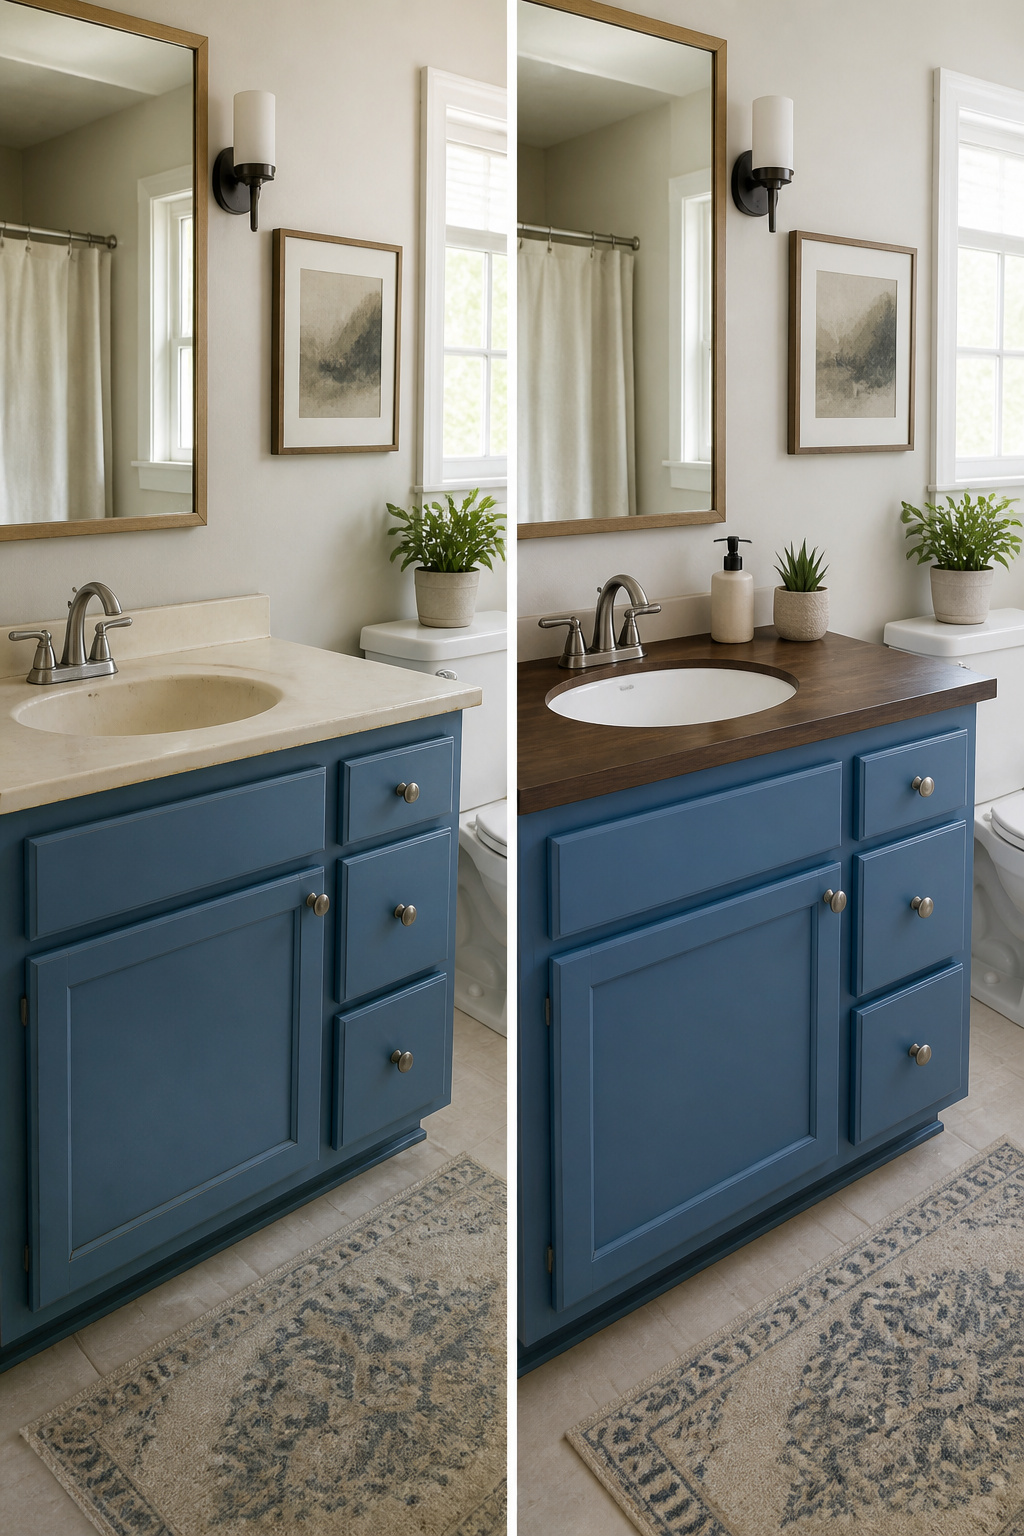
A vanity redo sits at the sweet spot of bathroom makeovers because the cabinet box is usually fine even when the finish looks tired. Paint handles the cosmetic part; a new top handles the surface that actually takes the abuse. The two jobs overlap in budget but not in skill level.
Prepping laminate or wood for paint means scuffing the gloss off, cleaning off the dust, and using a bonding primer the label says works on your surface. Skip the primer and the paint chips at the sink edge in six months. For the top, discount home centers carry pre-cut laminate pieces sized for standard vanities, which drops the replacement cost below what most people guess.
One blogger I came across, working with a cottage bathroom, spent $20 total on her vanity update: paint in a color she already owned, plus raw wood knobs she stained with coffee and sealed herself. That figure assumes you are not buying tools or primer, but it is a real benchmark for how low this can go.
Replacing just the top, or painting just the cabinet, keeps this project distinct from building a vanity from scratch. The structure stays where it is; you are dressing it, not engineering it.
6. Adding Open Shelving
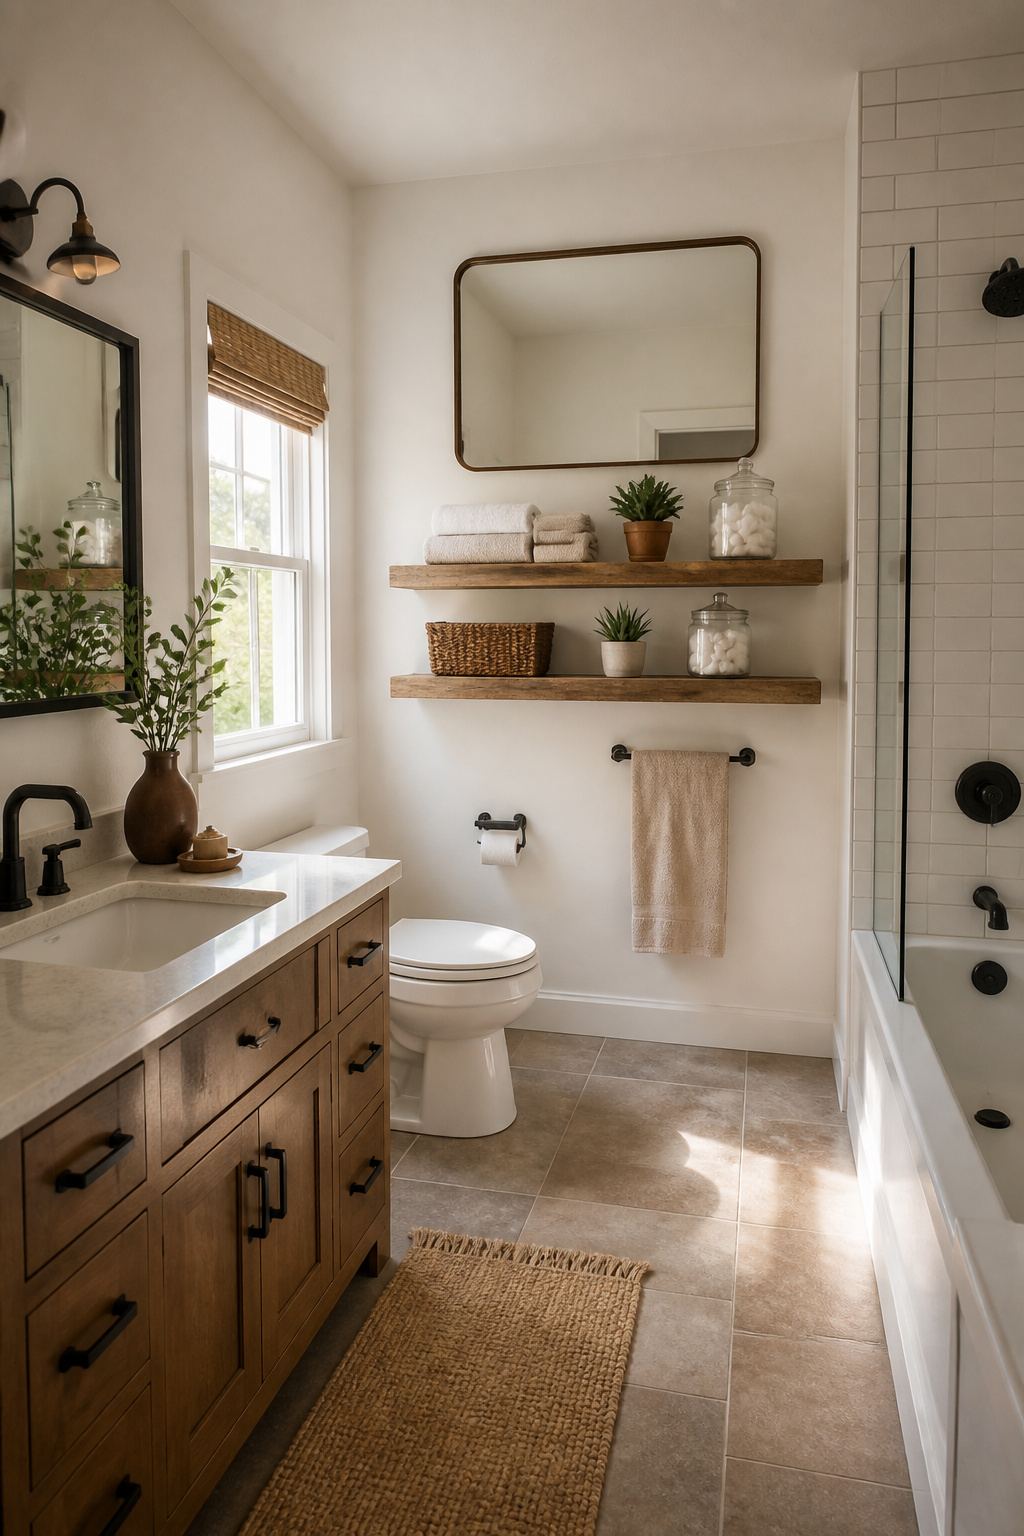
Wall-mounted shelves turn dead wall space into storage without the boxed-in feel of a cabinet. In a small bathroom, that visual openness matters as much as the shelf itself.
Two ways to build this. Basic bracket shelves go up fast: a ledger board or metal brackets, a plank on top, done. Sources point to spray-painting brackets for a cohesive look, and repurposing old wood planks or hunting discount floating shelves at budget retailers to keep cost down. The other route is building a unit, either a floating shelf system that hides its hardware or a more advanced between-the-studs installation. Between-studs shelving adds storage without extending into the room, which keeps the floor plan intact in tight spaces.
Either way, a stud finder, level, and power drill belong in your hand before the first hole. Towels are heavier than they look, especially stacked, so anchor into studs or use proper wall anchors with real weight ratings. One source notes the convenience of keeping everything inside the bathroom rather than hauling it from a hall closet. A shelf near the vanity with glass jars for cotton swabs keeps counter space clear; a row of baskets or bins on a higher shelf hides the clutter that open storage otherwise displays.
The spatial effect is straightforward. Eyes travel through the wall rather than stopping at a cabinet face, so the room reads larger than it is.
7. Replacing Hardware
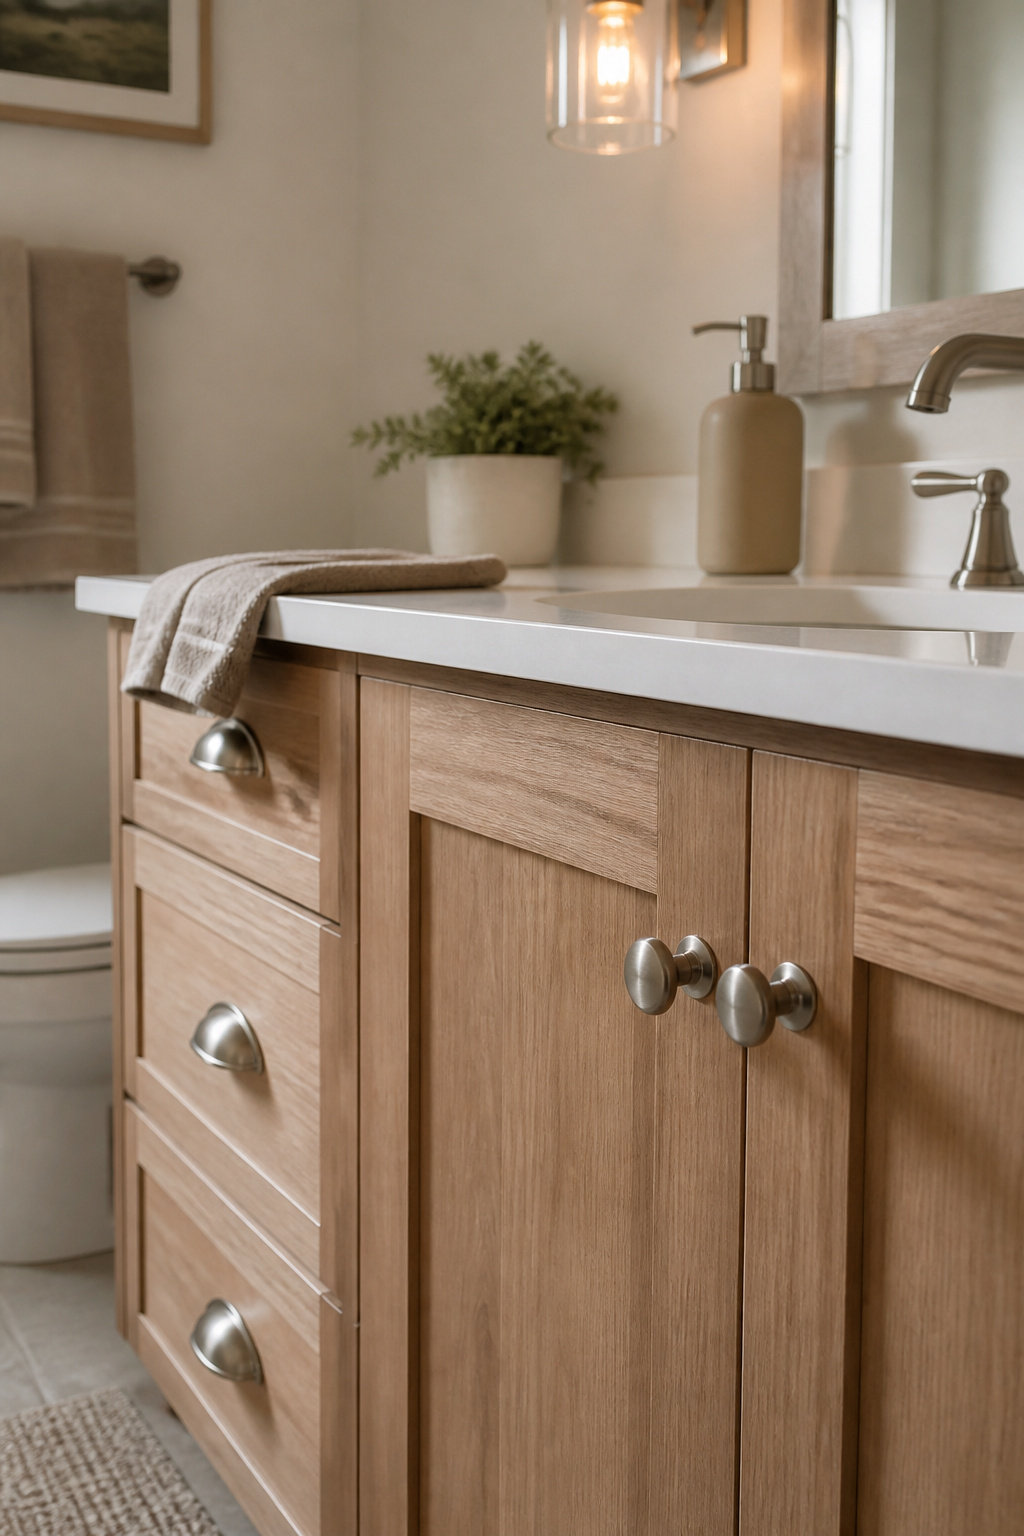
Fifteen minutes with a screwdriver can read as a full renovation in photos if you hit the right spots. Faucets, drawer pulls, towel bars, and toilet paper holders carry more visual weight than their size suggests, especially when the finishes match. Brushed nickel has the best staying power; it does not date itself the way trend colors do.
The mistake most people make is mixing eras cheaply. A mid-century knob on a traditional vanity reads as a hardware-store clearance bin, not as curation. Sticking to one finish family matters more than the specific metal.
Epoxy paint on existing fixtures stretches the budget when replacement is not an option. A matte black coating on a faucet and knobs runs under $20 and holds up for two years or more with normal use. The same approach works for shower heads, towel bars, and toilet paper holders. It is not a permanent fix, but it buys time and coherence while you save for the real swap.
8. Installing a New Mirror
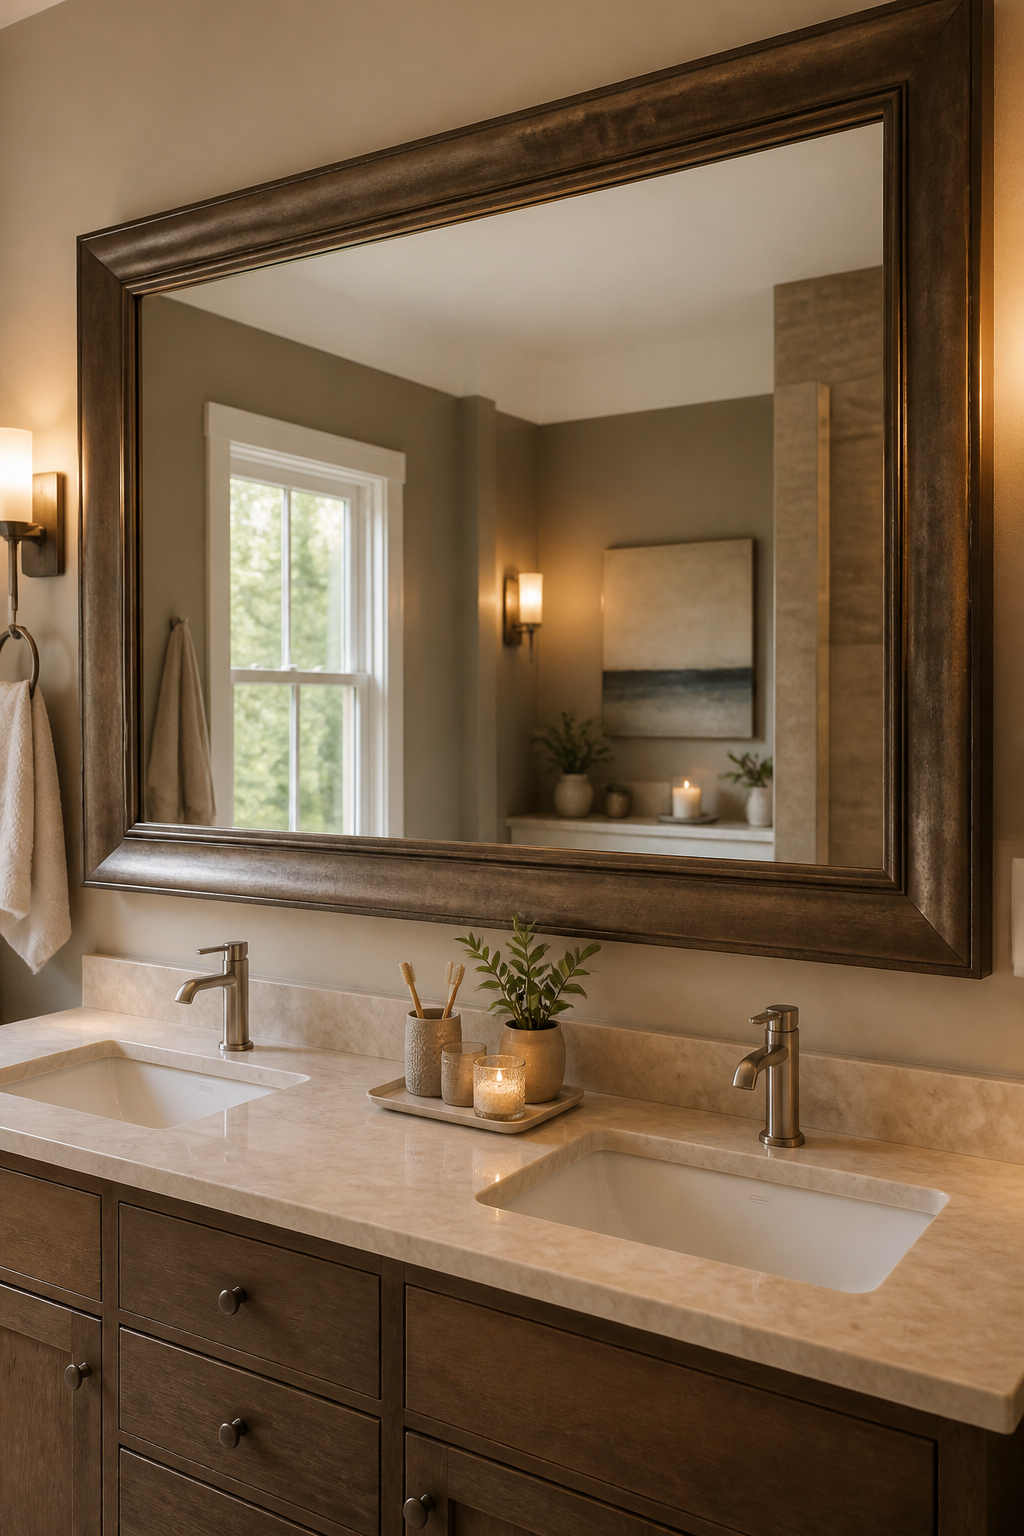
Replacing a mirror or reframing what you already own ranks among the cheapest ways to shift how a bathroom feels. A tall, narrow mirror draws the eye up and stretches ceiling height; a wide horizontal one spreads light and doubles the sense of width. Two smaller framed mirrors over a double vanity, swapping one big slab of glass, add structure that a single surface never quite delivers.
The stuck mirror is the real risk. Builder-grade frameless mirrors often adhere straight to drywall with mastic, and prying one free without gouging the wall takes patience. Work a length of wire behind it with a sawing motion, keep tension even, and expect to patch either way. Plaster needs a toggle bolt or molly anchor; drywall alone can hold a framed unit on screws if you hit a stud. Skip the guesswork and use a stud finder, or the mirror ends up on the tile three months later.
Medicine cabinets trade depth for hidden storage. Recessed models sit flush and eat no counter space; surface-mounted ones install in an hour but read bulkier. The cheaper path, if the glass itself is sound, is building a frame onto the existing mirror. Molding from a home center, reclaimed wood, or a thrifted frame cut to fit all run under $30 in materials. Attach with construction adhesive meant for glass and wood, tape it square while it sets, and the bathroom reads finished without the demolition.
9. Decorating with Plants or Artwork

The last plant I put in a bathroom was a pothos on the tank lid, and it outlasted two shower curtains before I finally overwatered it. Humidity-tolerant plants are the only kind that belong in here; ferns and air plants handle the same wet air without turning to mush. Skip the gallery wall over the tub and hang prints where shower spray never reaches, or seal frames behind glass if you insist on keeping them close. Dollar-store planters work fine, or old containers with drainage holes punched through. I treated my first bathroom like a living room and lost a framed photo to mildew in six weeks. Now I rotate a small fern from the shower shelf to the windowsill seasonally, but this layer is decoration; the paint and the caulk are what actually hold the room together.
10. Creating a Feature Wall with Wallpaper or Stencils
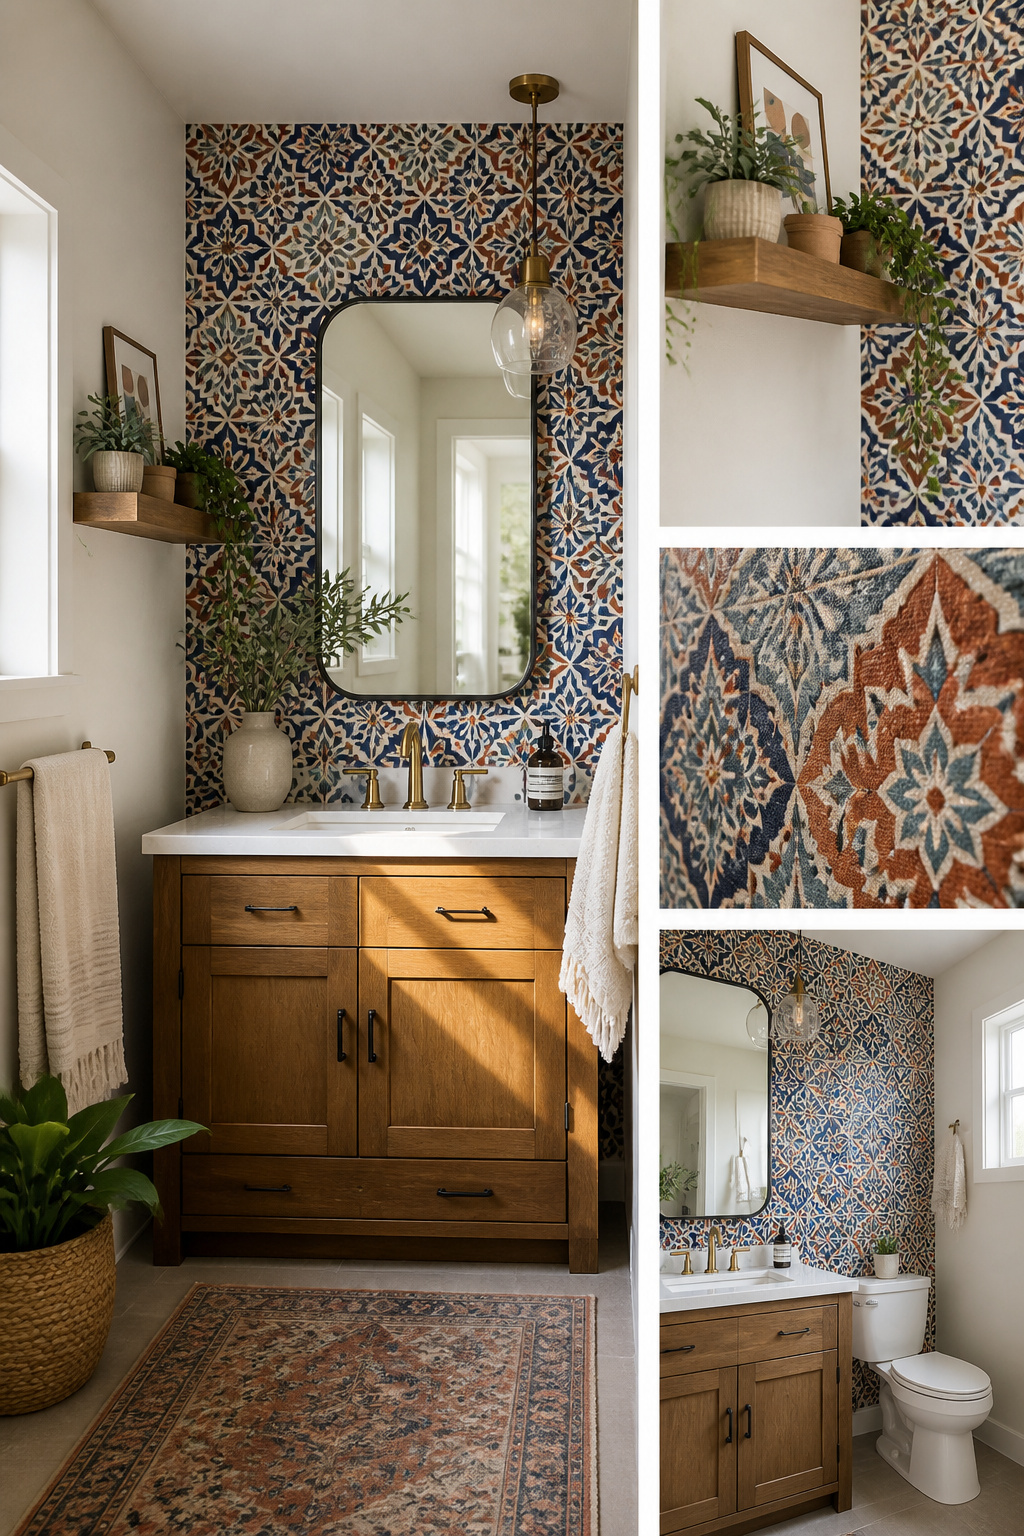
- Peel-and-stick wallpaper wins in a bathroom if you want the job done in one afternoon and the option to reverse it later. The adhesive holds up in humidity, and the Moroccan tile patterns now available read as real from across the room.
- Traditional paste wallpaper costs less per roll and lasts longer, but the prep and drying time stretch the project across days. For a single feature wall behind the vanity, that patience may not pay off.
- Stencils trade speed for savings. A quart of paint you already own, a $12 stencil, and three hours of Saturday get you the same visual punch as wallpaper without the pattern-matching headache.
- One wall only, not the whole room. The sources keep saying this: the wall you see from the doorway, or the one behind the vanity. Wrapping the pattern around corners is where alignment goes sloppy and the eye catches the mismatch.
- Alignment is the skill that separates clean from amateur. Peel-and-stick forgives less than paste; once that tile pattern shifts by a quarter inch at the seam, the whole wall announces the mistake. Stencils skip matching entirely, which is exactly why they suit a first-timer with more time than money.
11. Using Accent Rugs
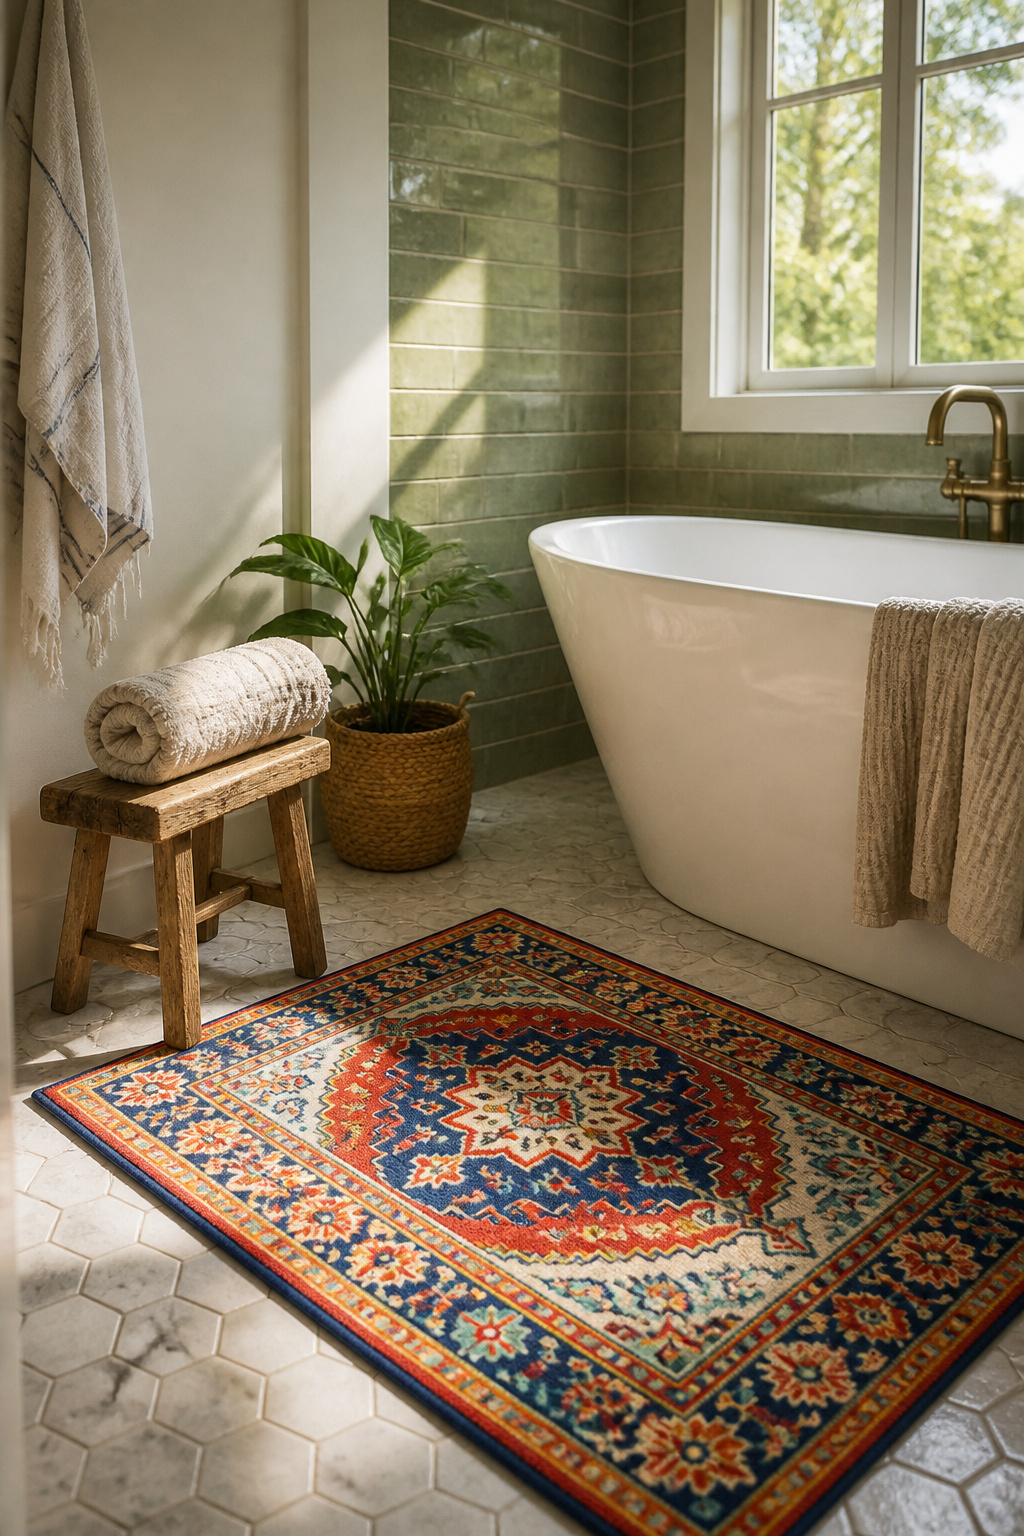
A standard shower curtain runs 72 by 80 inches, and an accent rug works the same way: the bold pattern does the visual lifting so you do not have to paint. Cotton soaks up splashes and launders well, which matters if kids use the bathroom, but synthetics dry faster and resist the mildew that creeps into memory foam backing after a few humid months. That backing fails quietly; the rug still looks fine from the top while the underside turns slick and starts to slide.
Layering helps in a larger bathroom. A small rug at the sink and a runner near the tub carve the room into zones without building anything. The catch is that a cheap rug refreshed this fall may need replacing by spring if the pile mats or the edges curl. Machine washable buys you time, not permanence. I treat accent rugs as the consumable part of the makeover: low cost, high change, replaced before they turn shabby.
12. Organizing with Stylish Storage Solutions
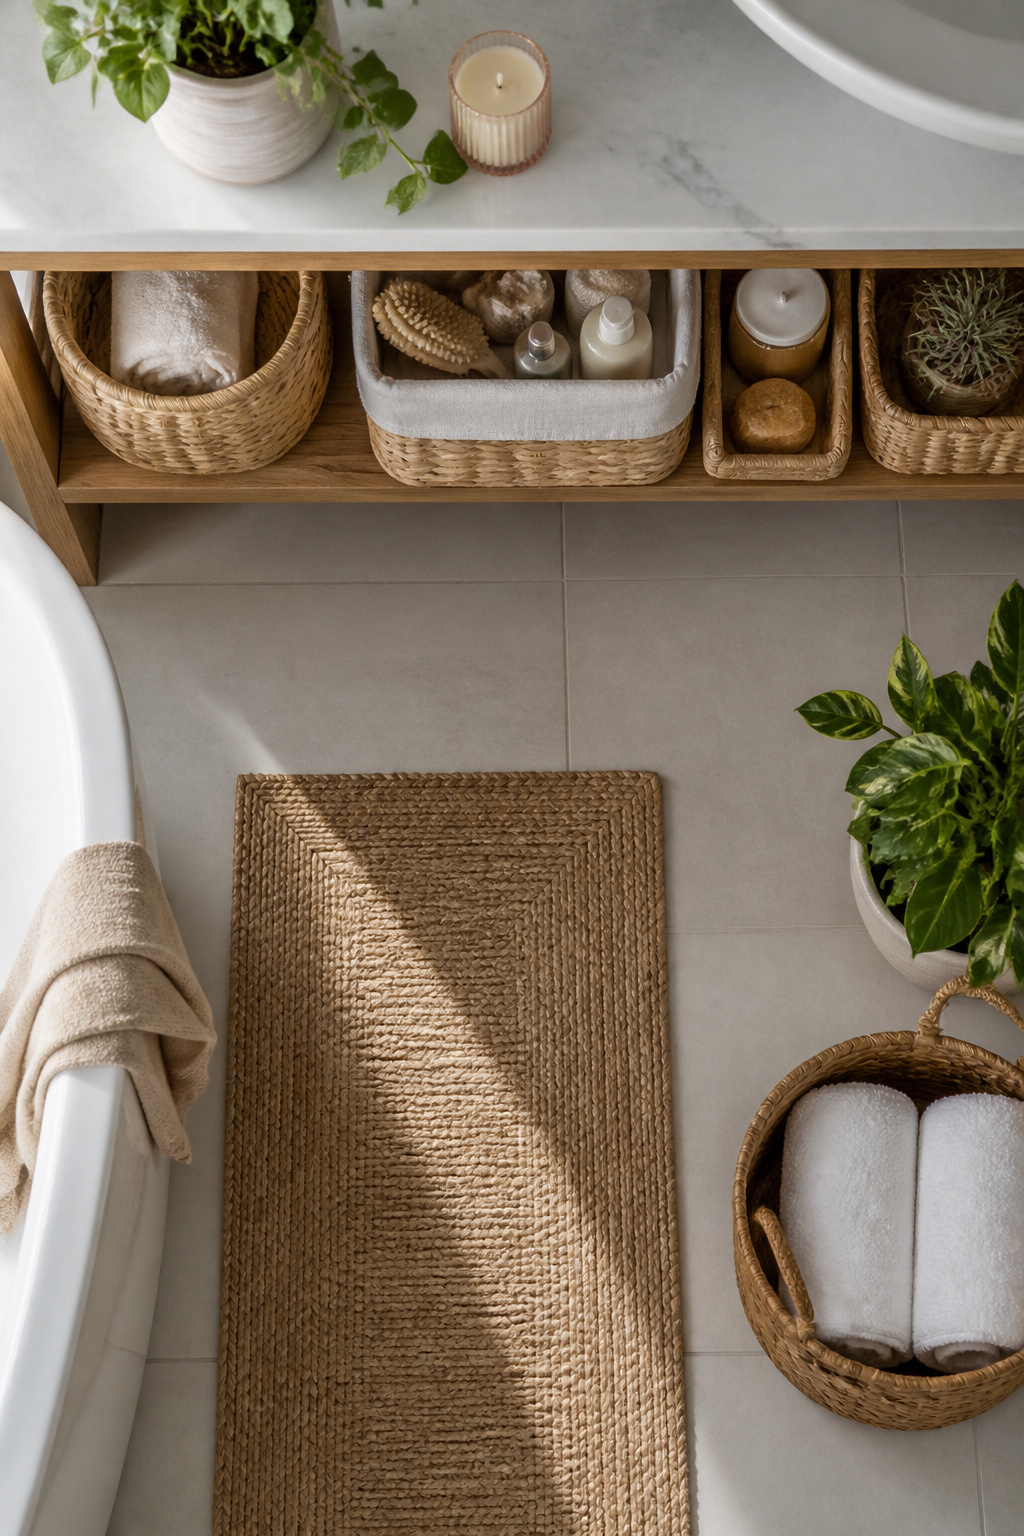
Baskets and bins only work if they fit the spot you actually have. I learned that after hauling home a set of woven seagrass baskets that looked perfect on the shelf and blocked the vanity drawer from opening. Measure depth, width, and any swing or slide clearance first; the sources all agree on the principle but never give universal dimensions because bathroom footprints vary that much.
Tiered trays keep daily items visible without swallowing counter space. I line mine with a shallow bin on each level, corral cotton swabs and hair ties into glass jars, and the whole thing wipes down faster than open piles. Over-toilet units are the same trade: a slim metal rack adds storage where no wall gets drilled, though a too-tall one makes the room feel boxed in. Paint the brackets or the frame if the finish clashes; spray paint unifies mismatched pieces faster than hunting matching sets.
Wall-mounted shelves near the vanity keep the counter clear. I stack towels or set a row of bins across, nothing loose that rolls. Hooks in a line beside the shelf hold the wet stuff off the floor. If you are up for more than surface fixes, drawers or shelves between the studs add storage that does not project into the room at all. The work is sharper, but the visual payoff in a tight bath is real.
13. Upgrading Accessories
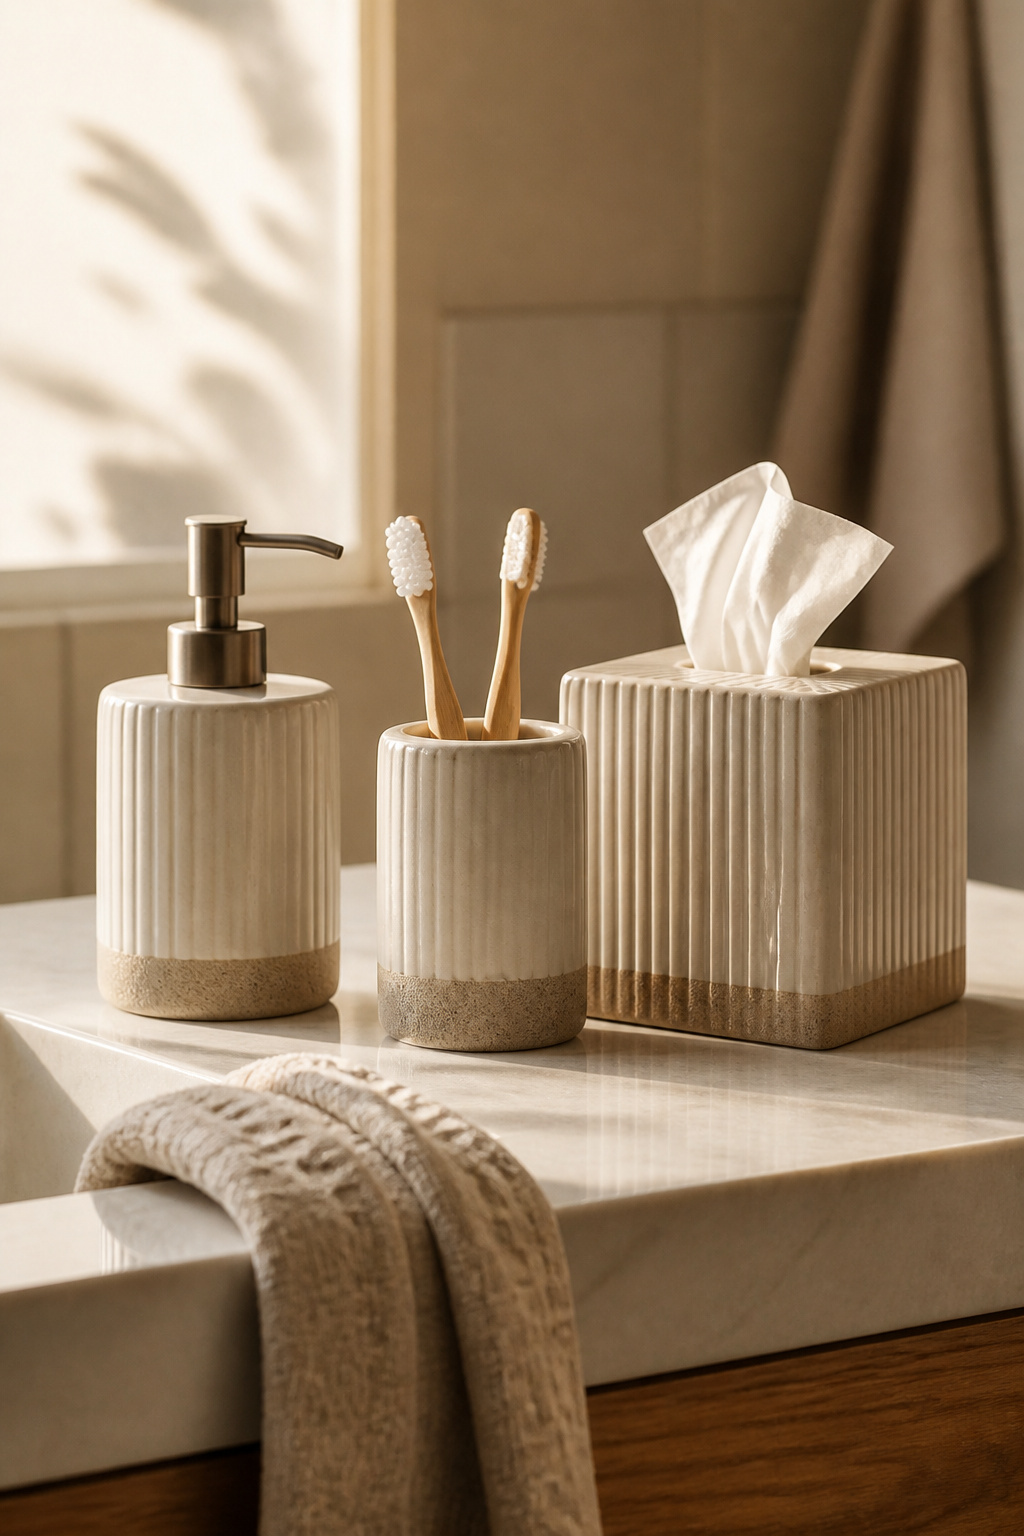
Swapping out a soap dispenser, toothbrush holder, and tissue box cover for a matching set runs about the cost of a single bath towel, yet the eye reads it as a full redesign. The sources back this: bundled accessory sets tie a look together faster than buying each piece alone, and the coordination does the heavy lifting so you don’t need new tile or paint to feel the shift.
The risk is the hotel-gift-shop finish, everything too matchy and sterile. Collected pieces, mixed by finish or texture, read more personal and less staged. My own bathroom landed somewhere in the middle after I tried both, a matched ceramic base for the soap and toothbrush with a brass tissue cover that shared the warm tone but broke the sameness. Three coordinated items hit the limit; add a fourth matching piece and the room starts selling you something.
Accent towels in a pulled color extend the set without doubling down on identical shapes. The move is small-dollar, high-visual-impact, and finished inside an afternoon if the delivery box arrives on time.
14. DIY Countertop Refinishing
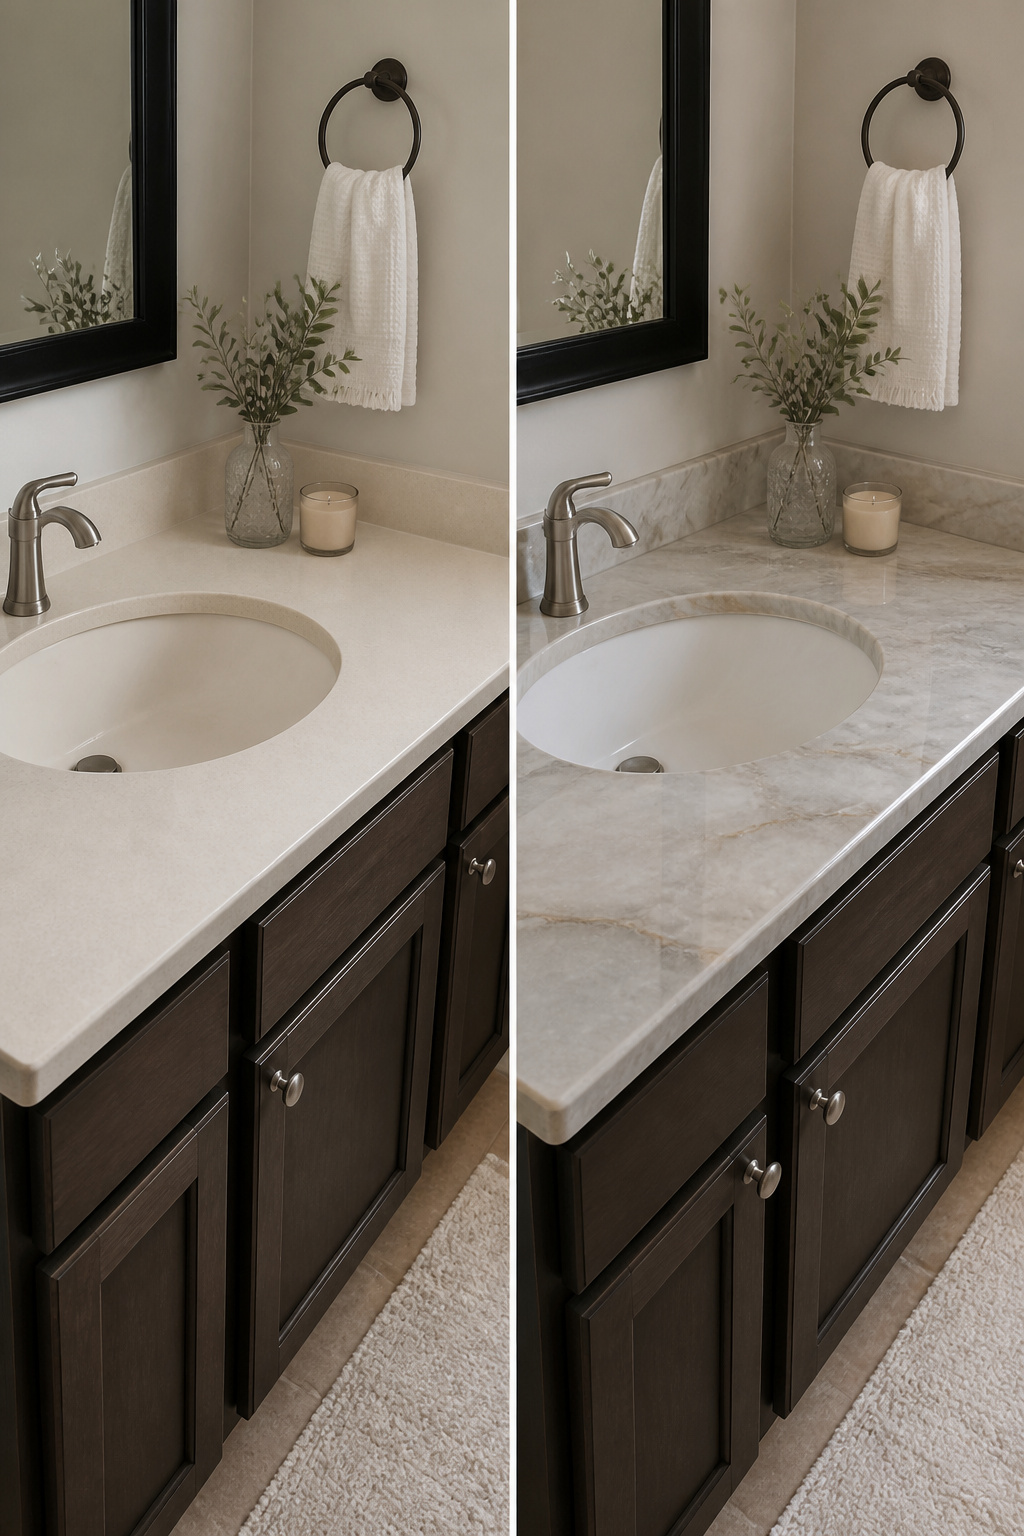
Countertop refinishing kits run under $80 and come in epoxy or paint-on stone finishes that mimic marble, concrete, or granite. The one I keep coming back to is Beyond Paint’s kit with flecks, which I spotted at Lowe’s in Pewter with Autumn fleck. The gold tones in that fleck play well against white vanities and brass hardware.
Prep intensity is where these projects live or die. Etching and degreasing a laminate surface takes longer than the painting itself, and skimping there means the coating lifts inside a month. Cure time is the real test: most kits feel dry in hours but need days before they can handle daily water and heat. Bubbles from trapped air, dust landing in wet resin, and uneven thickness at edges are the three failure modes that send people back to square one. A hairdryer held too close creates more bubbles. A ceiling fan running during application pulls dust straight down onto the surface.
Paint-over-granite or paint-over-quartz is a mistake. Those materials carry actual value that a faux finish erases. Laminate with a papery pattern or no eased edge, though, only improves. When the counter is cracked through, water-swollen, or harboring the kind of 1970s seashell sink that no kit can cover, plywood and stain under $80 builds something new instead of hiding what is past saving.
15. Building a Bathroom Vanity from Scratch
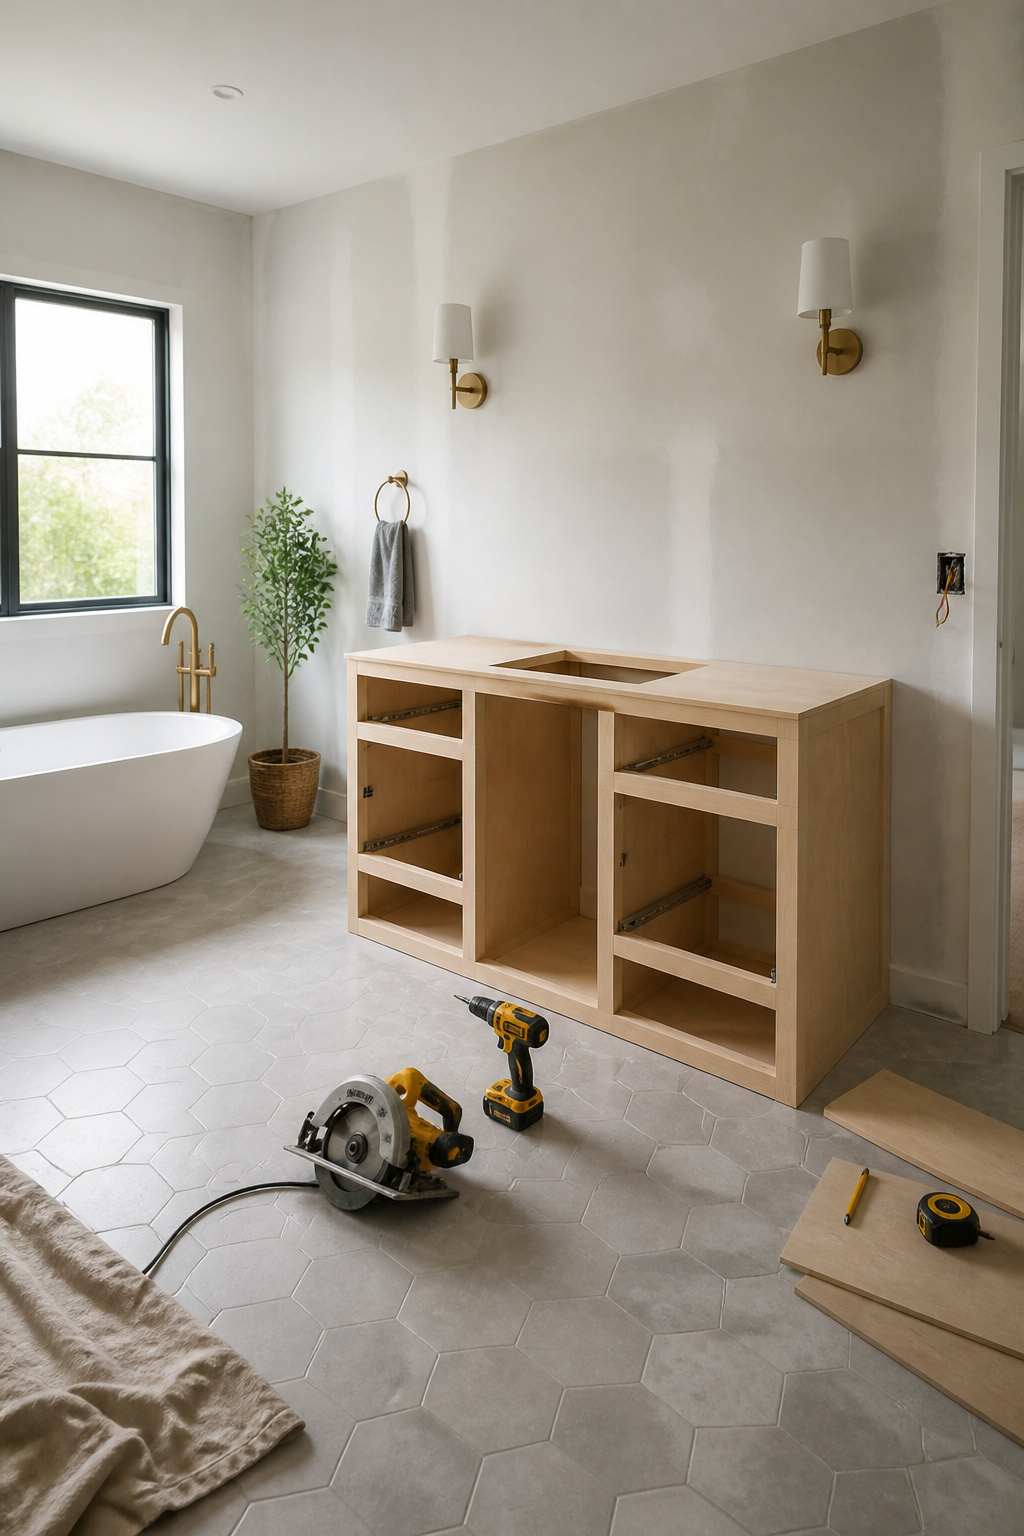
Building a bathroom vanity from scratch sits at the far end of what counts as a diy bathroom makeovers project. Plywood, stain, and wood protectant will run you more than a $20 paint refresh, and the tool list expands past what most of us keep in the junk drawer. A circular saw and a router help, and a Kreg jig for pocket holes moves this from frustrating to feasible. I borrowed a friend’s; rental runs about $15–25 a day if your circle does not include woodworkers.
The floating vanity a plywood build allows does transform a small bathroom, giving it that spa-like openness the boxed-in standard units kill. But honesty matters here. If your plumbing rough-in sits at the wrong height or your walls are more wave than flat, the forgiveness of a prefab unit with scribe molding and an adjustable base starts looking like the smarter money.
Skill and time both run higher than the afternoon projects in this list. Five weekends is not unusual for a first build, and that assumes the sink cutout goes right the first time. Granite or a solid-surface top means either fabricator relationships or a concrete pour that adds curing days. Stainless steel counters or a scored secondhand dresser with a vessel sink can shortcut that, but each carries its own fit issues.
Two paths, then: build the box and buy the top, or repurpose a dresser and cut for the sink. The dresser route skips the joinery but rarely gives you the under-counter storage a bathroom actually needs. Drawers interfere with plumbing; doors that clear p-traps take planning. I would not start this without a dry-fit day where the sink, faucet, and drain assembly sit in place before a single finish coat goes on. Prefab wins if you need the bathroom back by Sunday night.
Budget and Tool Basics
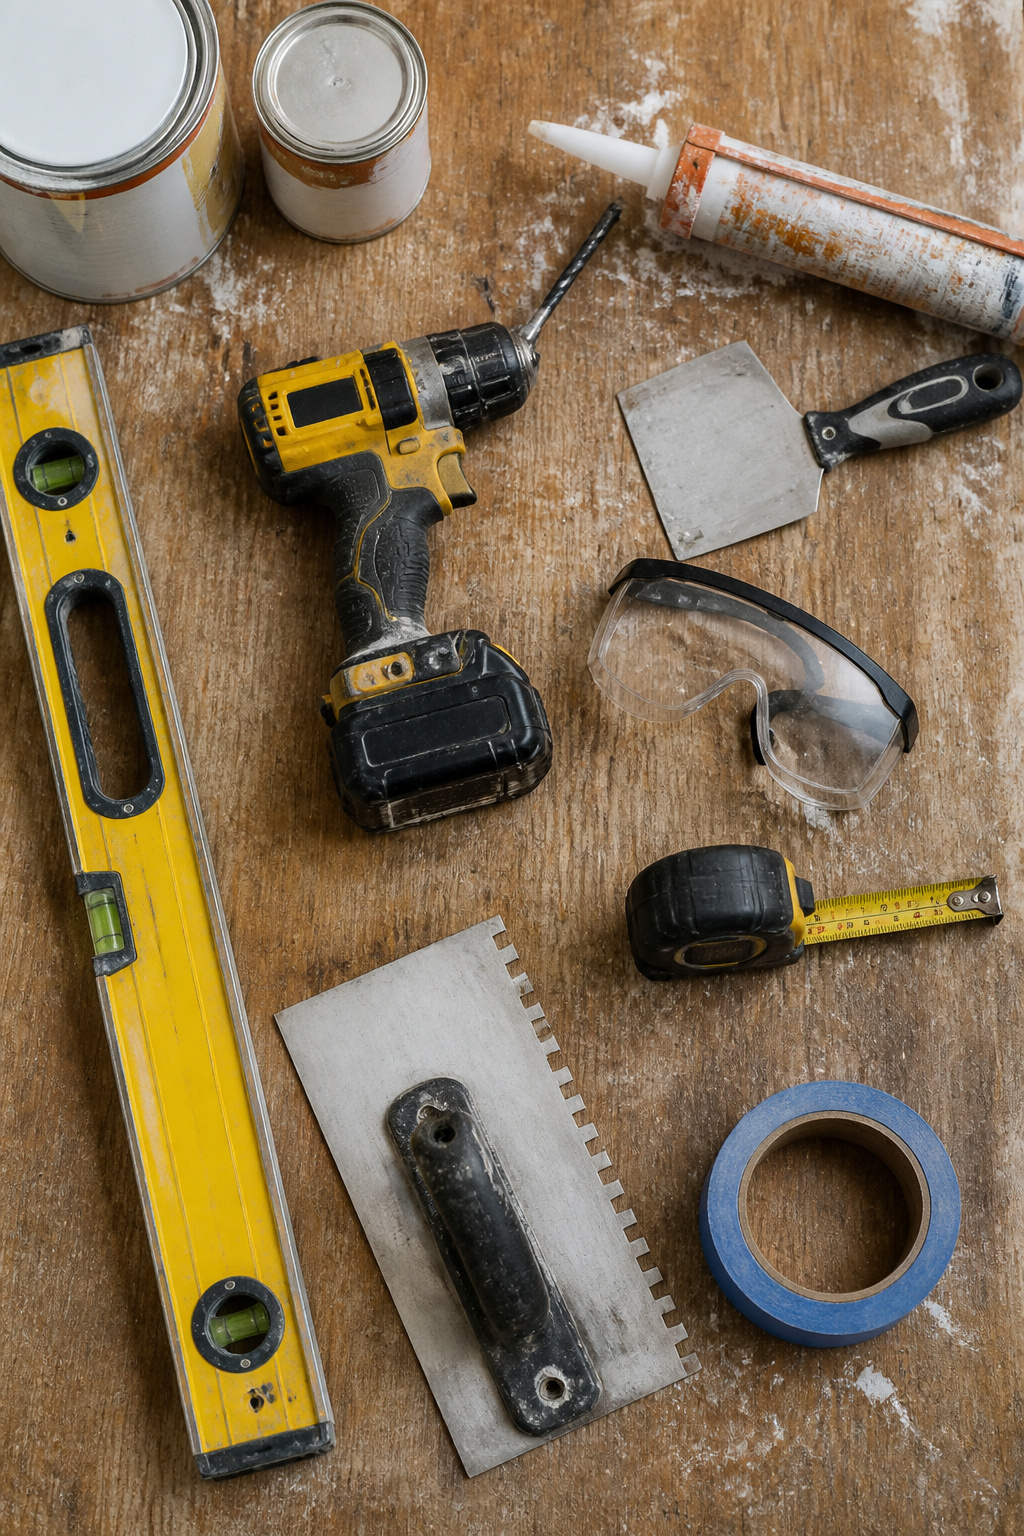
Most bathroom makeovers never touch a stud or a pipe, and that distinction saves both money and permits. A drill, screwdriver, level, measuring tape, and basic safety gear, mask, gloves, goggles, cover the bulk of what these projects ask for. A caulking gun, spackle knife, and stud finder come in handy often enough that owning them pays off. Everything else, the wet-dry vac, the cordless drill, the pry bar, you can rent for a minimal cost or borrow from that friend who already remodeled theirs.
The $250 makeover is real, though what that number covers shifts with every house. Paint, hardware, hand towels, and a light fixture swap bought one blogger a full refresh; another needed twice that once grout and sealant entered the picture. Cosmetic work, paint over tile, new cabinet pulls over a gutted vanity, keeps the budget in that range. Structural moves, plumbing, electrical, anything requiring code compliance, are where costs balloon and where most people should stop and call someone licensed.
Paint Finishes That Survive Steam

Flat paint in a bathroom is a lesson you only need to learn once. The ceiling in my first rental looked pristine for about six weeks, then the steam from daily showers started lifting the finish in soft, blistered patches that no amount of touching up could fix. Satin or semi-gloss is the only sensible choice for walls and ceilings that see regular moisture: the resin content in those finishes forms a harder, less porous surface that water beads on rather than soaks into. Mildew-resistant acrylic latex adds another layer of protection, since the antimicrobial additives in the formula slow the black spotting that thrives on steam-trapped organic matter. Degreasing the surface matters as much as the paint choice; any soap residue left on drywall or previous paint layers becomes a weak point where new finish releases first. I learned that after skipping the TSP step on a vanity wall and watching the new semi-gloss peel in ribbons six months later. The repair took a full Saturday that proper prep would have prevented.
Storage Without Renovation
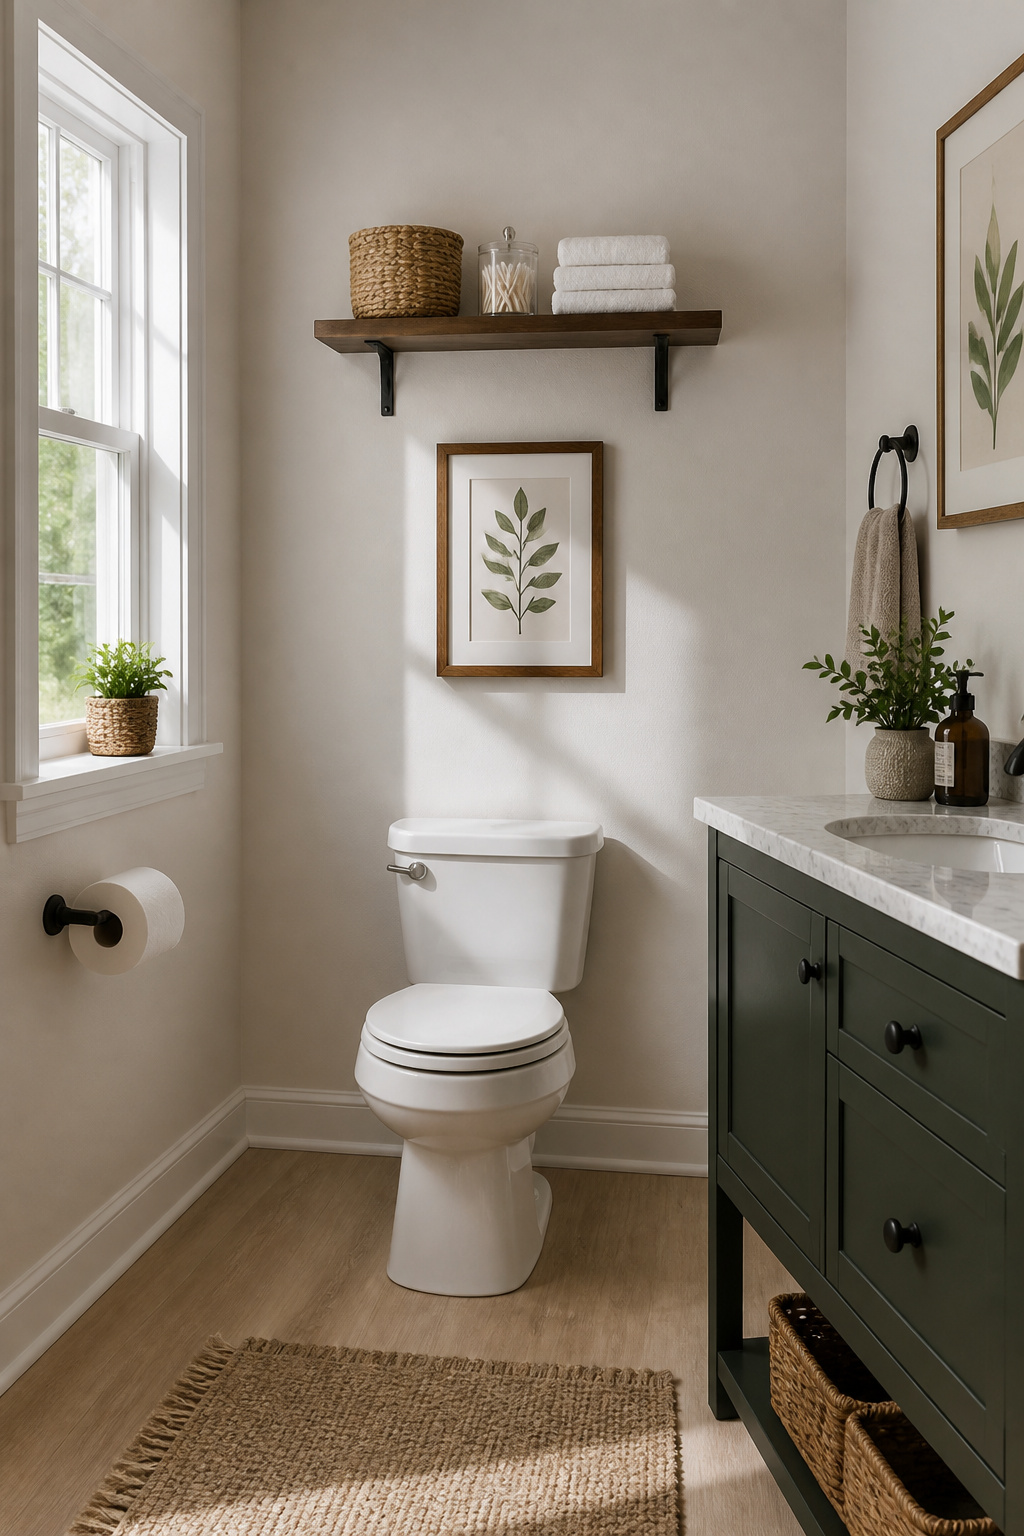
Vertical space is usually the last thing people think to use in a small bathroom, which is exactly why it works. A single wall-mounted shelf above the door or beside the mirror buys back square footage you already own but never claimed. I learned this the hard way after stacking towels on the toilet tank for two years.
Wall-mounted shelves are an easy DIY project. Stack towels on them, or install a row of baskets, bins, or trays to hold loose items attractively and out of sight. Put one near the vanity to keep counter space clear, using glass jars or other containers for cotton swabs and the like. If your skills run more advanced, adding drawers or shelves between the studs keeps storage from extending into the room at all. That visual inch matters in a space where you turn around and bump the wall.
Woven baskets or decorative bins keep toiletries neat, and you can upcycle ones you already own. A little spray paint or new labels unifies mismatched items into a coherent system. Hooks in a line on the wall handle towels or hair products without the footprint of a bar. Even a stool or bench with below-seat storage earns its place. The principle is simple: store what you need inside the bathroom, use the height, and keep the floor as open as you can.
Electrical and Plumbing Stopping Points

Most DIY bathroom makeovers run straight into a wall that has nothing to do with skill level or budget. Your local building code decides where the project ends, and that line sits in a different place in every county.
Swapping a standard faucet for another standard faucet usually stays inside safe territory. The connections are the same size, the shut-off valves already exist, and nothing behind the wall gets disturbed. LED vanity lighting gets trickier fast. Hardwired fixtures, anything involving a ground fault circuit interrupter, or new outlets near water all draw inspector attention for good reason. What passes in a thirty-year-old ranch might fail in new construction ten miles away.
The honest move is calling your local permits office before you buy the fixture, not after you have the wall open. Ask specifically about homeowner-permitted electrical and what level of plumbing alteration triggers an inspection. Some jurisdictions allow almost anything on existing circuits; others want a licensed electrician for any hardwired addition. Water heater connections and anything involving the main stack are almost always off-limits for DIY.
Saving that phone call for the end of a Saturday project turns a quick refresh into a delayed closing when you sell. The fifteen minutes on hold beats the alternative.
What I Bought and What It Cost

A gallon of moisture-resistant wall paint ran $40, the tub refinishing kit was $80, and the cabinet paint came in at $16. Those three numbers sat on my list for weeks before I pulled the trigger, and they stayed fixed even when I added a $12 brush set I hadn’t budgeted for. The brushes were the right call; the cheap ones from my garage would have left streaks in that epoxy coating.
| Approach | My Spend | Best For | Where I Went Over |
|---|---|---|---|
| Wall paint | $40 | Quick color change | n/a |
| Cabinet paint | $16 | Vanity refresh | Extra primer, +$9 |
| Tub refinishing kit | $80 | Porcelain or fiberglass | Ventilation fan rental, +$22 |
The primer pushed the cabinet line over because the original laminate soaked up the first coat like water on bare drywall. The fan rental was non-negotiable once I read the curing instructions; the epoxy needs airflow I couldn’t get from a window crack in July humidity. Total came to $177, not the $136 I had sketched out.
Frequently Asked Questions
What are the best DIY bathroom makeover ideas?
The strongest options include refreshing walls with moisture-resistant satin or semi-gloss paint, installing peel-and-stick vinyl floor tiles, refinishing an existing bathtub instead of replacing it, upgrading to LED light fixtures, and painting or replacing a vanity top. Open shelving, new hardware, and a reframed or replaced mirror also deliver visible change for under $50 each. These projects avoid plumbing and electrical permits while still shifting how the room feels.
How can I update my bathroom on a budget?
Keep the work cosmetic rather than structural. Paint, hardware, hand towels, and a light fixture swap bought one blogger a full refresh for about $250; another spent just $20 on a vanity update using paint she already owned and wood knobs she stained with coffee. Peel-and-stick tiles, epoxy-painted fixtures, and a DIY mirror frame all stay under $30 in materials. The rule is simple: if you are not opening walls or moving pipes, you are probably still in budget territory.
What tools do I need for a DIY bathroom remodel?
A drill, screwdriver, level, measuring tape, and basic safety gear, mask, gloves, and goggles, cover most of what these projects ask for. Add a caulking gun, spackle knife, and stud finder for the jobs that come up repeatedly. Anything heavier, a wet-dry vac, cordless drill, pry bar, or Kreg jig, can be rented for minimal cost or borrowed. The article notes that most bathroom makeovers never touch a stud or a pipe, so the tool list stays short.





