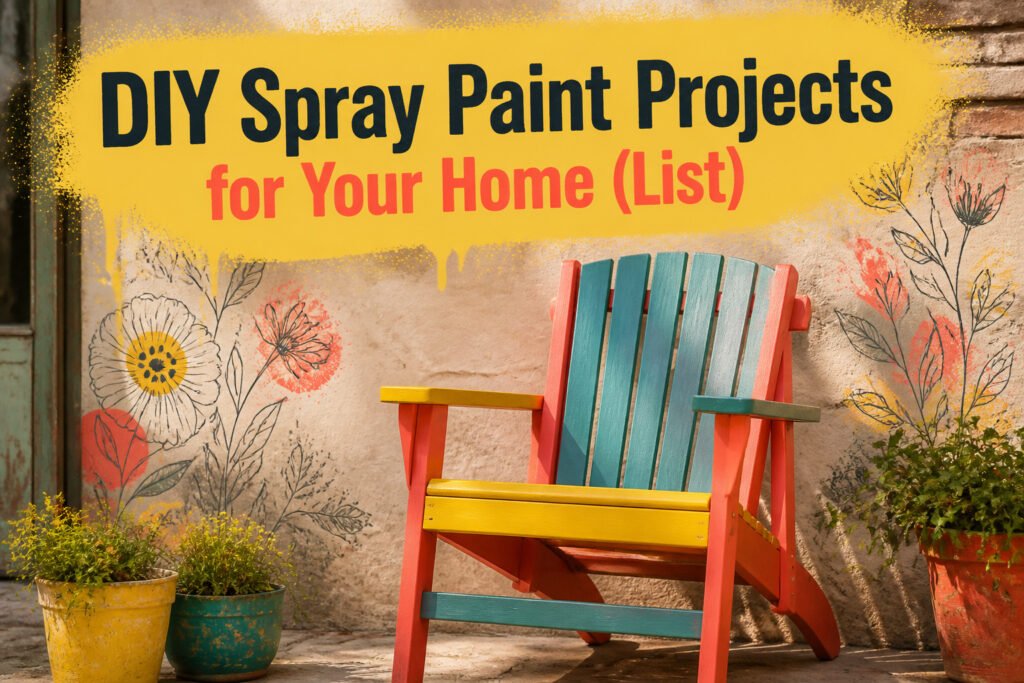
The right diy spray paint project depends on whether you need a weekend fix or a ten-year solution. Aluminum window frames and wooden chairs both take paint well, but only one of them holds a decade later if you seal it properly. The chairs do; skip the sealer and you will know within a season.
1. Aluminum Windows

Aluminum window frames from the 1970s usually work better than they look. The metal holds up, the storms and screens still seal, but the finish goes chalky and the whole house starts to feel dated. Replacing them is expensive and often unnecessary; a weekend with spray paint changes the room for the cost of a few cans.
Paint and primer in one saves a step and adheres well to scuffed metal. Rust-Oleum and Krylon both make formulas meant for this, and either brand covers clean aluminum without a separate bonding primer if the surface is prepared right. Sand lightly, wash off the dust with a degreaser, and mask the glass carefully; overspray on windows is tedious to remove.
White reads freshest against siding or brick, though the color shift looks subtle in photos. The real difference is walking up to the porch and seeing crisp trim instead of dull factory gray. Inside frames can be done first, with exteriors painted later when the weather holds; both hold up well over years of sun and rain.
2. Sliding Glass Doors

The track on a sliding glass door collects more grime than you notice until paint day. I learned to vacuum it out, then wipe with a degreaser, because flecks of old lubricant and patio dust love to drift up and stick to wet paint. Tape the glass with painter’s tape pressed right to the frame edge, not lazily across the middle. Overspray on glass scrapes off with a razor, but it costs time you did not budget.
For the finish, satin or semi-gloss stands up to fingerprints better than flat. Eggshell looks sophisticated for about three days, then every handprint shows. I would skip oil-based unless you have a week to let the smell clear; modern acrylic enamels level nearly as smooth and cure fast enough to close the door overnight. Two light coats beats one heavy one, especially on the vertical stiles where runs pool if you get impatient.
3. Shower Door
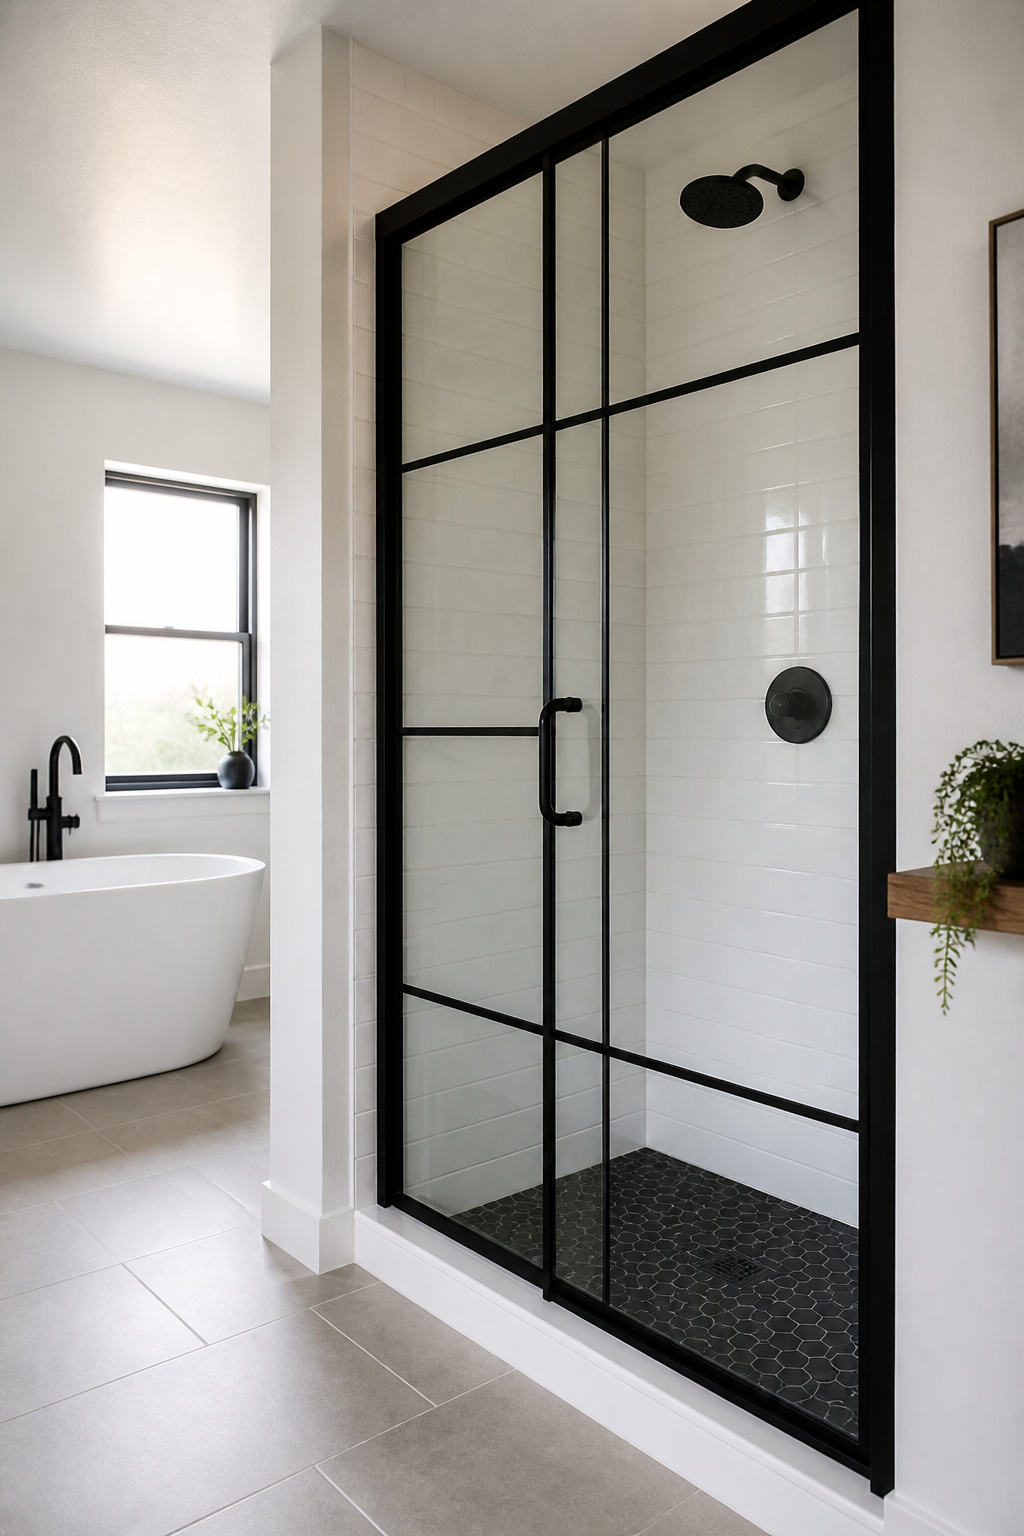
Shower door frames sit right where steam and overspray from the shower itself blast them daily, so the finish matters more than the color. Rust-Oleum Painter’s Touch and their metallic line are what I’d reach for; the cans are everywhere, and the paint films tough enough to survive the humidity if you prep right.
The real risk is water getting under the paint at the edges of the frame. Scuff every millimeter of the metal with fine grit, clean with a degreaser that actually evaporates, and tape the glass so the seal lands on bare metal, not on top of your paint line. Skip any of that and chips start where the frame meets the seal, usually at the bottom rail where water pools.
One blogger ran her spray-painted shower door for three years before a full renovation took it out, and the black she put down only chipped in one or two tiny spots. That is about the honest lifespan: not forever, but long enough to outlast your patience with the color. If your bathroom fan moves real air, you might stretch it further. If the door already has pitting or the frame is aluminum that has been wet for years, paint buys you time, not a miracle.
4. Light Fixtures
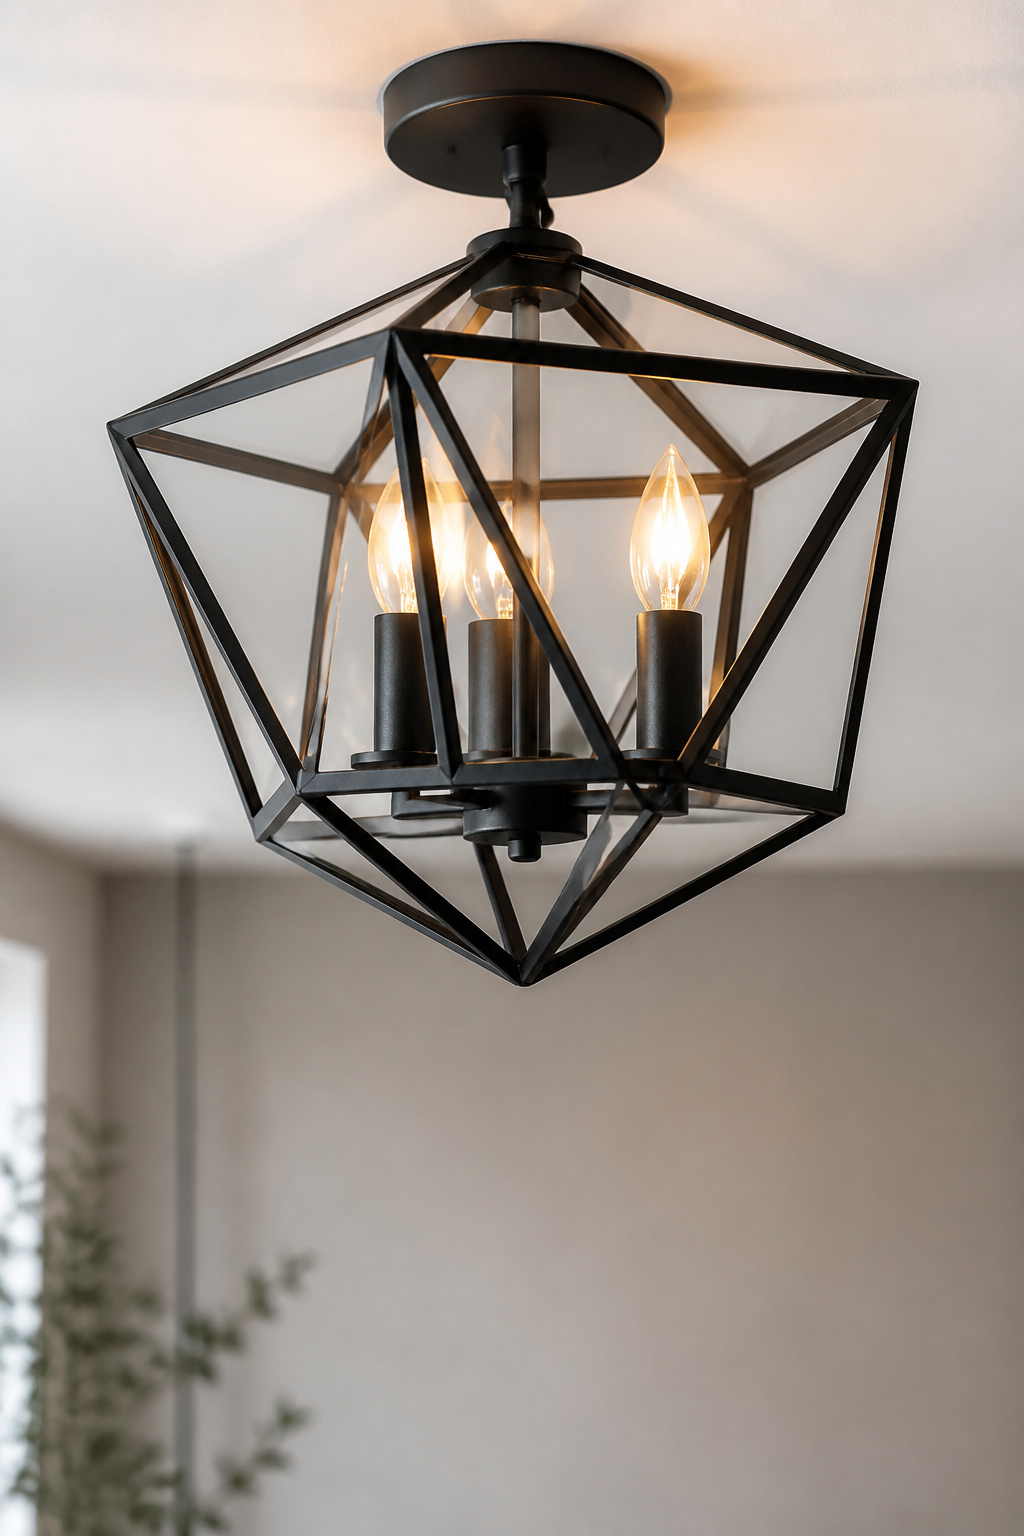
Ceiling fixtures and wall sconces respond to spray paint the same way thrifted frames do, but with one non-negotiable step first: the breaker stays off until the fixture is back together and the bulbs are out of your hand. I learned that sequence the hard way after watching someone else spray a live socket.
Metal, wood, and glass all take paint well, though glass needs primer first or the finish flakes by month two. Plastic shades work too, same primer rule. The real choice is whether to unmount the whole fixture or mask it in place. Taking it down means better coverage in the crevices where dust collects and where brush paint would pool. Leaving it up, the way one blogger did with her lantern, saves the rewiring hassle but demands careful masking of the ceiling ring and any wiring channels you can’t fully seal.
High-heat fixtures, anything with halogen bulbs or enclosed housings that run above ordinary temperatures, need paint rated for heat. Standard spray paint on a hot-running metal shade will bubble and discolor, sometimes within weeks. Check the can for temperature ratings, or skip the paint and swap the shade entirely. For everything else, two light coats beat one heavy one; flashing shows up brutally under bulb light on large flat surfaces like drum shades.
5. Fireplace Doors
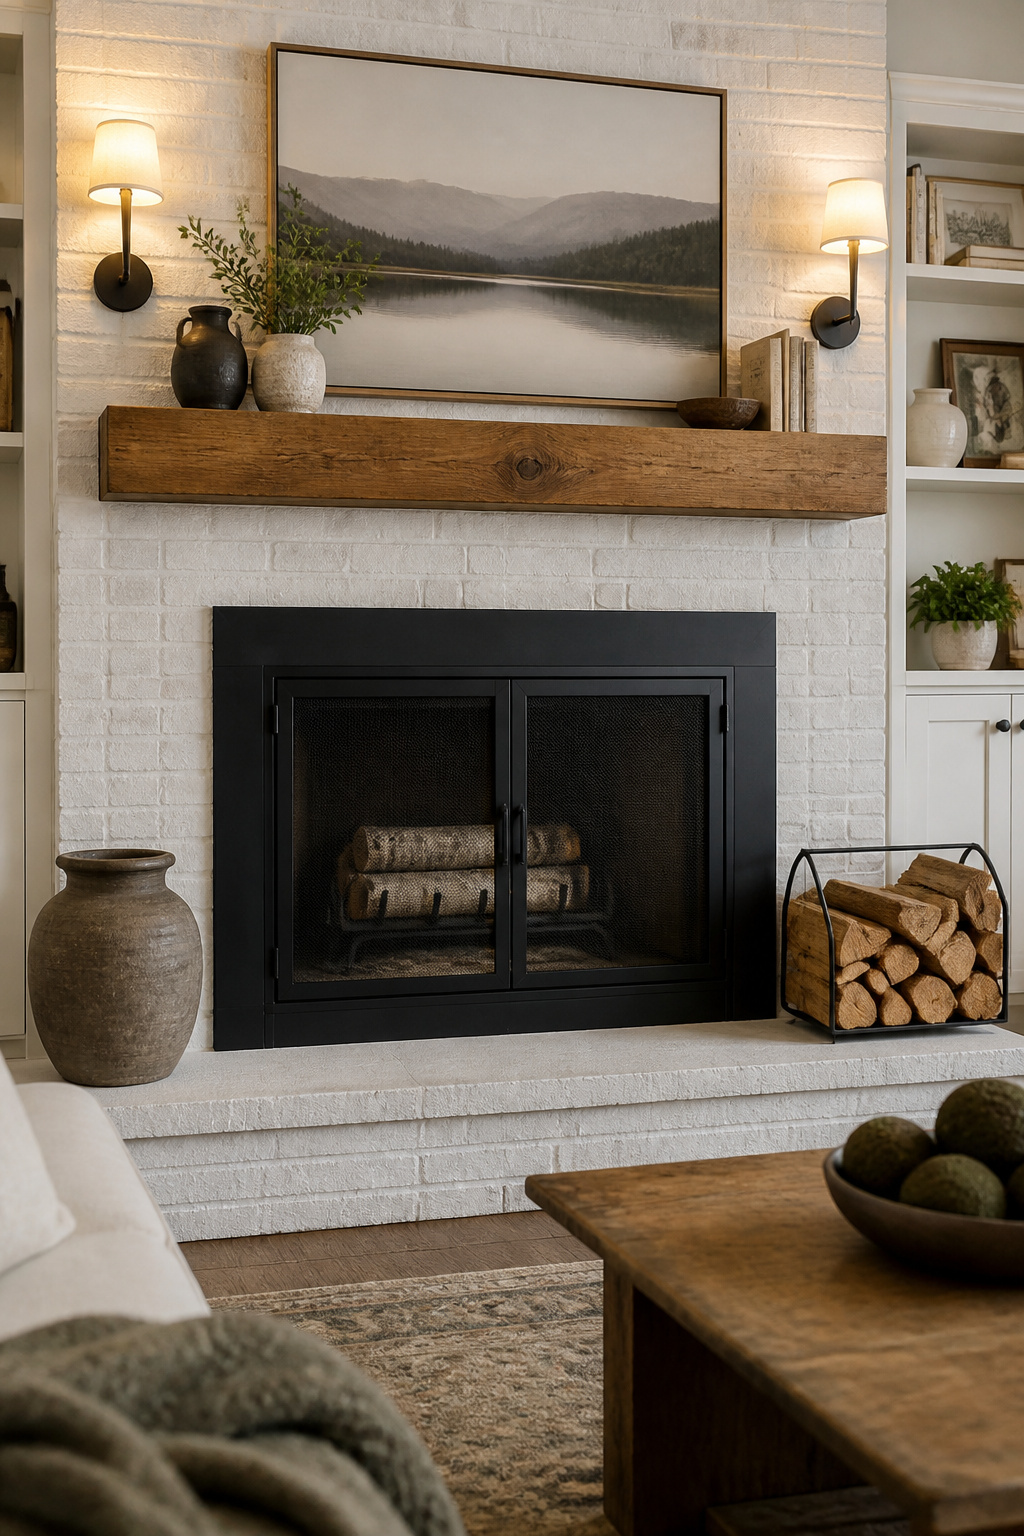
Brass fireplace doors were what finally taught me that high heat spray paint is a different product entirely, not a marketing label. Standard spray paint on a surround that sees 400 degrees or more will bubble within the first few fires, and the smell of curing failure is not something you forget.
The first pass on my own doors went all white, paint and brick both, which looked clean until the room swallowed the fireplace whole. A few years later the brick went blue and the doors went black with the same Rust-Oleum high heat line, and that contrast finally gave the thing a pulse.
If you are standing in the aisle deciding, paint-and-primer-in-one formulas work for almost everything else in the house. Here they do not. The can has to say high heat, and it has to say it for a reason. A comfort grip handle helps on the long, even passes the mesh screens demand, but the paint choice itself is the only move that matters.
6. Lamps
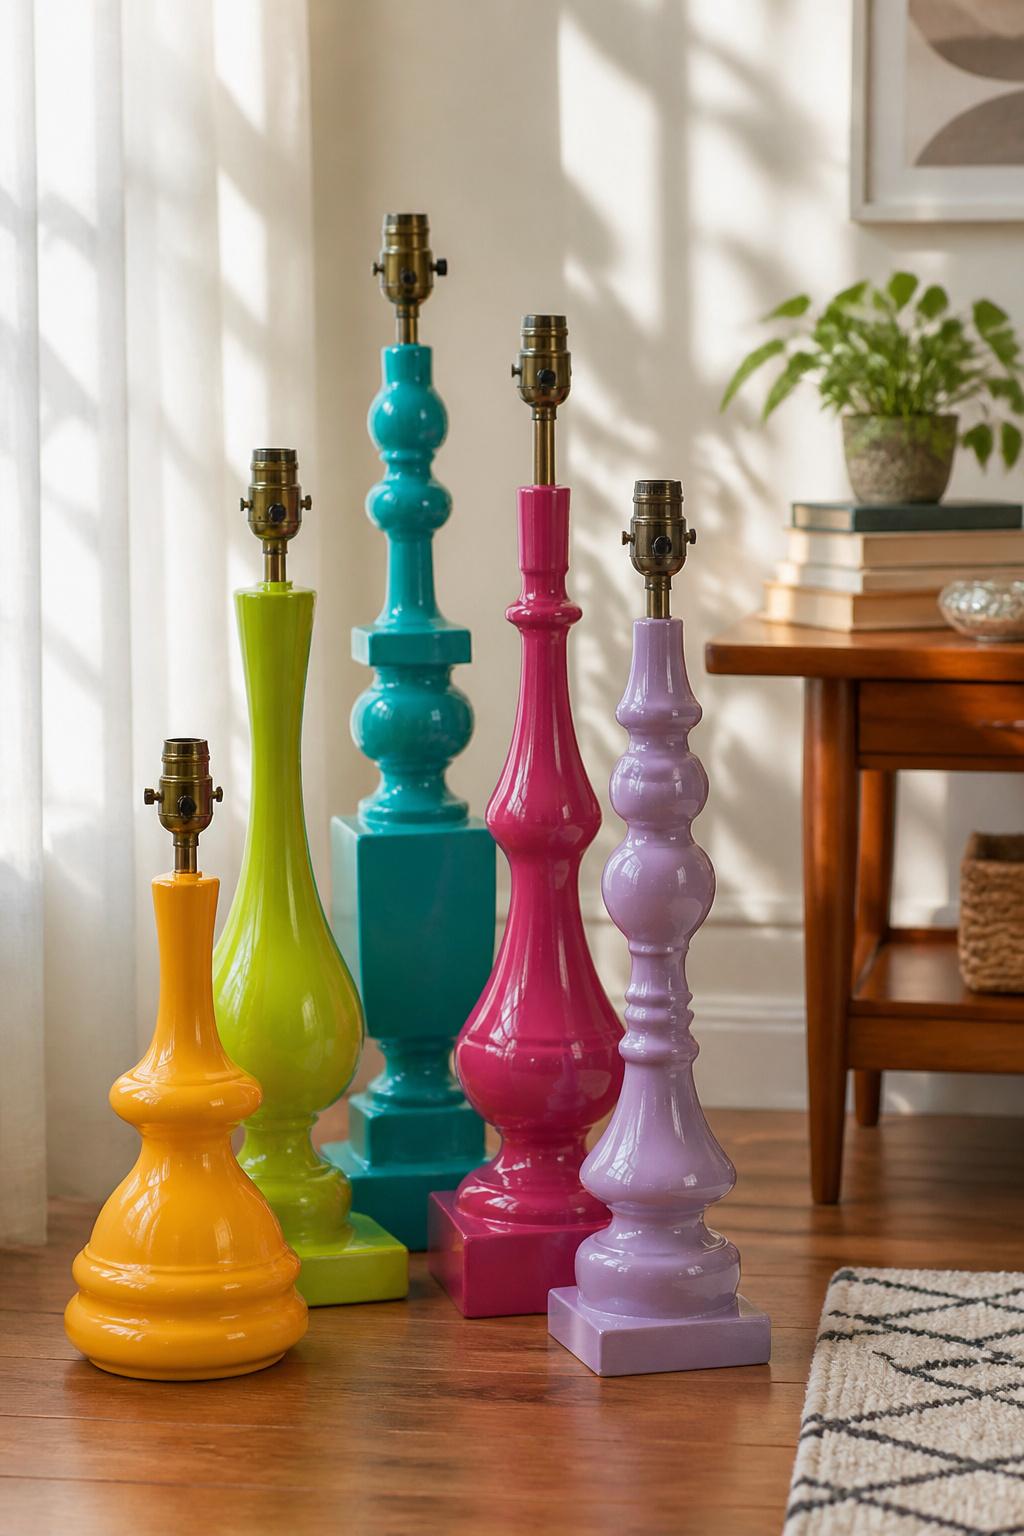
Metal lamp bases are the easy wins here. Spray paint grips them without a fight, and the curves that make a lamp interesting are exactly what a rattle can handles best. Plastic works too, but the finish has to be right. Anything slick needs a dedicated primer first, or the paint flakes off the first time someone nudges the cord.
Mask the cord and switch with painter’s tape, not grocery bags. Work the tape right up to where the hardware meets the base, because overspray on rubber or textured plastic turns gummy and never fully cures. I learned that the hard way on a floor lamp whose switch housing I thought I could just angle around.
Wood lamp bases are where I draw the line. The flat panels on most of them show every pass of the nozzle as flashing, those stripes that catch the light from across the room. Thrift stores are full of beautiful-shaped metal lamps with dated brass or that brown 1990s finish. Those are the ones worth carrying home.
7. Curtain Rods
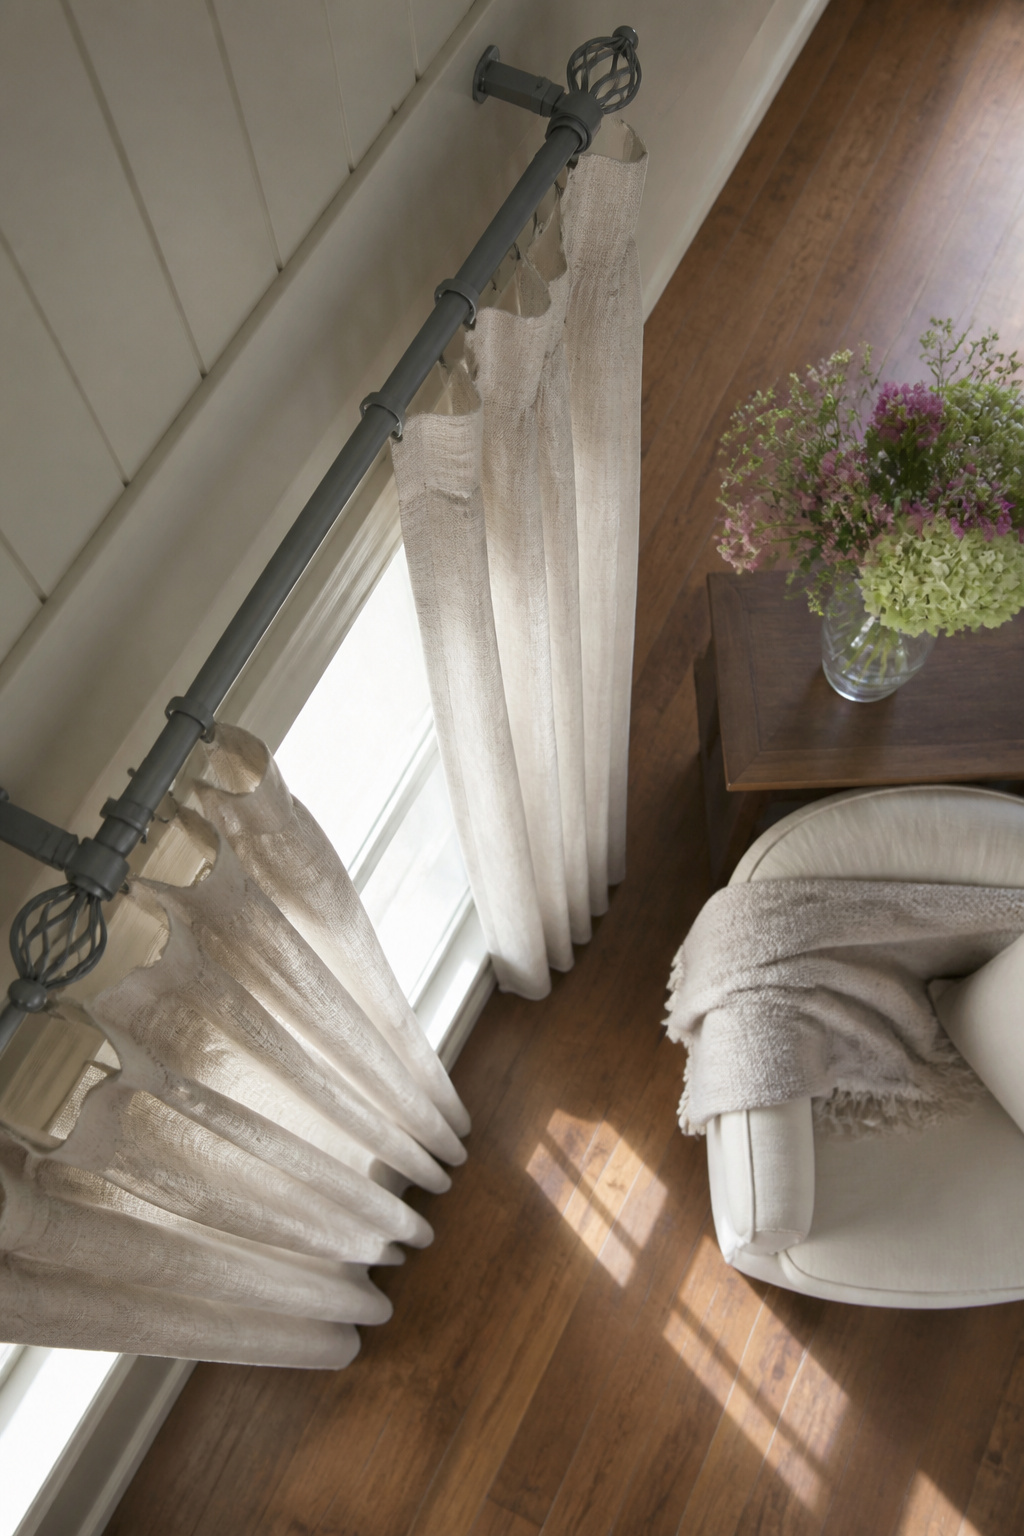
Curtain rods and finials collect fingerprints and fade faster than the fabric they hold, so a coat of spray paint is one of the quickest wins on this list. The trick is suspending the rod so paint reaches every side at once. I run a length of twine between two ladder rungs or porch railings and hang the rod through its own bracket holes with wire bent into hooks. The finials screw off most rods, and they get their own hooks so the spray hits the ornamental face dead-on rather than pooling where they meet the rod.
The mounting brackets are the part easy to overlook. Paint them installed on the wall and you risk overspray on the drywall; paint them loose and the screw holes get coated, which changes how the hardware seats. My move is to drive the screws into a scrap of cardboard, brackets attached, and spray that assembly the same way I spray the rod. Brackets painted separately go back up with the original holes already cleared.
A paint-and-primer-in-one formula saves a step on metal, though on cheap electrical conduit the industrial seams can telegraph through if the first coat goes too thin. Two light passes beat one heavy one, especially on finials with carved detail where drips love to form.
8. Picture Frames
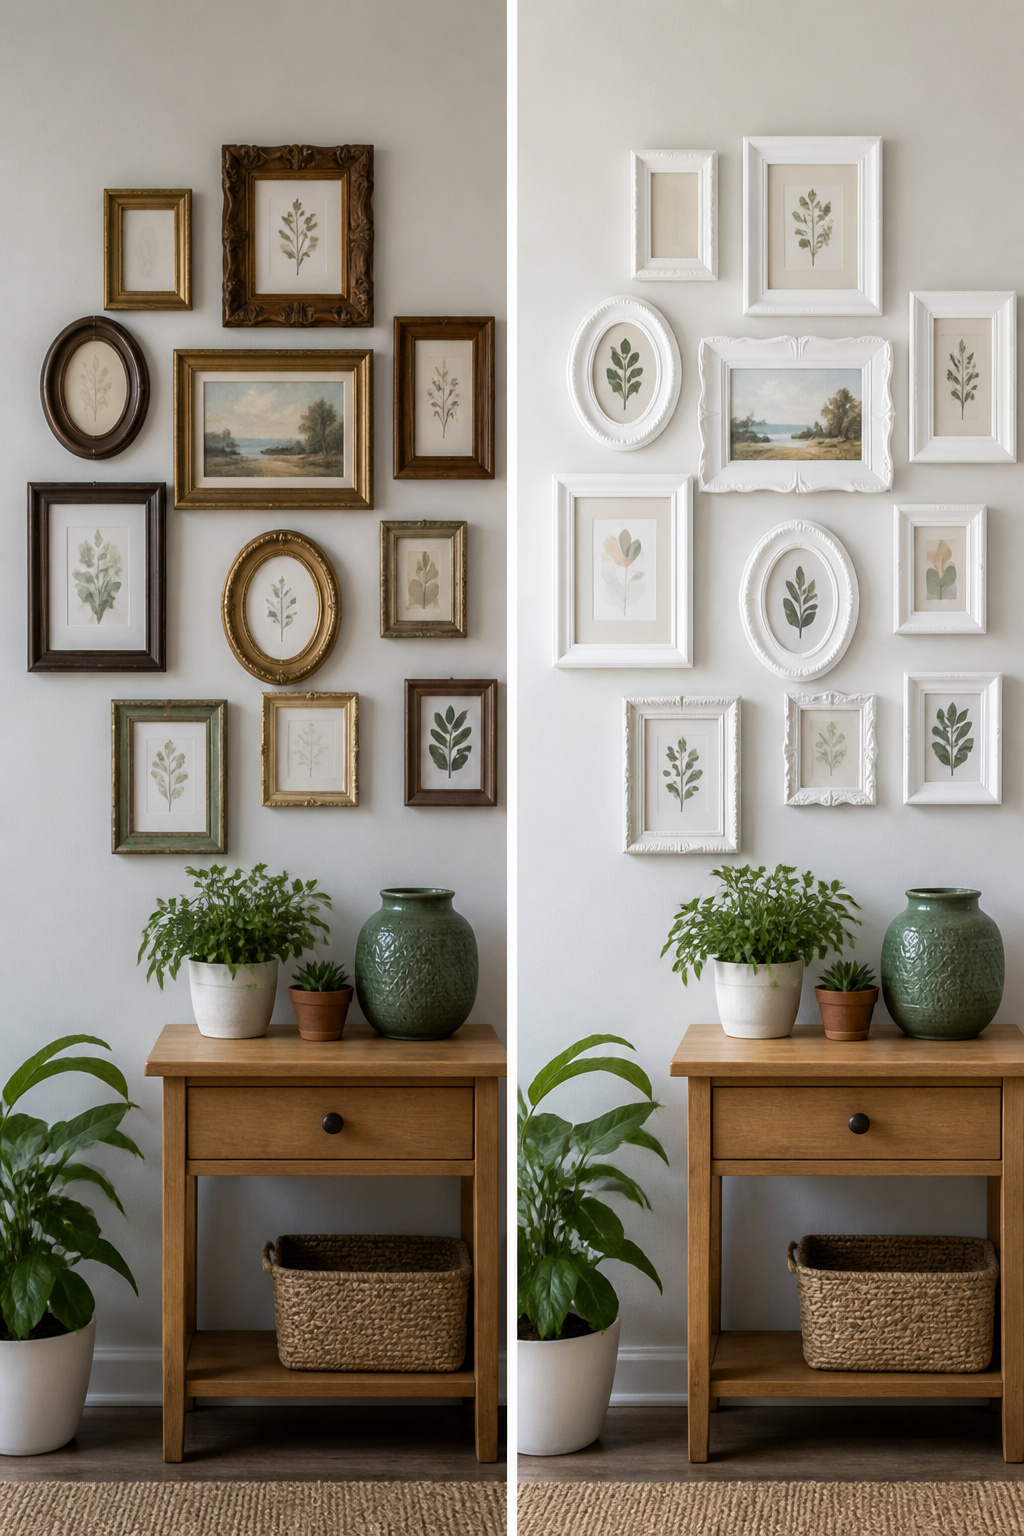
Picture frames are the fastest payoff in any batch of diy spray paint projects. A mismatched pile of thrifted wood or dated metal turns into a clean gallery wall in under an afternoon, and the paint does the unifying work that matching frames from a store would charge forty or fifty dollars to achieve.
The first decision is whether to pull the glass or tape around it. Removing the glass wins every time if the frame has a removable backing; one slip with a razor against taped edges scratches what you were trying to save. Ornate molding is where spray paint earns its keep over a brush. The overspray settles into crevices a bristle would streak, though you pay for that ease with masking. Painter’s tape pressed into scrollwork with a wooden skewer or the edge of a credit card blocks the spots your finger cannot reach.
A few light coats beat one wet one. The first pass looks disappointing, almost dusty. The second or third brings the color home. By the third coat the frame feels like something bought as a set, not gathered from yard sales and basement bins over five years.
9. Wooden Chairs
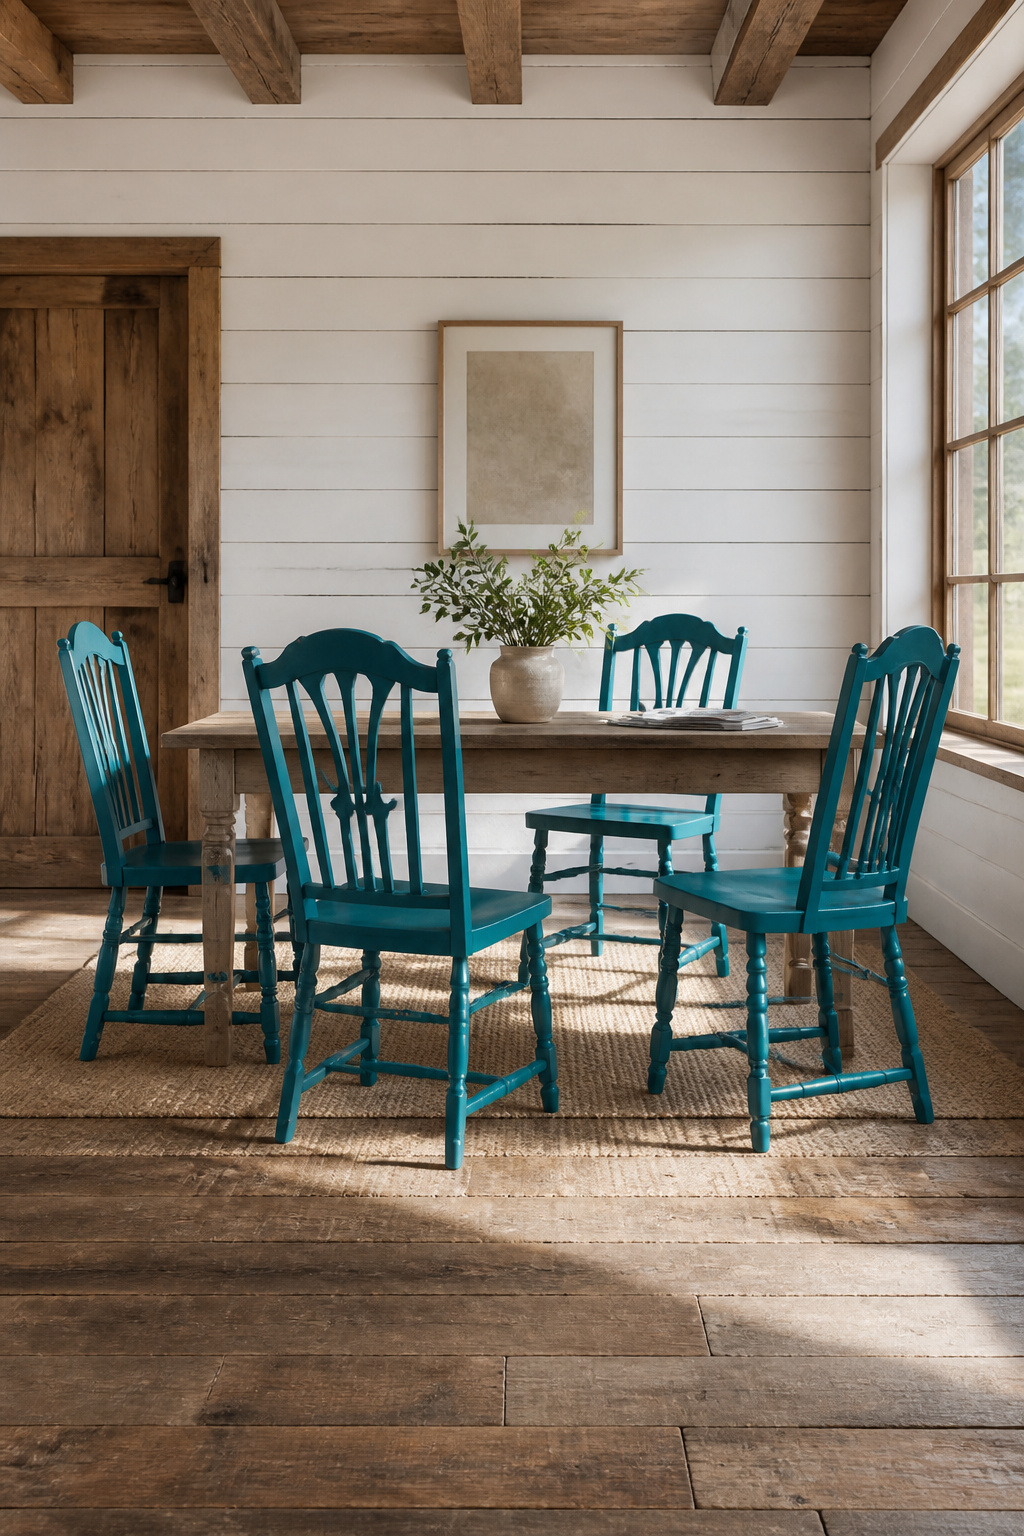
Wooden chairs are the one piece of wooden furniture where spray paint actually wins over a brush. Table tops go streaky and flat surfaces flash under light, but all those legs, slats, and twists make a chair the perfect candidate for a can.
A single chair burns through about 1.5 cans if you are doing full coverage on something with turned spindles or a ladder back. That adds up fast on a set of four, so buy more than the math suggests and keep the receipts. Sanding between coats still matters; the paint will feel smooth and grab the next layer instead of beading up on dust.
The dining set I keep coming back to in my reading was spray-painted a full decade ago, and the owner still has it in use. The chairs held; only the tabletop needed stripping later. That ten-year reference is for a set that was prepped and sealed properly, not rushed through on a humid afternoon. Skip the sealer and you will know within a season.
10. Wicker Furniture
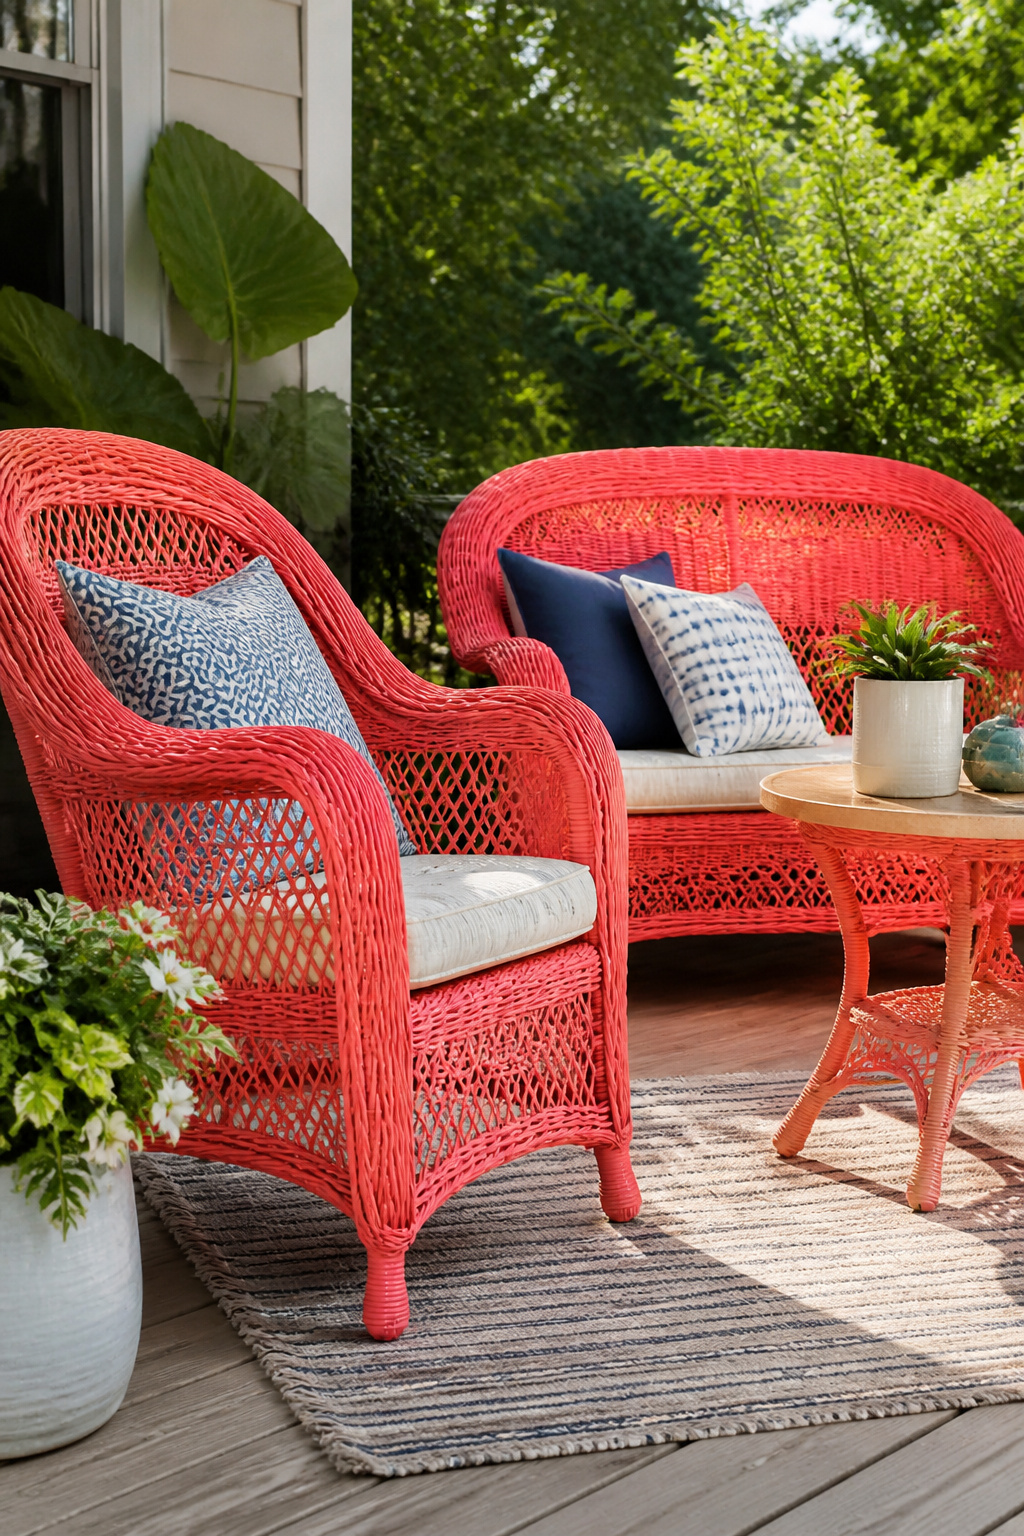
Spray paint turns old wicker and rattan into the kind of project you actually finish before dinner. The weave leaves thousands of crevices that a brush would miss entirely, and aerosol reaches them in a way nothing else does.
The mistake most people make is treating it like a wall. One heavy coat pools in the low spots, runs down the legs, and leaves you with a sticky, uneven finish that takes days to sort out. What works is the opposite: three or four light coats, each one barely there, with ten or fifteen minutes between them. Hold the can eight to ten inches back, keep moving, and let the previous layer go tacky before you circle back. The paint sinks into the gaps instead of flooding them, and you end up with a surface that looks factory-done rather than rescued from the curb.
I learned this the hard way on a porch rocker that sat in my garage half of last summer. The first attempt took one thick pass and looked like melted candle wax. Stripping it back to the weave took longer than the whole job should have. Second try, patient and thin, the thing was dry enough to bring inside by evening.
11. Outdoor Cushions
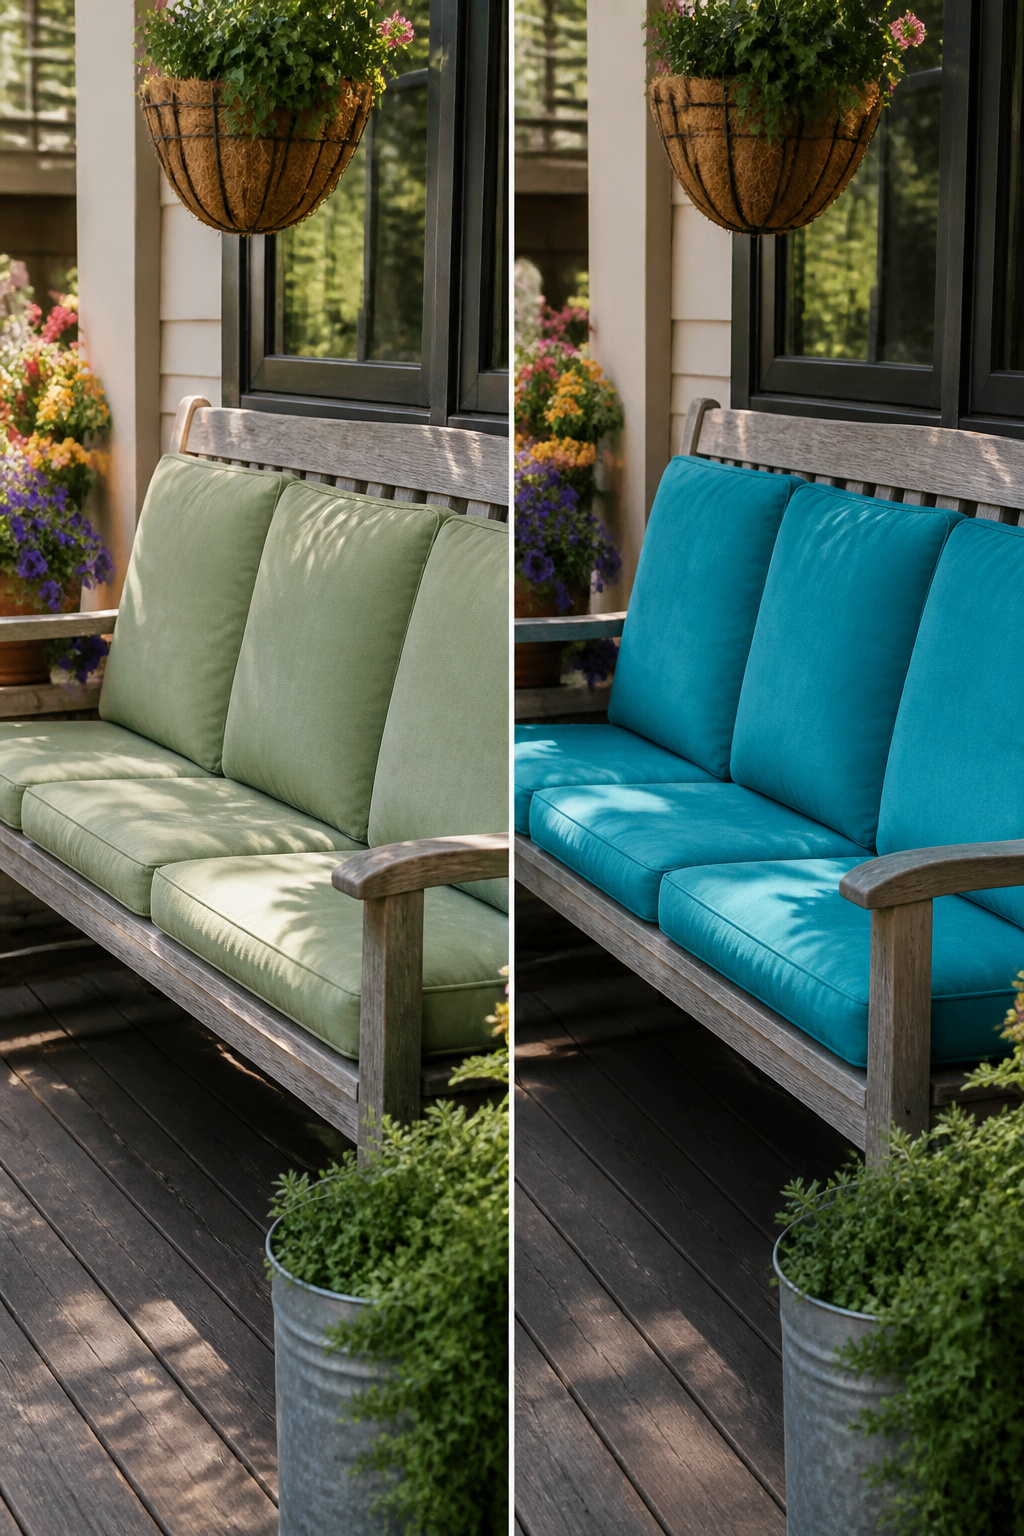
Outdoor cushions sit in the sun until the color goes flat, and buying new ones every two seasons gets old fast. Fabric spray paint exists for exactly this, though the trick is accepting that the hand will change. The material won’t turn crunchy if you work in thin layers, letting each one cure before the next. One tester noted the paint adhered well and left the pillow wearable, not stiff, which only happens when you resist the urge to saturate it in one pass.
The texture shifts from soft upholstery to something closer to canvas, a trade you feel every time you sit down. For me, reading through accounts of this, that change is the real decision point: refreshed color against a surface you notice. If the cushions live on a porch you barely use, the swap probably pays off. If they’re your daily reading spot, the new hand might nag at you more than faded teal ever did.
12. Knobs and Hooks

A full set of cabinet knobs runs about $30 or more even on sale, while a single can of spray paint covers the whole batch for $5.99 before coupon. That math is what keeps me spray-painting hardware instead of replacing it.
The trick is setting up so nothing touches anything while it dries. I take a shallow cardboard box, punch holes through the bottom, and thread the knob screws through from underneath so the knobs stand clear of the surface. Drawer pulls balance on their screws the same way. For wall hooks, a scrap of pegboard or even a strip of cardboard with slits cut in it keeps them upright and separated.
A clear spray sealer is worth the extra step on hardware because hands touch these pieces daily. Two light coats of color, one of sealer, and the finish holds up to actual use.
I have painted original silver knobs bronzy brown to match a rustic white dresser, and sprayed inexpensive rose-shaped pulls pink for a kid’s room when the silver outline clashed. Command hooks work the same way: they come in white, clear, silver, and black, but a custom color takes ten minutes and costs nothing extra.
13. Thrift Store Items
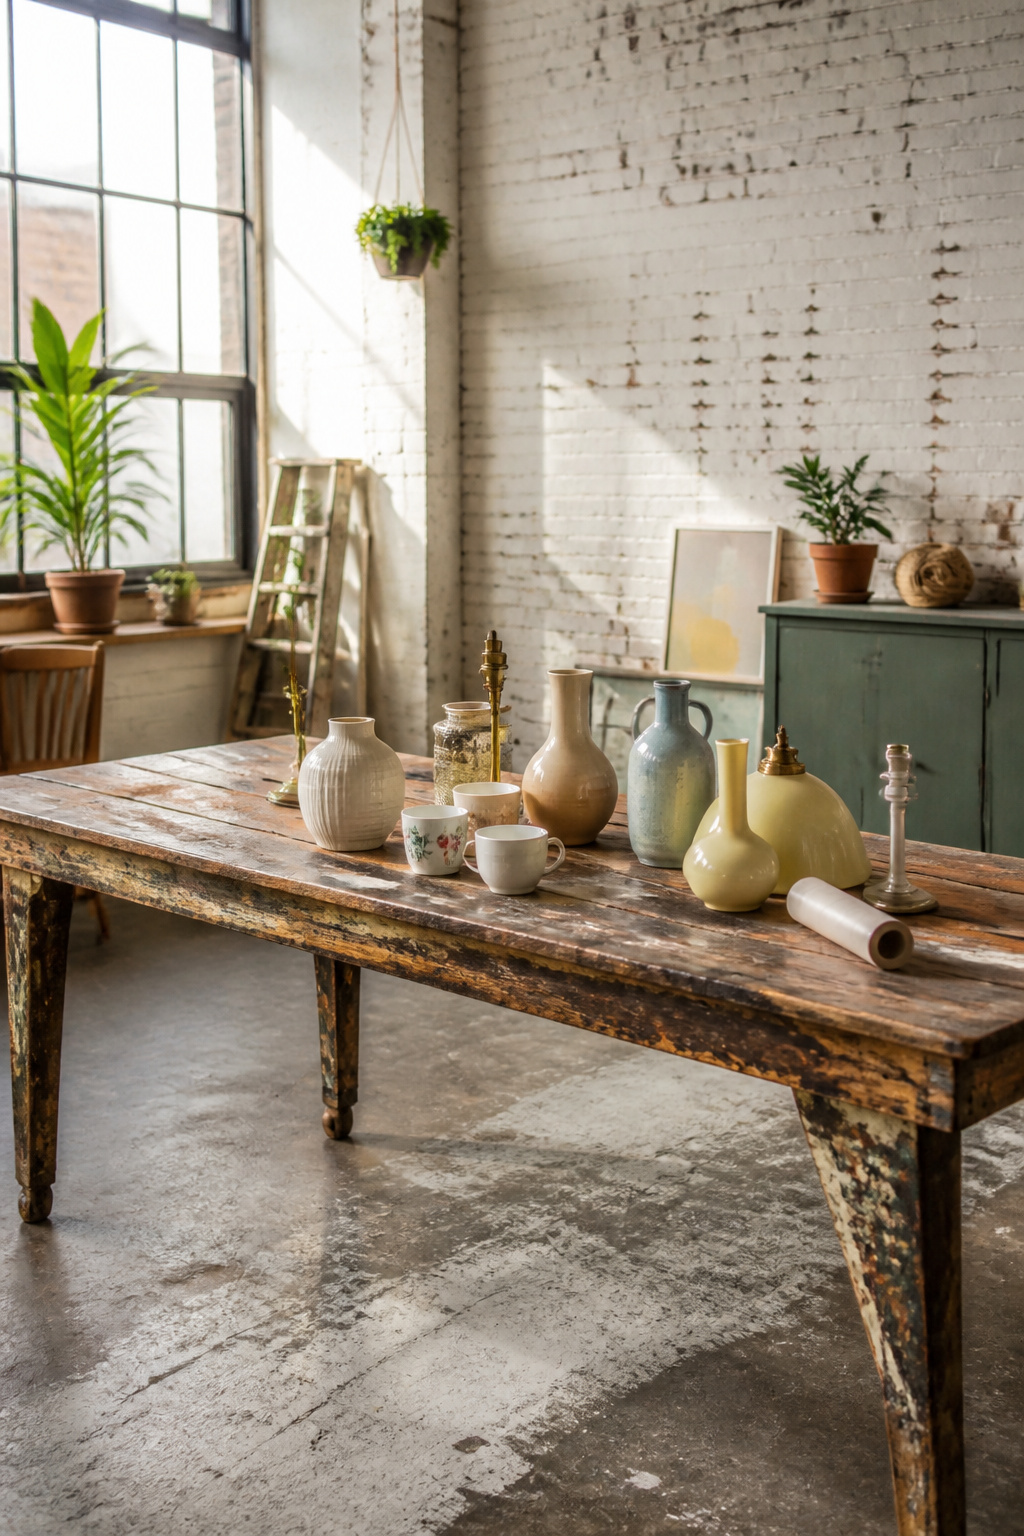
The best thrift store finds for spray paint have three things going for them: a shape you like, a surface that can take paint, and a price that leaves room for the $5.99 can plus primer. Ceramic pieces clean up well with soap and water, and spray paint grips their glazed surfaces once you scuff them lightly. Metal lamps are even easier, curves and all, because paint sticks to metal and plastic without much fight. Mismatched mugs or teacups become a set when you hit them all with one bold color, though anything with cracks or chips will still show through. I skip anything with oily residue or soft plastic, since that means sanding down to something solid or walking away. New decor with half the personality costs three times as much, and these projects finish in an afternoon if you let the primer do its work between coats.
14. Wreaths
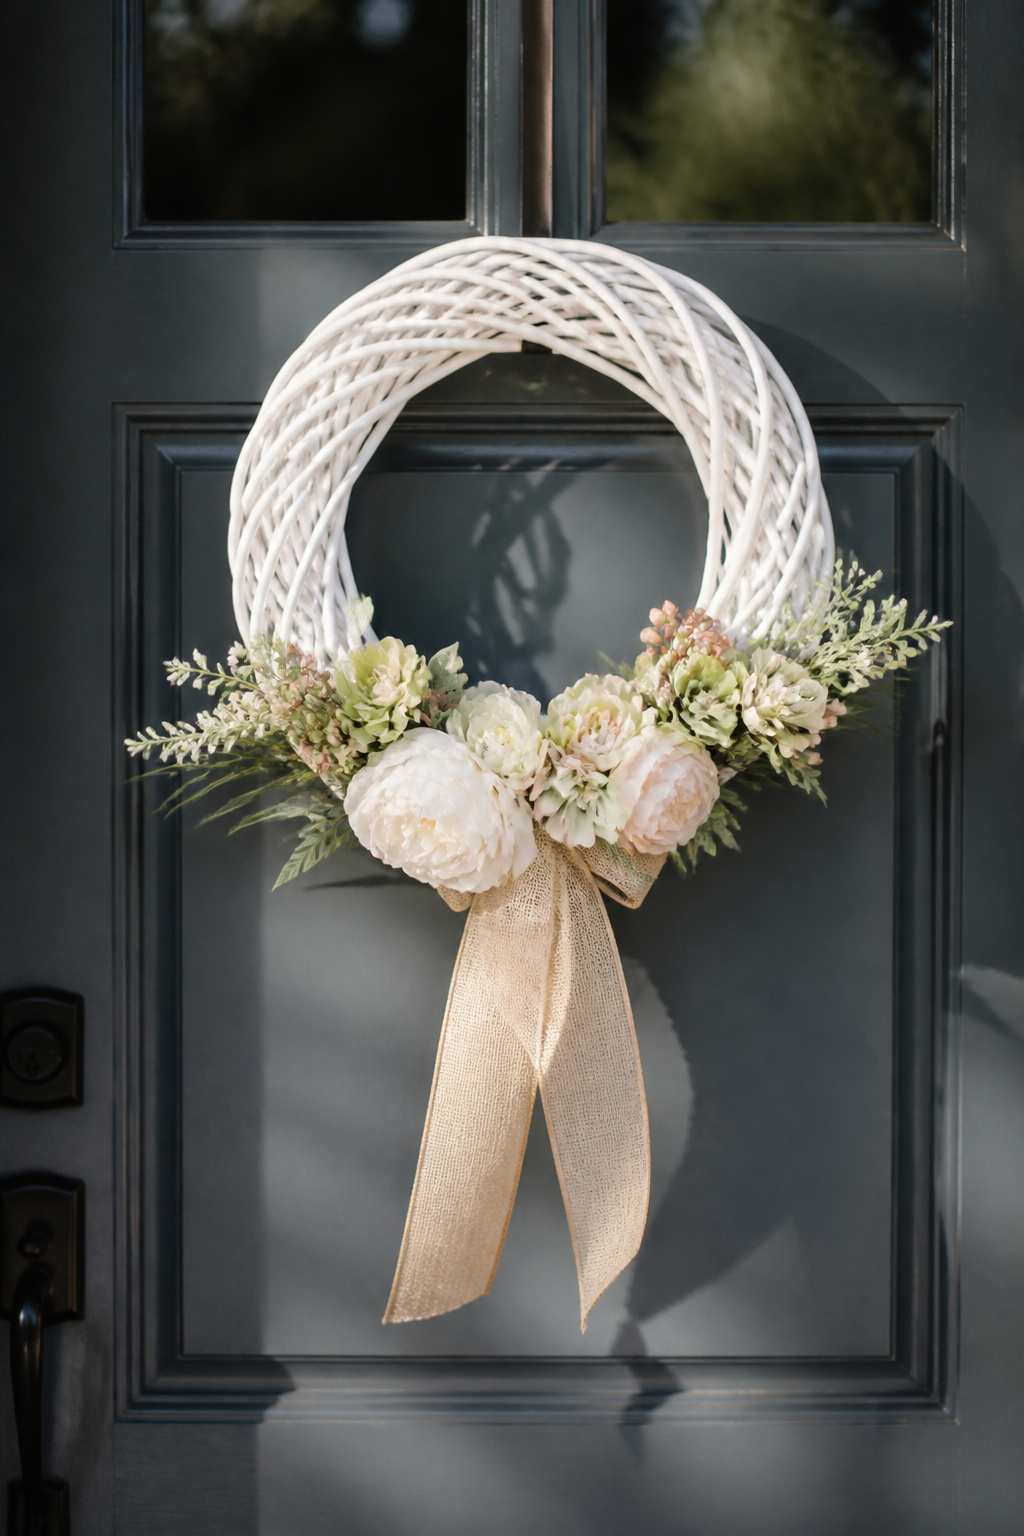
Grapevine wreaths usually stay natural, but a coat of white spray paint turns the base into something that reads coastal or patriotic depending on what you layer on top. The paint seals the fuzzy edges, which actually helps hot glue grab silk flowers and ribbon without the wiry stems slipping through.
Metal wreath forms are trickier. Spray paint sticks fine, but the smooth surface means every attachment point wants to slide. A separate spray primer first gives the paint something to bite into, and that rougher surface becomes useful later when you wire on heavier elements like dried oranges or pinecones.
Plastic forms are the ones that change the most. The slick factory finish disappears under paint, and suddenly you can use materials that would never stay put on bare plastic. Spray paint covers the curves fast, though large flat spots on those forms can flash under light if you overload them.
A painted base limits you to cooler palettes if you want it to read intentional. White grapevine looks deliberate; red grapevine looks like a mistake unless you commit all the way through the decorations. The paint is the decision point, not the afterthought.
15. Coasters
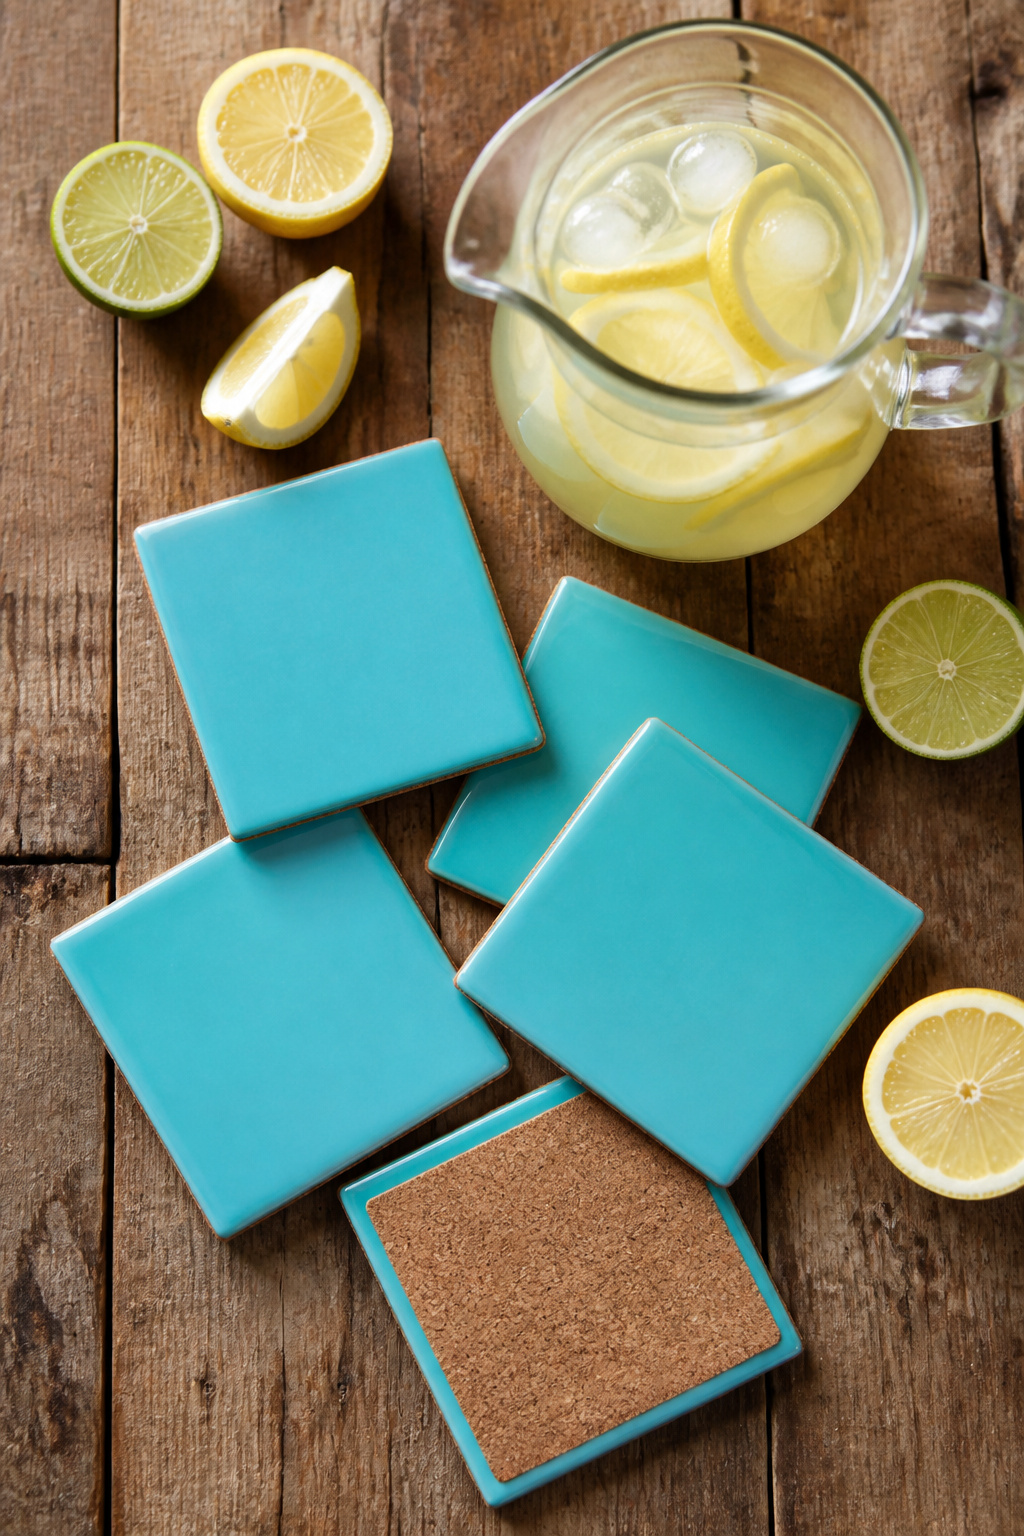
Tile coasters take spray paint better than you would expect from something meant for a bathroom floor. The glaze gives you a slick surface that behaves almost like plastic, so colors stay bright and edges stay crisp. Cork backs keep them from scratching the table, and a couple of light passes with the can beats trying to brush paint into all those little pores.
Wood slices work too, though the grain will drink in the first coat and leave you with a patchy look until the second or third. Sanding between coats helps, but do not skip the sealant or a cold glass will weld itself to the surface by morning. A water-based polyurethane in satin finish gives you the protection without the plastic shine that looks cheap on raw wood.
For tile and cork both, the same rule applies: spray thin, let it cure, and resist the urge to stack them until they have had a full day to off-gas. Nothing ruins the paint job like sticking them together too soon and peeling half of it back off.
16. DIY Jewelry Organizing Frame
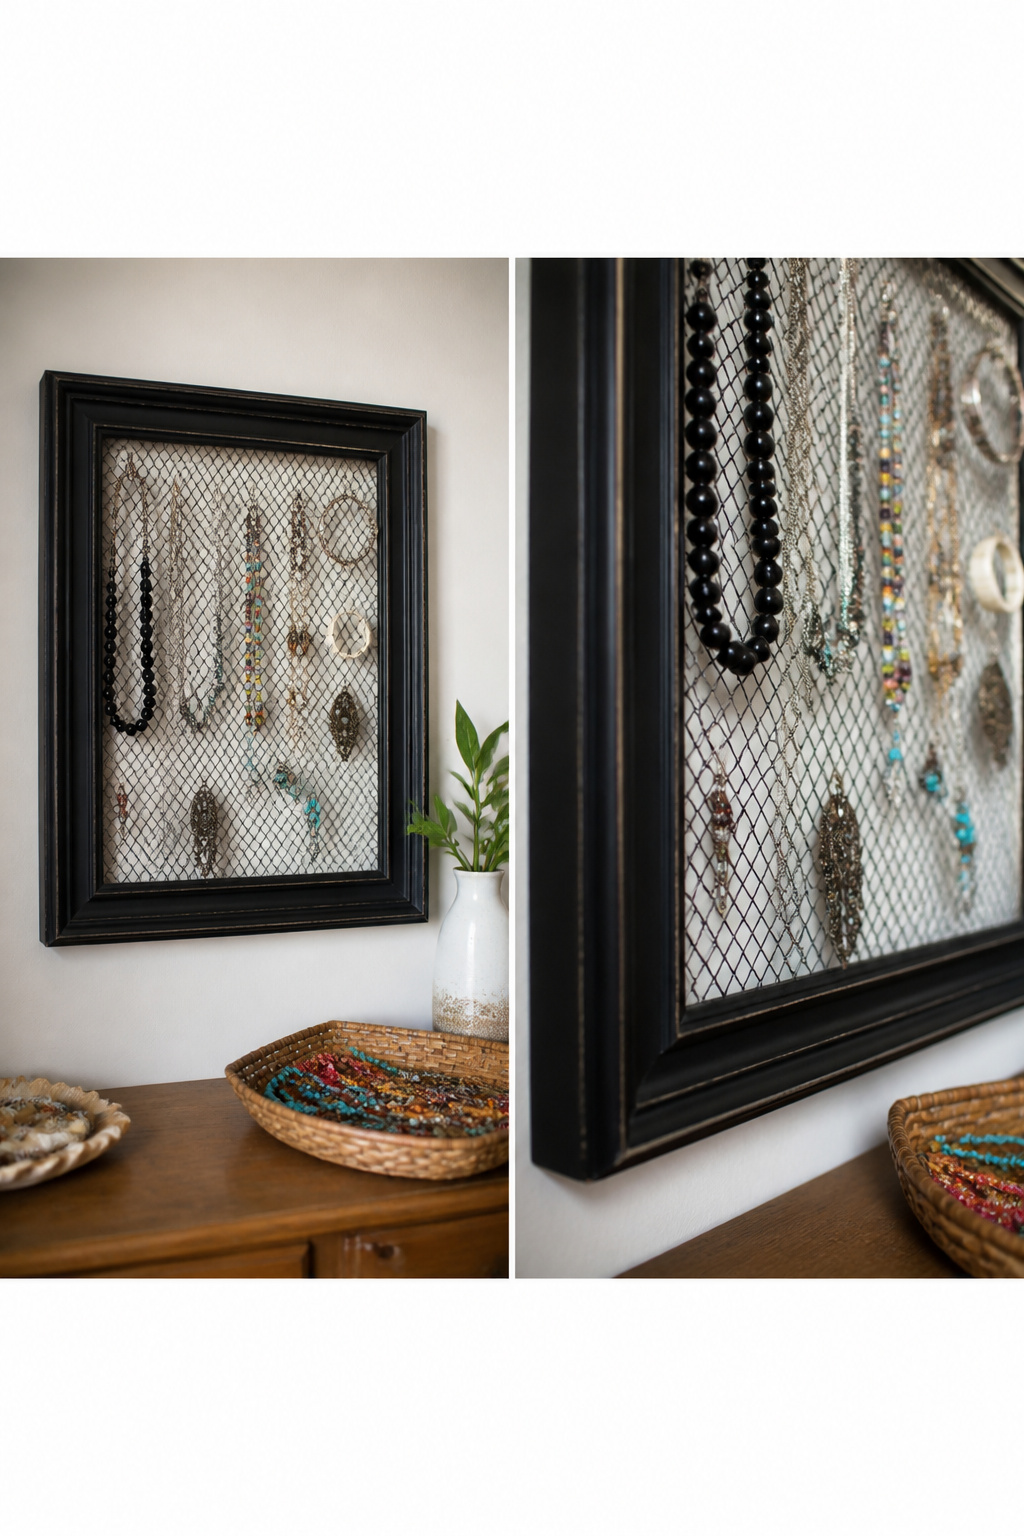
A thrifted picture frame with warped corners and stained backing makes the best starting point because you are not trying to save it. Pop out the glass and cardboard, smooth the inner lip with medium-grit paper, and wipe the dust off the mesh or chicken wire before anything else. Paint grips clean metal; paint on fingerprint oil flakes off in six months.
Spray the frame first, let it cure overnight, then staple the mesh across the back. Reversing that order gums the openings shut. I learned this the hard way on a window screen project years ago; the overspray shrinks the usable holes from half-inch to pinprick. One thin coat on the wire after attachment is plenty, just to knock down the factory zinc glare. Earring hooks catch better on matte black or oil-rubbed bronze anyway.
Staple every three inches around the perimeter and fold the corners like wrapping a gift. Sharp wire ends poke through fabric if you trim them flush; bend them flat against the frame back with pliers. A ribbon bow at the top hides the hanger and weighs nothing.
17. Aged Zinc Pumpkins
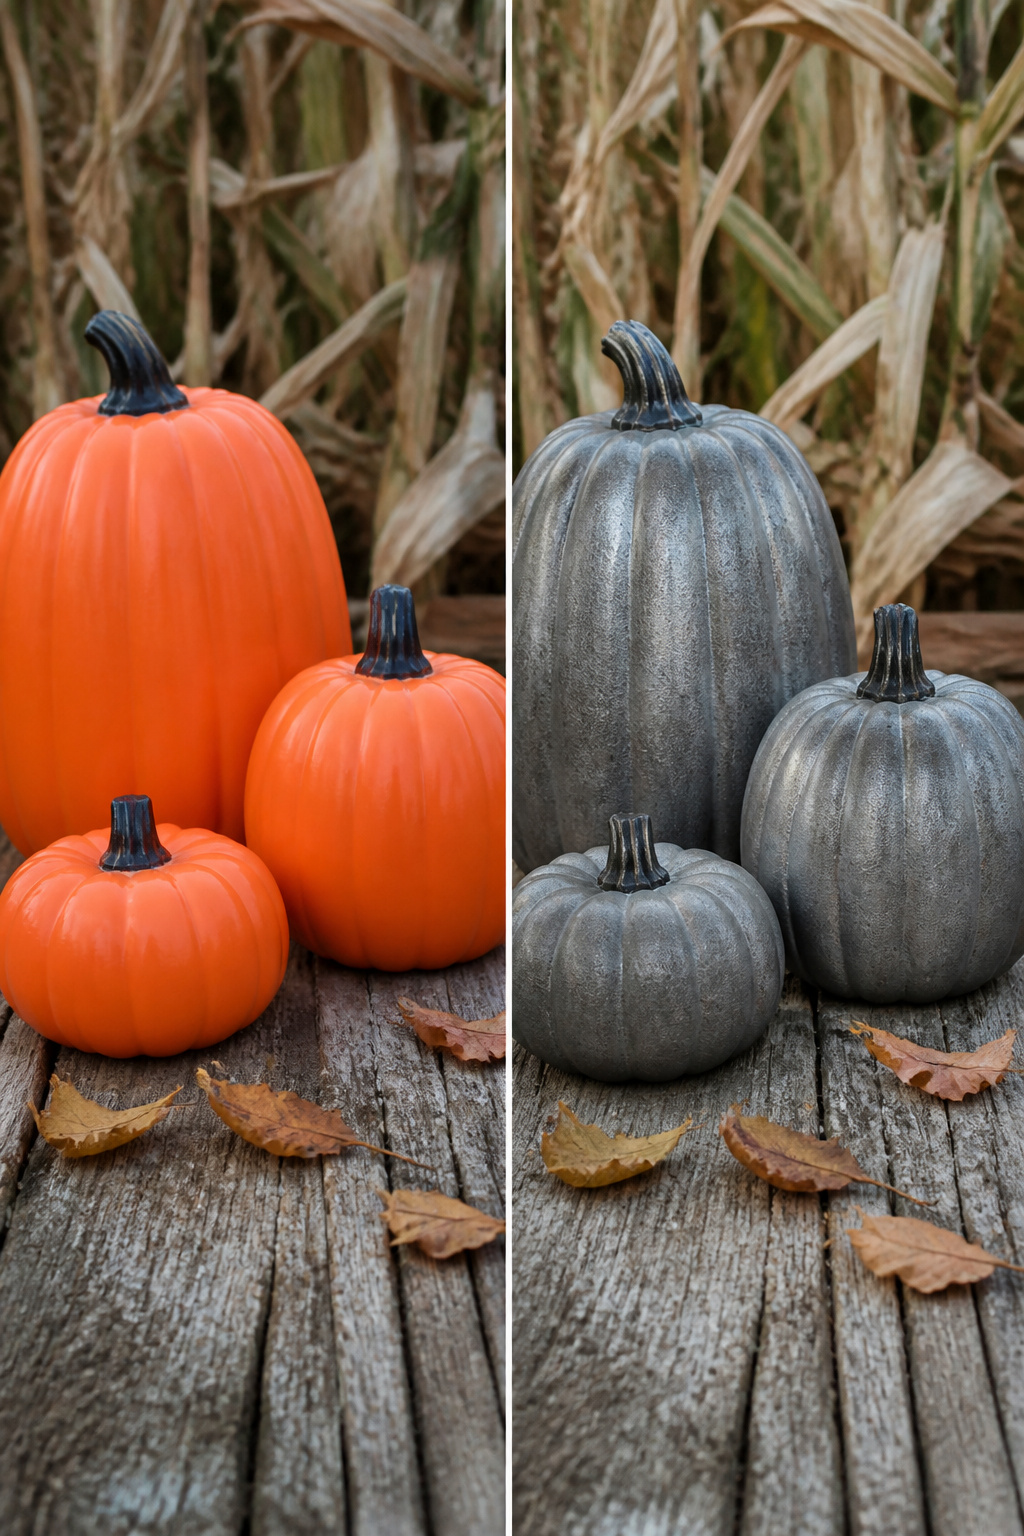
Plastic pumpkins take spray paint well, but the finish looks flat until you add the acrylic wash over the metallic base. I learned that the hard way my first year, ending up with orange spheres that just read as gray.
Start with a thin coat of silver or light gray spray primer on your foam or plastic form. Let it cure completely, then mist on a darker metallic, something in the gunmetal family, holding the can farther back than feels right so the color breaks up instead of blanketing. The real age comes next: water down dark brown or black acrylic paint until it runs like ink, brush it on, and wipe most of it away with a rag. What lingers in the creases reads as years of oxidation rather than craft-store newness.
Skip the wash step and you have painted pumpkins. Add it, and the same dollar-store forms pass for aged zinc at ten feet.
18. DIY Desk Accessories

Mismatched desk supplies start looking intentional when they share one color. Tin cans, mason jars, wooden boxes, and metal trays all take spray paint differently, so primer is non-negotiable if you want them to read as a set. Metal needs sanding or a self-etching primer. Wood soaks up the first coat and turns patchy without a base. Glass jars will chip the second you drop a paperclip in them unless you rough the surface with fine grit first.
I learned the hard way that "the same can of paint" does not mean "the same finish." A glossy coat on smooth metal next to matte on porous wood looks like two different colors even when the label matches. One sheen across every piece, or the mismatch becomes the point you’re trying to fix.
The cheap route is already on your desk. A soup can becomes a pencil cup. A jelly jar holds rubber bands. The wooden box that held your last online order sorts cables. The whole set costs the price of one can of paint and an afternoon of drying time, which beats the thirty-dollar "coordinated" desk sets that still look like dorm furniture.
19. Indoor Herb Garden

Terracotta’s porous surface lets roots breathe, which is why herbs stay alive in cheap clay pots longer than they do in glossy ceramics. Spray paint seals those pores, so the soil stays wetter and the roots sit closer to rot. If you want matching color on terracotta, a food-safe liner between paint and soil is non-negotiable; a second, unpainted pot nested inside works, or a glass jar slipped in for smaller herbs.
Drainage holes drilled through the painted outer shell still need to line up with whatever holds the actual dirt. Without that alignment, you are watering a decorative cachepot while the real container drowns or dries out unseen. Plastic nursery pots fit almost too well inside standard terracotta dimensions, but the gap traps condensation and breeds fungus gnats. A few pebbles at the bottom buys air space.
The paint itself only needs to hit the outside. Mist drifts through those same breathing pores, so masking the rim and inner walls matters more than the coat on a sealed metal can. Two light passes beat one heavy one; drips pool at the base and glue the pot to whatever surface it sits on. Ask how I know.
20. DIY Spray Paint Art
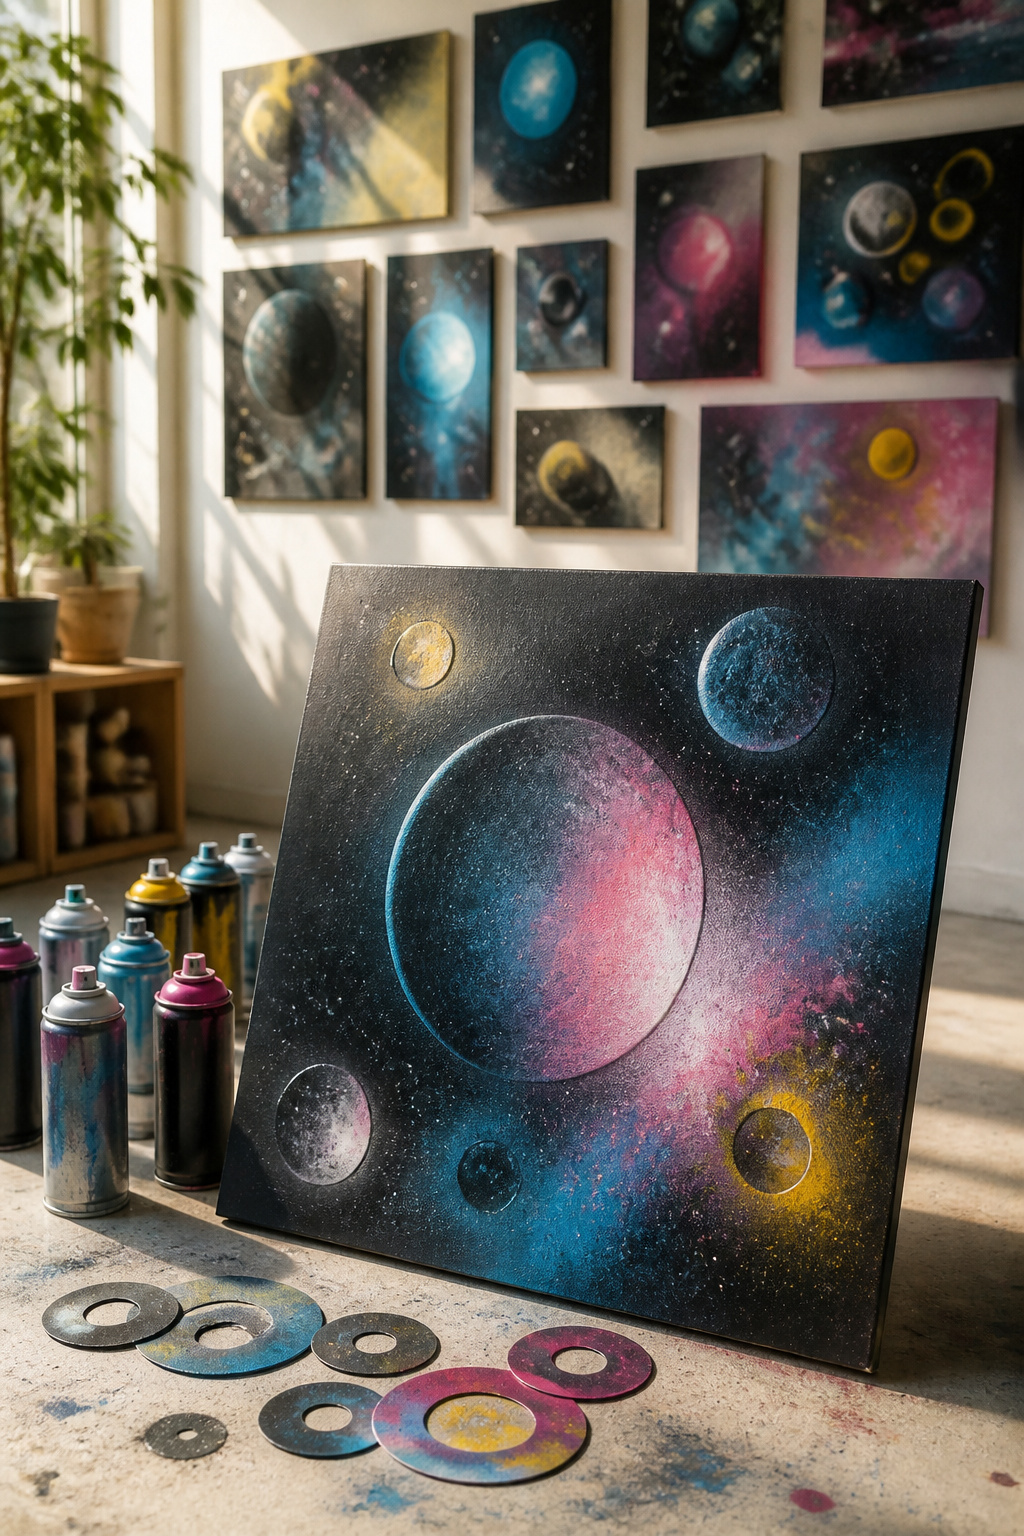
The glossy side of poster board is what makes spray paint planets work. Water-based paint beads on it just enough to let you lift a clean circle with a plastic lid or pot, leaving a soft halo behind. Rust-Oleum Painter’s Touch in black, white, yellow, pink, orange, and Metallic Blue are the colors that carried the first piece I studied: yellow and pink at the center, orange bleeding outward, then black and blue raked across with a folded magazine cover for texture. A respirator mask matters more than the brand of paint, because this is aerosol work in close quarters, and the fumes collect fast even near an open window.
Five minutes is honest for a first planet once the ventilation is sorted. The real holdup is finding round objects in the right sizes; yogurt lids and takeout containers stack better than they have any right to. Stencils come later, after the basic lift technique stops surprising you.
Krylon or Rust-Oleum
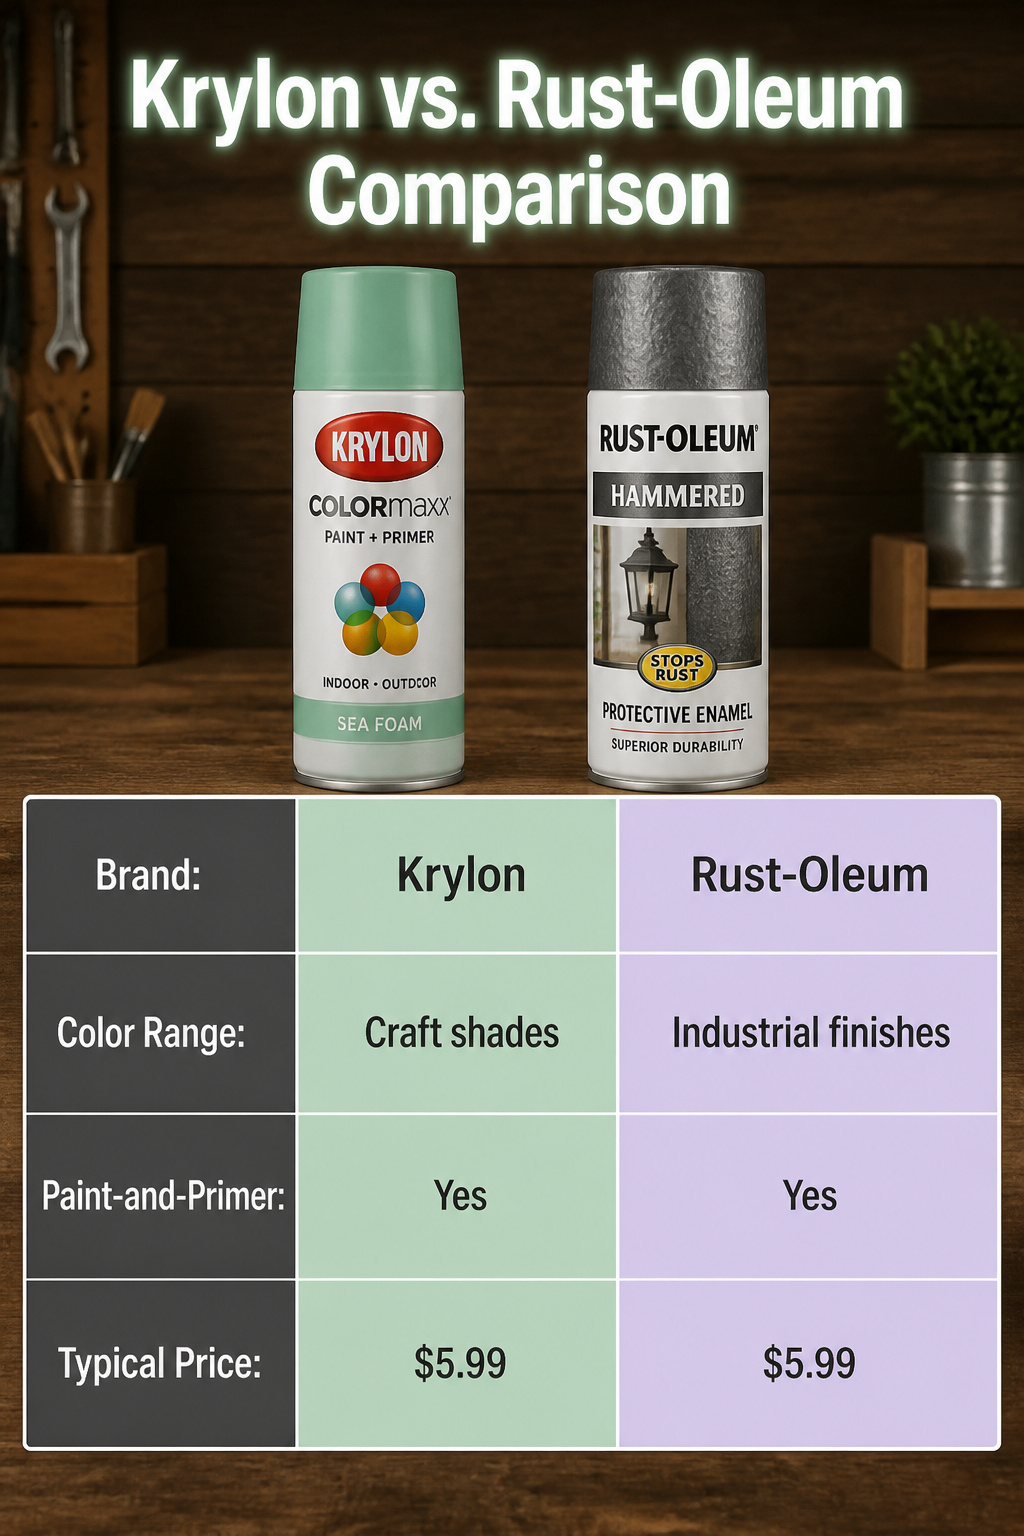
Krylon and Rust-Oleum have both spent decades on the same hardware-store shelf, and the difference between them is smaller than the marketing suggests. For a standard afternoon project, either one lays down a coat that sticks and covers.
The real decision is color. Rust-Oleum runs wider on industrial finishes and hammered metals; Krylon carries shades like sea foam that slip into craft territory where the other brand does not go. Neither mixes custom, so you buy what is already in the can.
Paint-and-primer formulas exist under both names and save a step on raw wood or metal. A can typically rings up around $5.99, which puts most specialty lines within a dollar or two of each other. Brand loyalty is not worth driving to a second store. Grab the one with the color and finish that matches what you actually planned to make.
Clean First, Prime Second
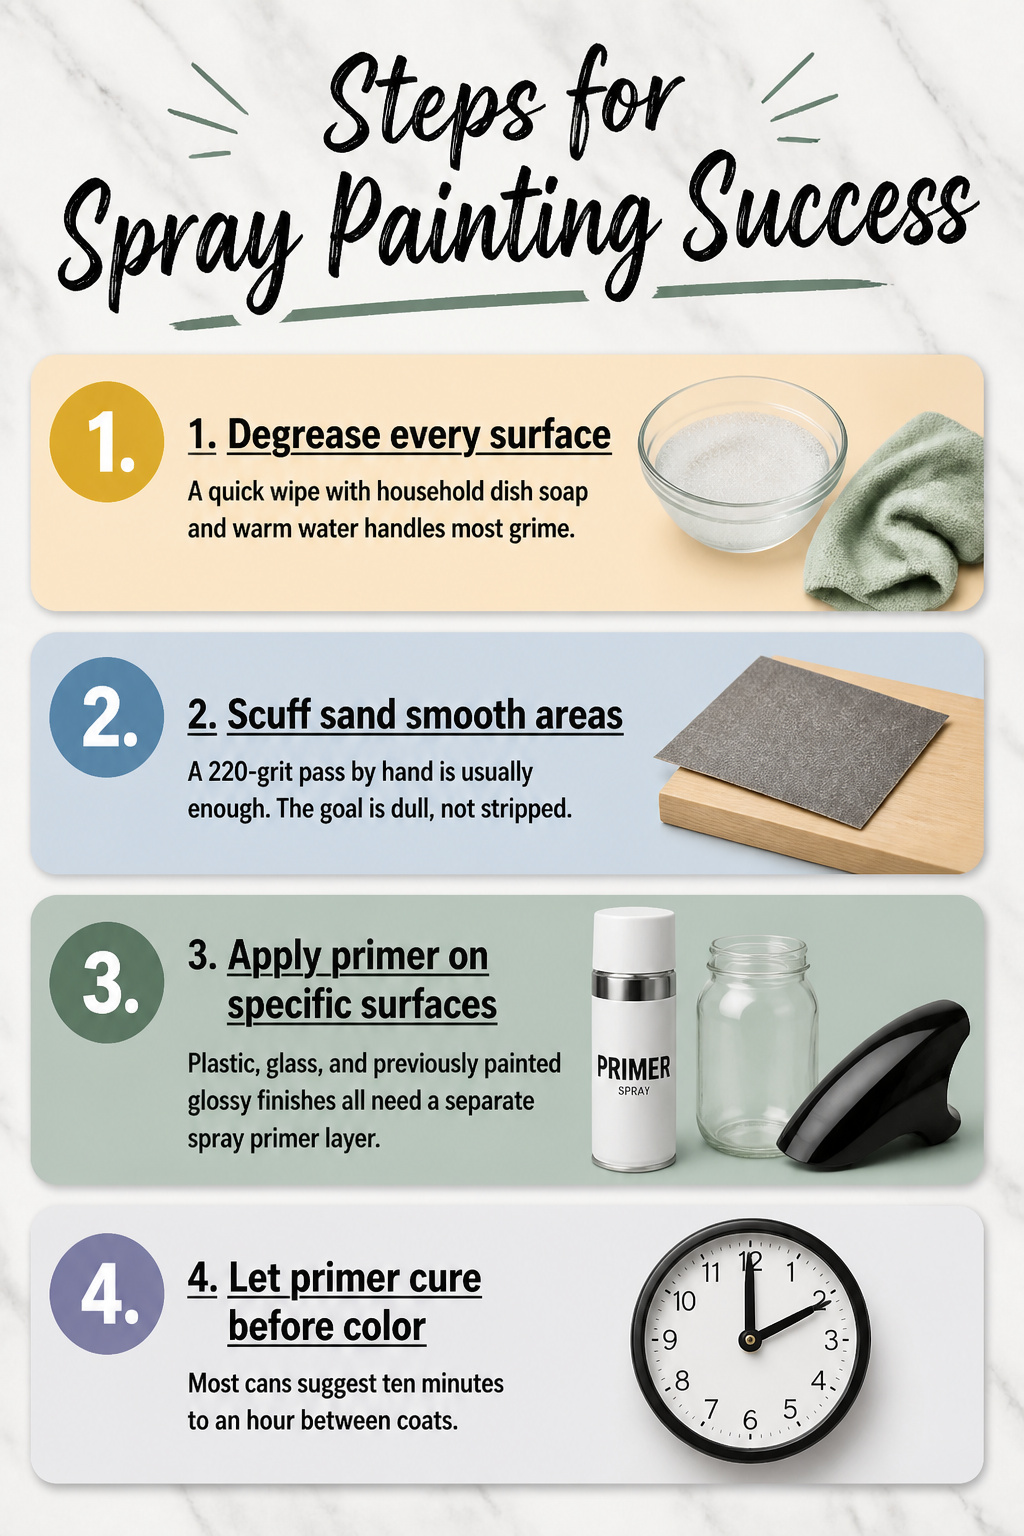
- Degrease every surface before anything else touches it. Spray paint bonds to oil, not through it. A quick wipe with household dish soap and warm water handles most grime. Skip this and the finish flakes off in sheets six months later.
- Scuff sand anything smooth enough to reflect light. Glossy old paint, factory-finished metal, sealed wood: the paint needs tooth. A 220-grit pass by hand is usually enough. The goal is dull, not stripped.
- Primer is non-negotiable on three surfaces. Plastic, glass, and previously painted glossy finishes all need a separate spray primer layer or the color sits on top like a skin waiting to peel. Metal and raw wood can sometimes skip it with decent scuffing, but these three never can.
- Let the primer cure to the touch before color goes on. Most cans suggest ten minutes to an hour between coats. Rushing this traps solvent underneath and the surface stays soft for days.
How Long Spray Paint Lasts
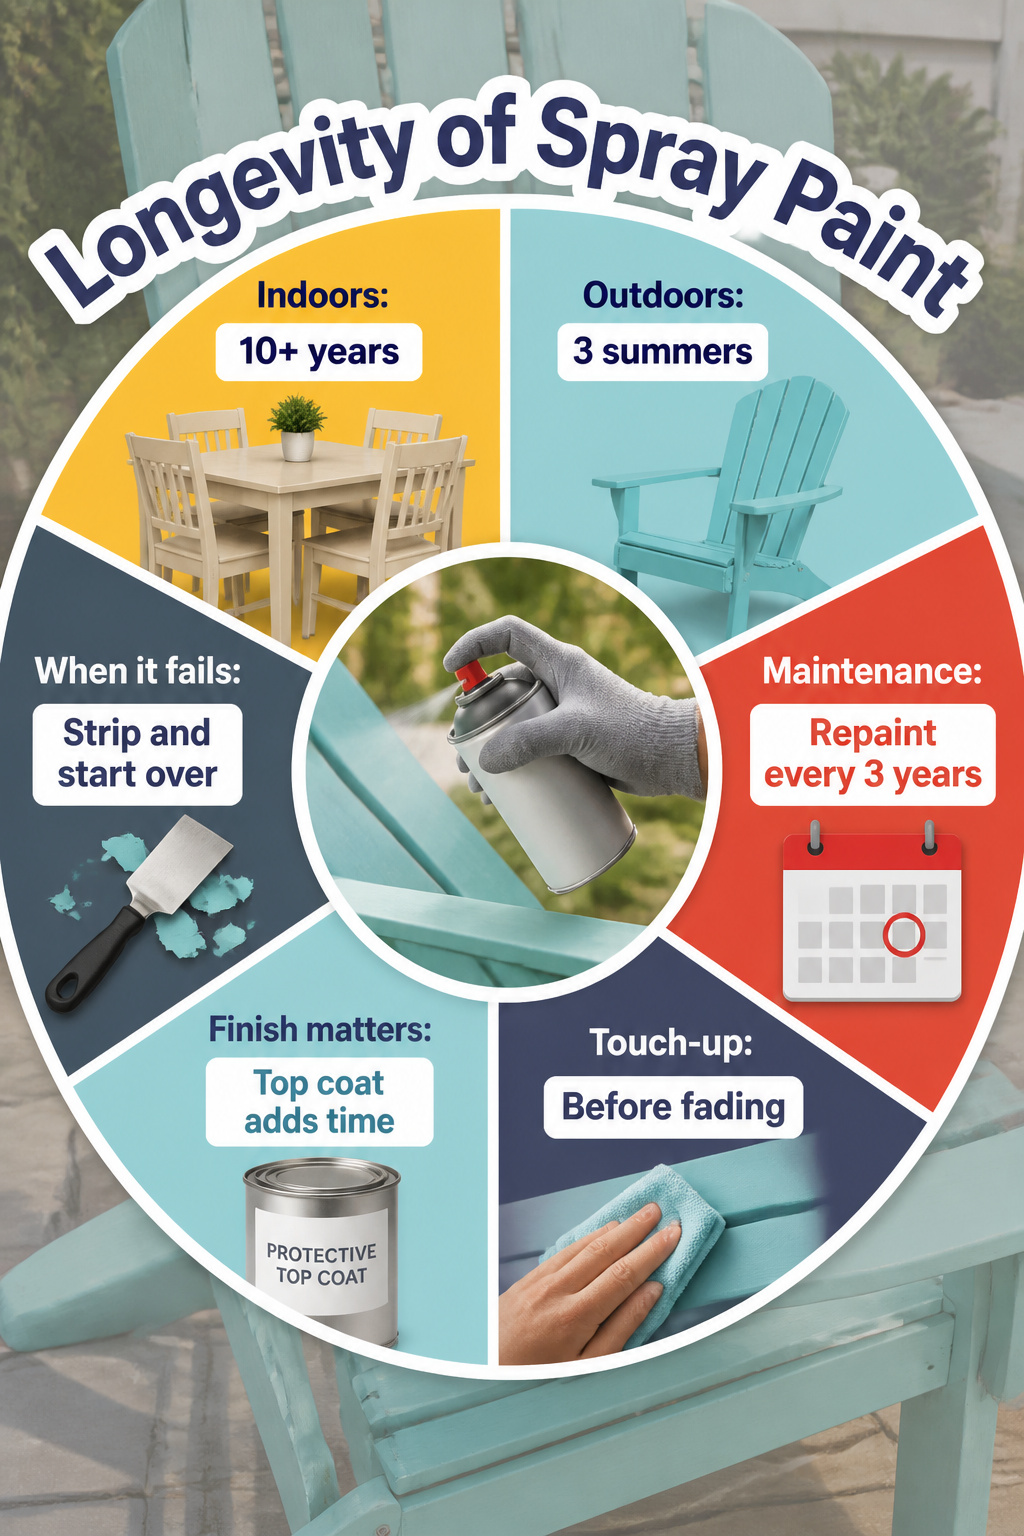
Spray paint holds up longer than most people expect, but the surface and the weather set the real timeline. An indoor dining set at At Home with the Barkers still looked good after ten years, with only the tabletop needing a strip and redo. That is about as solid a case as you will find for furniture that lives inside and does not take abuse.
Outdoor pieces are a different conversation. Those hard plastic Adirondack chairs from Notice the Little Things went three summers before fading turned into a real problem. They never chipped, just dulled, which tells you the paint film stayed intact but the sun got to the pigment. A protective top coat on the second round bought more time, and that is the maintenance rhythm to plan for: repaint outdoor furniture every three years, or touch up the moment you see fade before it becomes failure. Touch-up works when the surface is still sound. Once the finish starts flaking or the color is more memory than reality, you are stripping and starting over, same as that tabletop.
Frequently Asked Questions
What is the best kind of spray paint to use?
Rust-Oleum and Krylon are the two brands that come up most often for home projects, and either works well for general use. Paint-and-primer-in-one formulas save a step on metal, wood, and plastic, but high-heat projects like fireplace doors need paint specifically rated for temperature; the standard stuff will bubble within the first few fires. For fabric, like outdoor cushions, look for spray paint made for that surface so the material stays wearable instead of turning stiff.
How do you spray paint correctly?
Clean and scuff the surface first, then remove dust and oils with a degreaser that actually evaporates. Mask anything you do not want to hit, hold the can eight to ten inches back, and keep moving in smooth passes rather than lingering in one spot. Two light coats beat one heavy one almost everywhere; the second layer grips better and runs are far less likely.
How do you spray paint evenly?
Keep the can at a steady distance and move in sweeping motions rather than arcing your wrist. On large flat surfaces like tabletops, spray paint tends to flash, showing stripes where passes overlap, so chairs and frames with curves and details are the better match for a rattle can. Let each coat go tacky before the next; rushing is what causes drips on vertical pieces like chair legs and door frames.





