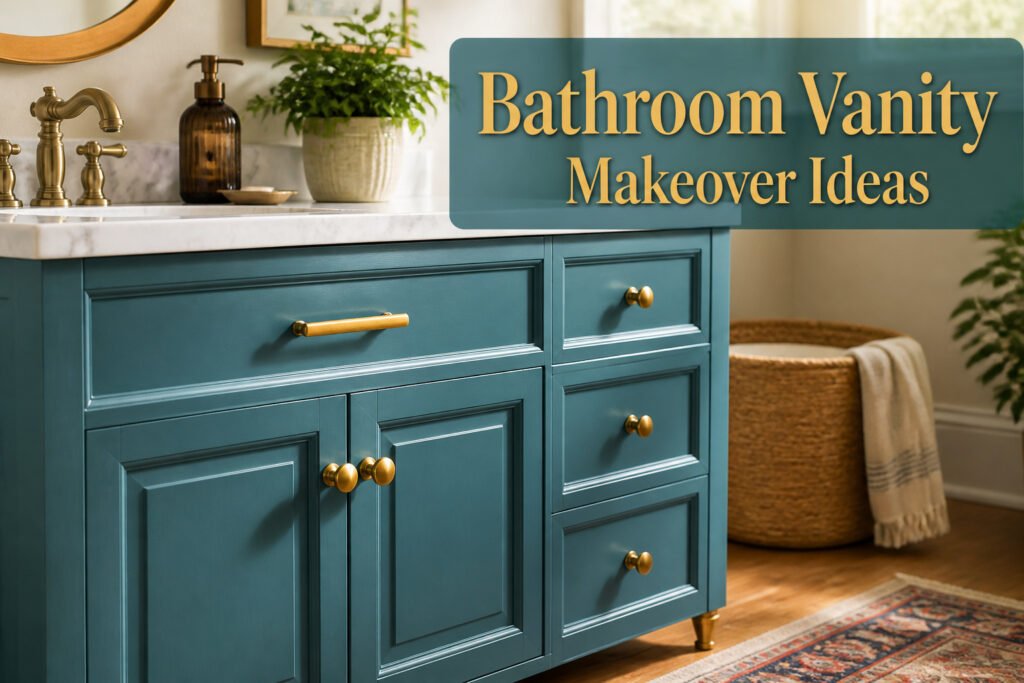
A bathroom vanity makeover in 2026 can run anywhere from under $10 to a few hundred dollars, and the single factor that decides which path is yours is how much of the existing structure you are willing to live with. Keep the cabinet box and the plumbing exactly where they are, and the whole project stays in spare-change territory; start moving walls or drains, and you have left makeover territory entirely.
The $70.54 refresh that opens this list, built from a $6 mistint of paint and a set of furniture feet, proves how far "good enough" can stretch when the prep work is treated as non-negotiable. That figure is not aspirational; it is what the receipt actually showed, and the vanity still reads as deliberate years later because the primer was bonded to a sanded, degreased surface rather than wishful thinking.
1. Paint the Vanity
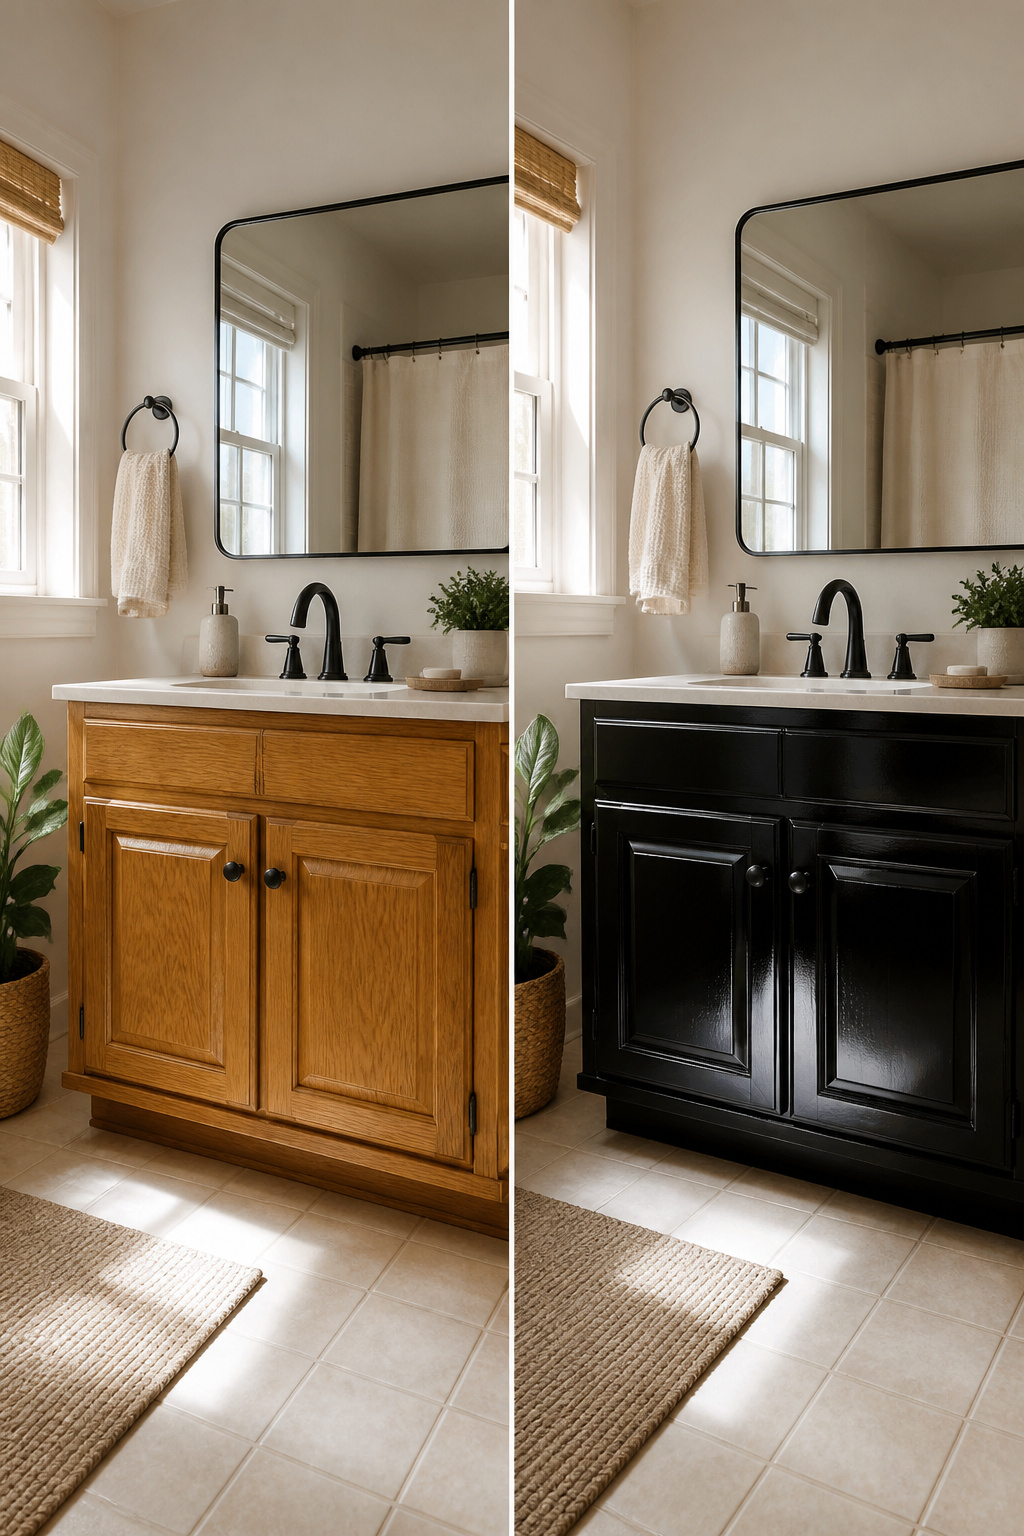
A fresh coat of paint changes more than the color; it changes whether the vanity still reads as builder-grade from 1998. Two coats of Behr Premium Plus Interior/Exterior Hi-Gloss Enamel in Pure Black took a dated stained cabinet to something that looked deliberate, not inherited. The high-gloss finish carries the mildew resistance a bathroom actually needs, and the enamel levels out to a surface that looks maintained rather than merely covered up.
Prep work is where the finish lives or dies. I clean with a degreaser first, sand with 150-grit to rough the surface without stripping it bare, then vacuum every trace of dust. Sherwin Williams Extreme Bond Primer goes on next. The can advertises that you can skip sanding on slick surfaces; I sand anyway, because this is a bathroom that sees real traffic and I would rather overbuild the foundation than watch the paint fail at the corners in year two.
The cost can stay reasonable. A mistint rack at Sherwin Williams turned up "At Ease Soldier" in satin for $6, and with hardware from Build.com at $45.54 and furniture feet at $18.97, the whole project closed out at $70.54. The $6 paint was the gamble, but bonding primer forgives a lot of sins, and the color held.
2. Replace Cabinet Doors
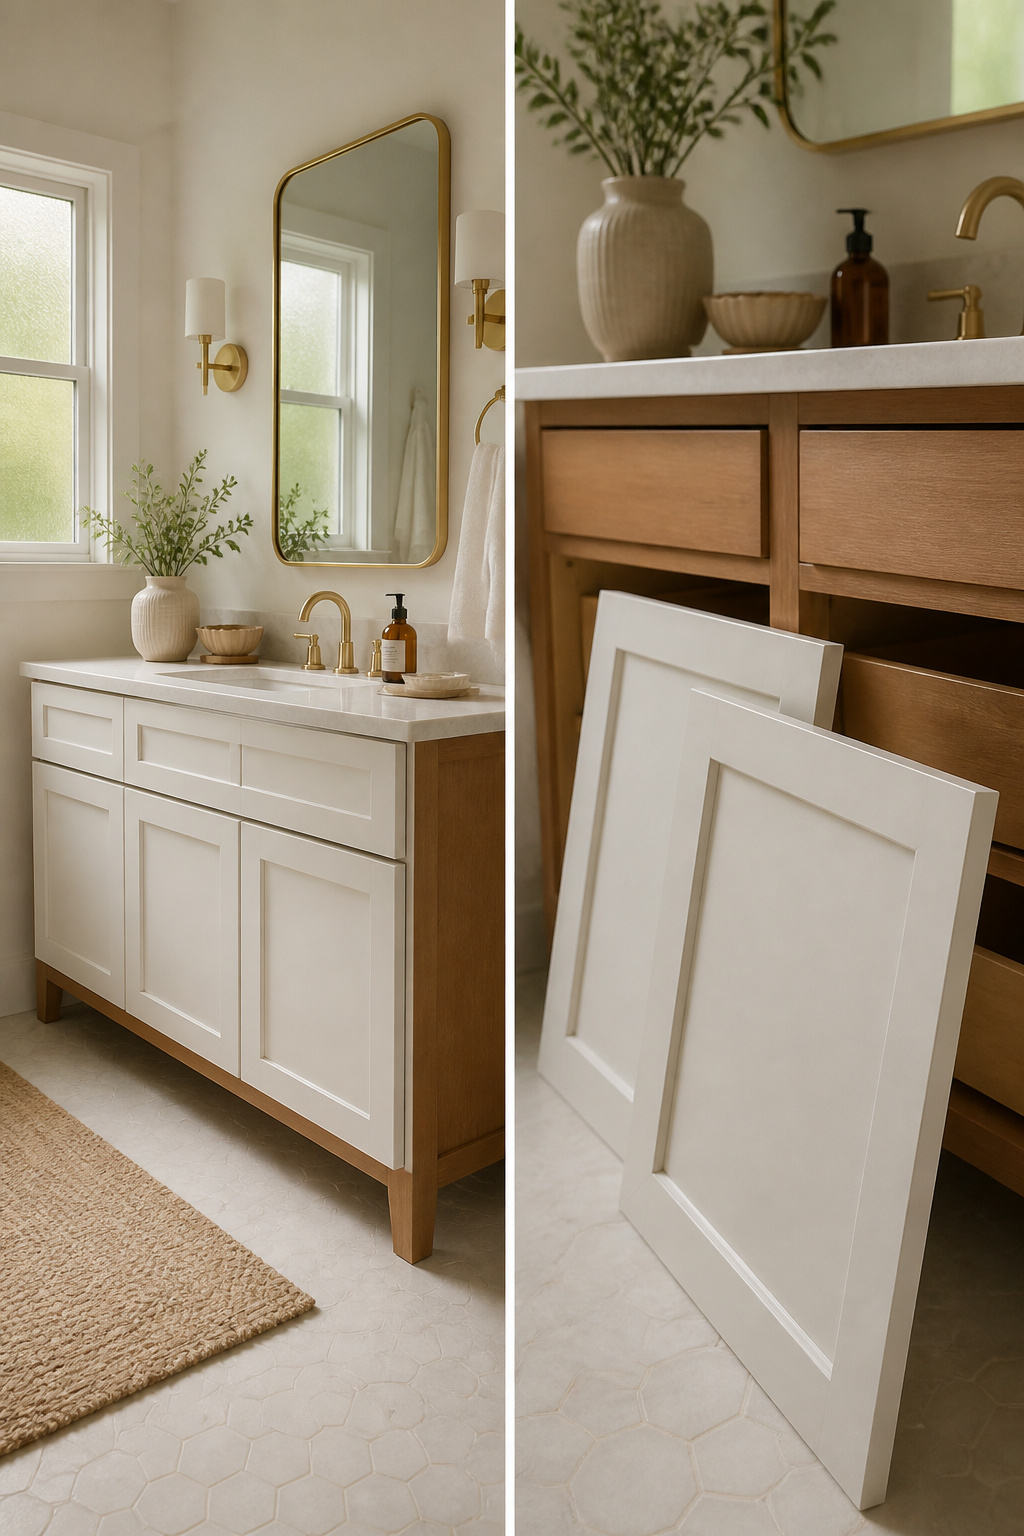
The cabinet box behind a vanity door is usually the most durable part of the whole unit. Water hits the front edge, not the frame inside, and the plumbing stays put no matter what hangs in front of it. Swapping doors keeps that structure and all the pipework exactly where it is while the whole piece reads as new.
Shaker-style doors tilt the room toward something classic; flat slab doors with minimal detail push it somewhere cleaner and more current. Stores that sell replacement doors walk you through measuring for the right overlay and bore position, which matters because hinge spacing on a bathroom vanity is rarely the same as on kitchen cabinets. Order the hole pattern matched to your existing hinges or you are drilling into finished face frames you kept specifically to avoid that kind of work.
The savings sit in what you did not demo: no plumber, no countertop removal, no realignment of drawers to a new box width. The vanity stays where it sits. Only the first impression changes.
3. Add or Update Hardware
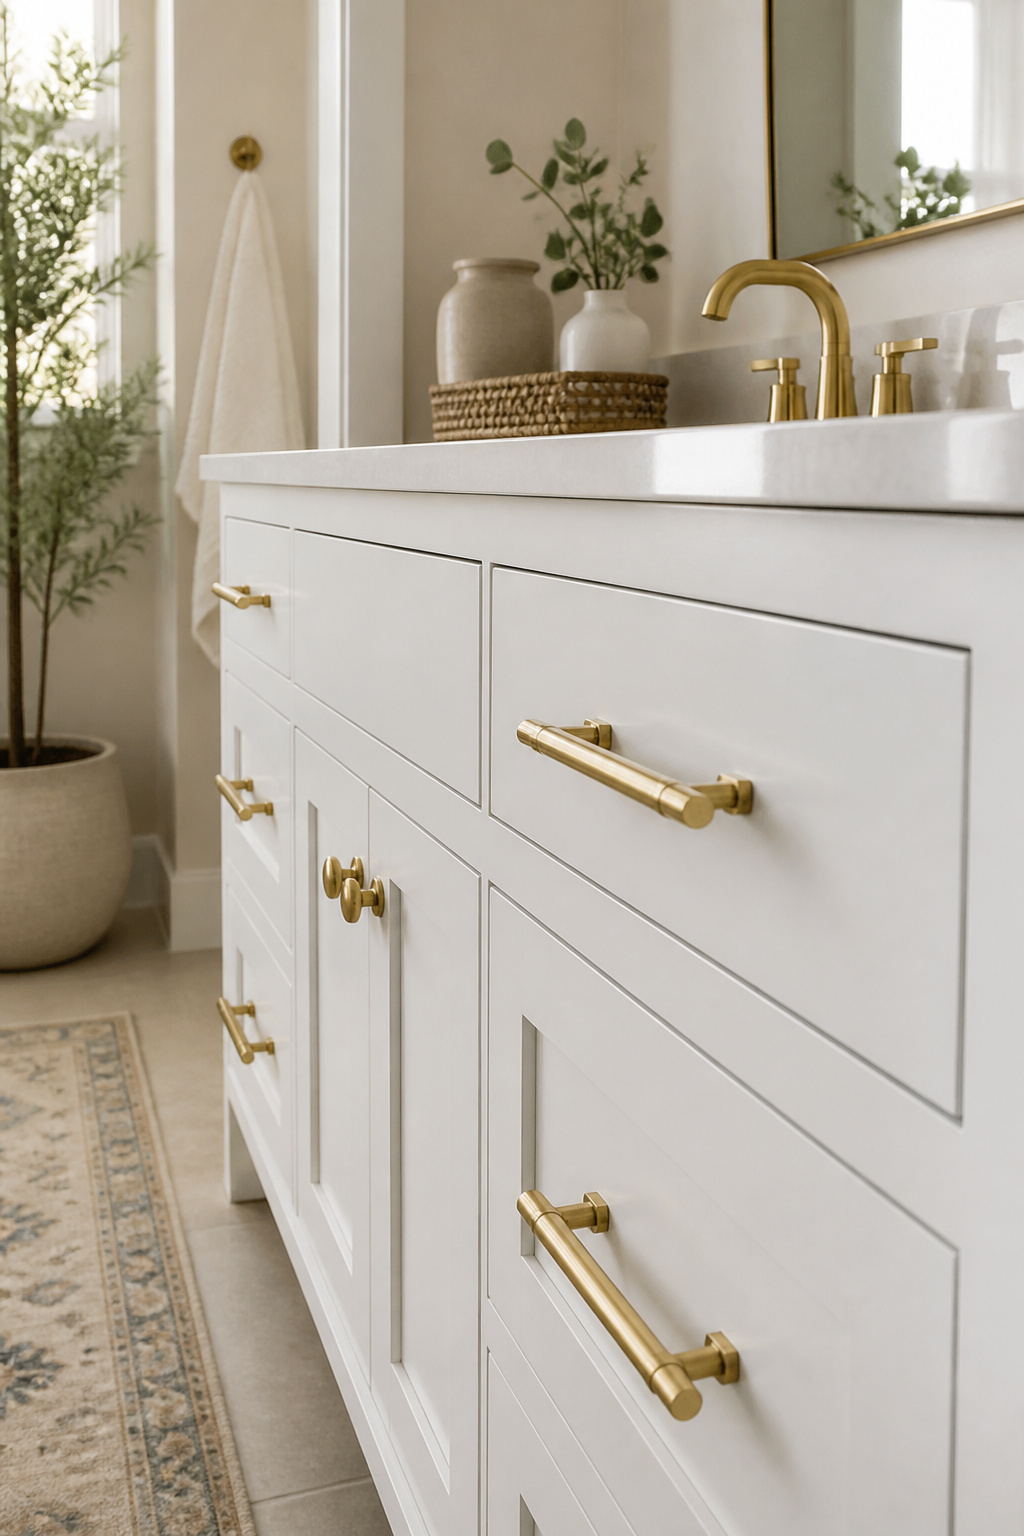
New knobs and pulls can shift a vanity from dated to deliberate for the cost of a takeout dinner. Brass or brushed nickel finishes tend to read current right now; matte black leans colder than most bathrooms need, though personal taste wins if you love it. Matching the hardware to existing faucets and shower trim keeps the room from feeling like a sample board. The holes have to land exactly right, so a measuring jig beats eyeballing by a long shot. Builder-grade hardware is usually the first thing to swap, and the change registers more than the price would suggest — plenty of designers treat hardware selection as the decision that pulls the whole vanity together.
4. Install a New Countertop
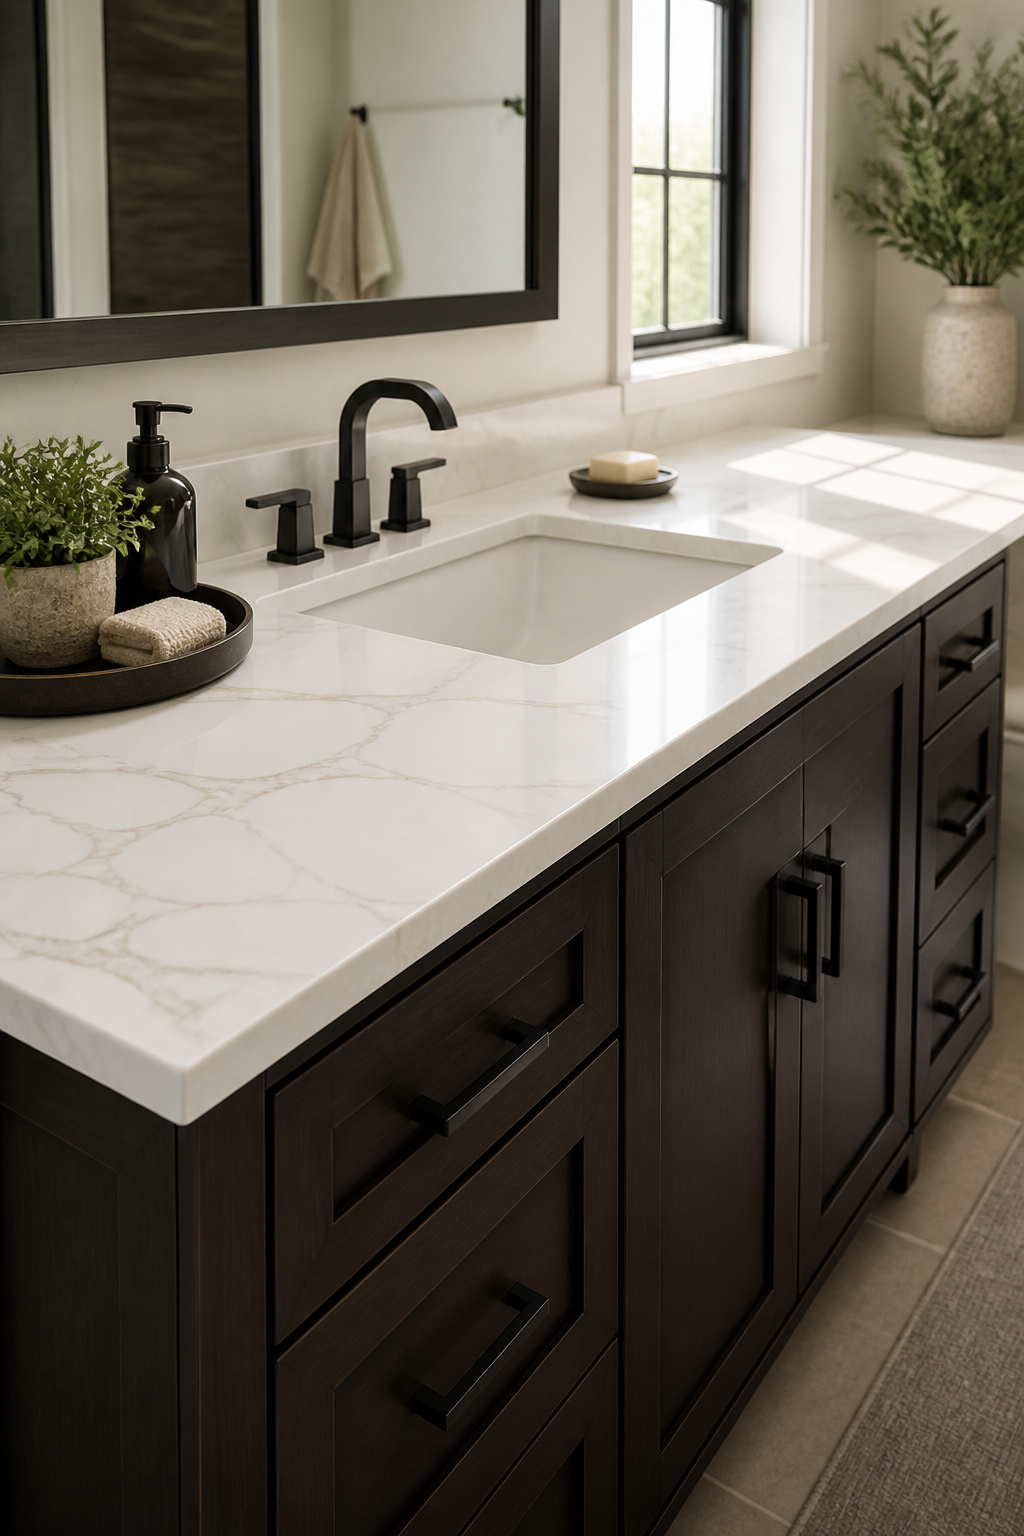
Swapping out the countertop lands somewhere between a weekend paint job and tearing the whole vanity out. The surface you actually touch every day, the one that collects toothpaste splatter and coffee-cup rings from rushed mornings, becomes something you want to reach for instead of wipe down fast and forget.
Countertop stores sell remnants, leftover pieces from larger installs, usually for much cheaper than full slabs. That route takes patience and a willingness to hunt, but the savings are real. Pre-fabbed options from places like Lowe’s, cultured marble included, run closer to off-the-shelf convenience. I weighed the two once for a half-bath refresh and went pre-fabbed, mostly because I could carry it home without borrowing a truck.
The remnant hunt pays off when your vanity size matches what is already cut. A standard pre-fabbed top wins for speed, but the edges and corner radius are decided for you. Either way, you keep the cabinet box, the plumbing rough-in, and the floor you already have. That is the point of a bathroom vanity makeover idea that stops short of full replacement: new surface, same footprint, done in an afternoon if the old top comes up clean.
5. Use Decorative Trim

Flat cabinet faces read as builder-grade even when the paint is fresh. Trim fixes that by breaking the plane into smaller frames, the way picture moulding turns a blank wall into architecture. On a vanity, the same pieces that finish a window or chair rail can give doors a recessed-panel look or add a border that catches light along the edge.
The trick is keeping the scale right. A strip too wide overwhelms a 24-inch door; too narrow and it disappears behind the sink. Bobbin and ribbed profiles read as furniture detail rather than baseboard scrap, and they sit proud enough to cast a small shadow. Glue and brads hold them fine on painted surfaces, though you will want to fill the holes before the topcoat so the fasteners do not telegraph through.
This is the move that makes guests ask whether you replaced the whole vanity. It costs less than new hardware and takes an afternoon if the miters cooperate. Mine rarely do on the first try, so buy an extra foot of trim to recut the corner that gaps.
6. Repurpose Furniture
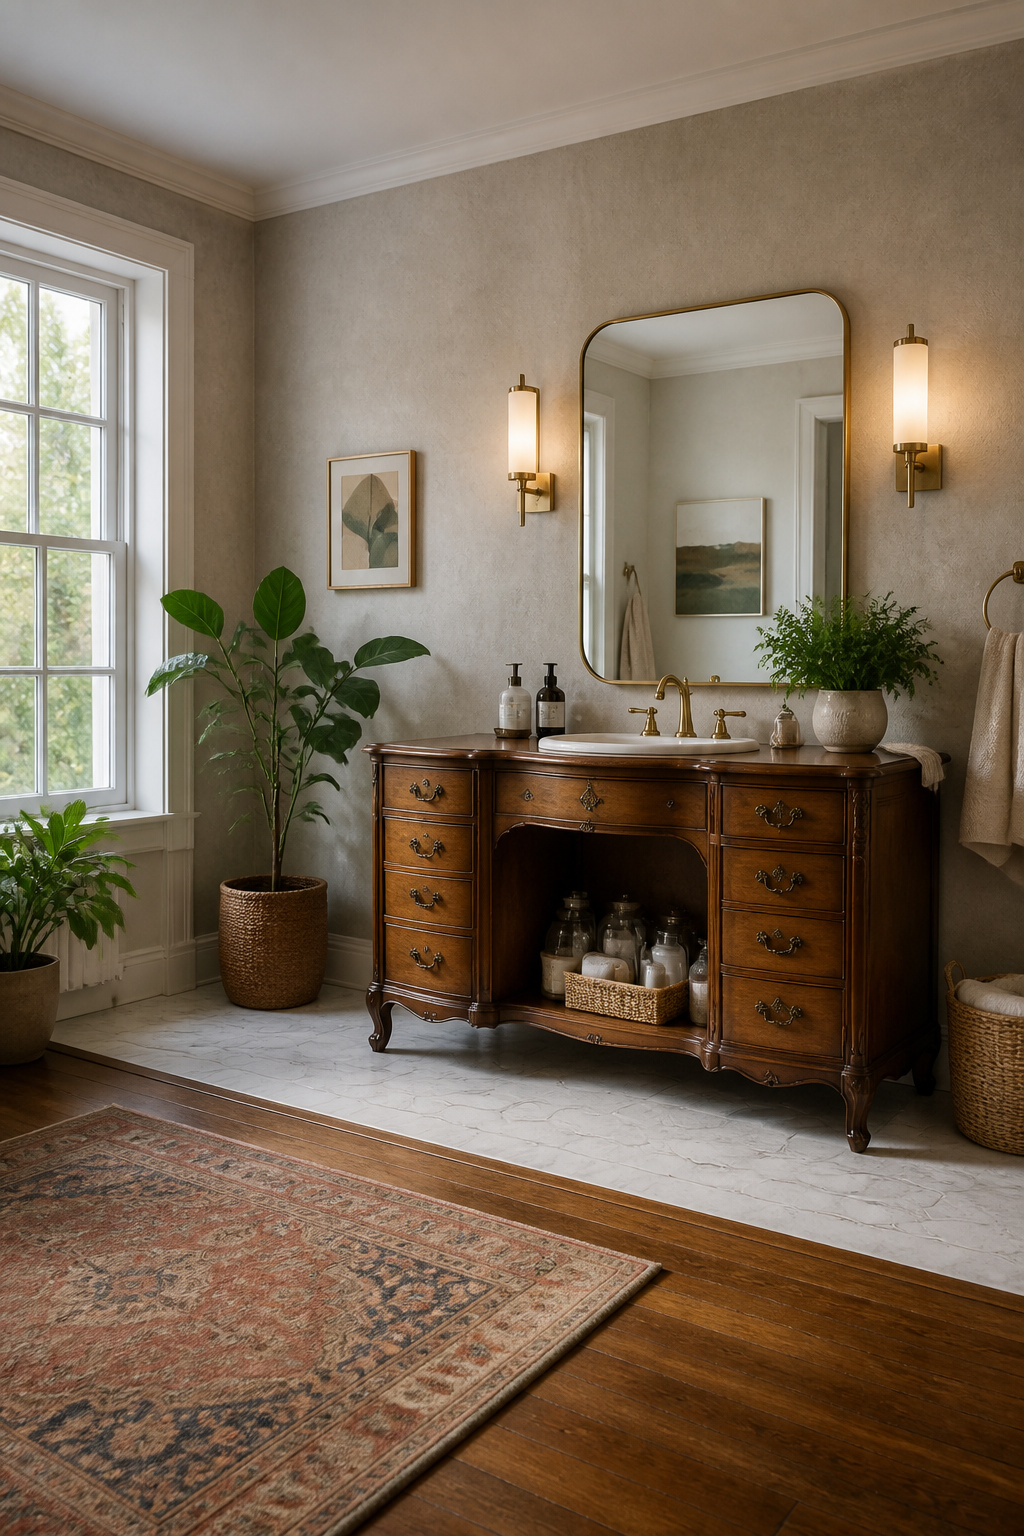
A vintage dresser or credenza with a spin on it answers the question of what to use instead of a standard bathroom vanity. These pieces already carry carved details and brass hardware that no new vanity off the shelf will match, and the retrofit gives you storage shaped to what you actually keep in a bathroom rather than what a manufacturer guessed.
The work sits at the intersection of plumbing and carpentry. You are cutting for drain lines, sealing wood against constant humidity, and bracing a piece that was never meant to hold a stone top or a vessel sink. One approach Liu used was simpler: a single piece of wood with a vessel sink mounted on top, which skips some of the cabinet surgery but still needs a watertight finish.
The payoff is warmth in a builder-basic space that never had any, plus the chance to preserve original charm while gaining function a vintage piece never planned for. The risk is a weekend project that stretches longer once you open the back and find the drawer runs exactly where the P-trap needs to go.
Skip this route if you are not comfortable with both trades, or if the piece has sentimental value and no backup plan. A dresser with good bones but no family history attached is the safer bet for a first conversion.
7. Create a Built-In Look
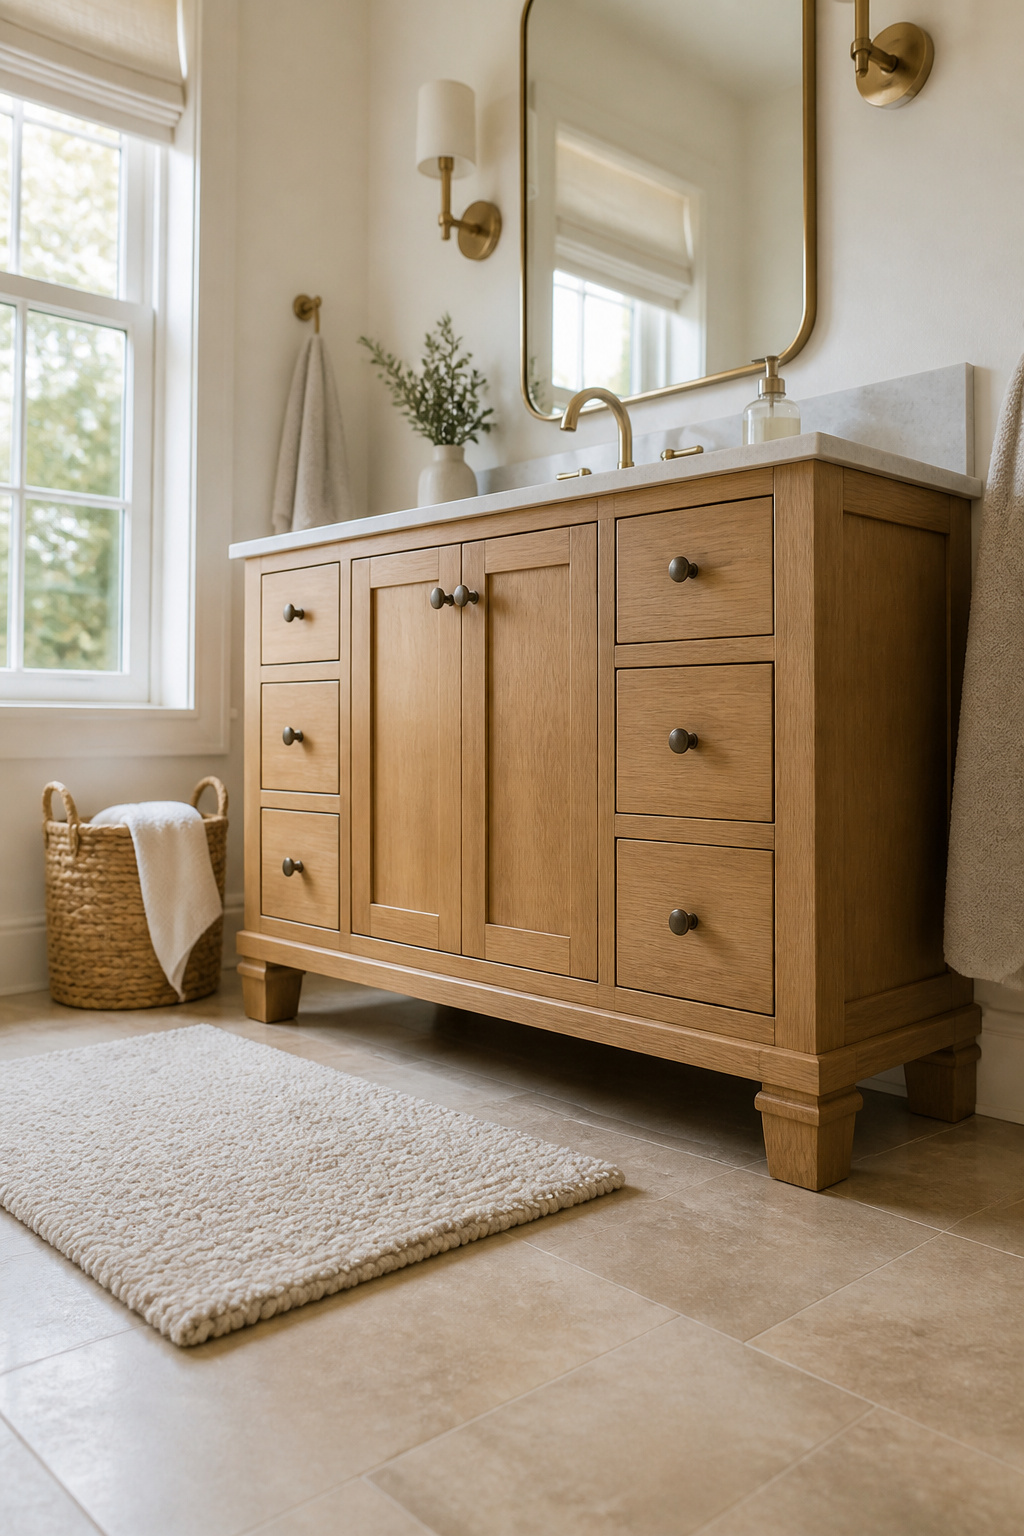
Stock vanities sit flat on the floor like they were wheeled in and forgotten. Adding furniture feet lifts the whole piece off the ground and gives it the deliberate look of cabinetry that was planned for the room, not bought in a hurry.
A pack of four 3" furniture feet runs $18.97, which is about the cheapest custom detail you can buy. The ones I tracked down needed a quick sanding to fit the gap beneath my vanity; a power sander took them down to height in a couple of minutes, then paint and a rubber mallet seated them snug. Since mine fit tight, I left them unattached, though wood glue or a small finish nail makes sense if yours feel loose.
The difference is immediate. The vanity stops looking like a box and starts looking built for the space, all for less than twenty dollars and twenty minutes of work.
8. Upgrade the Sink
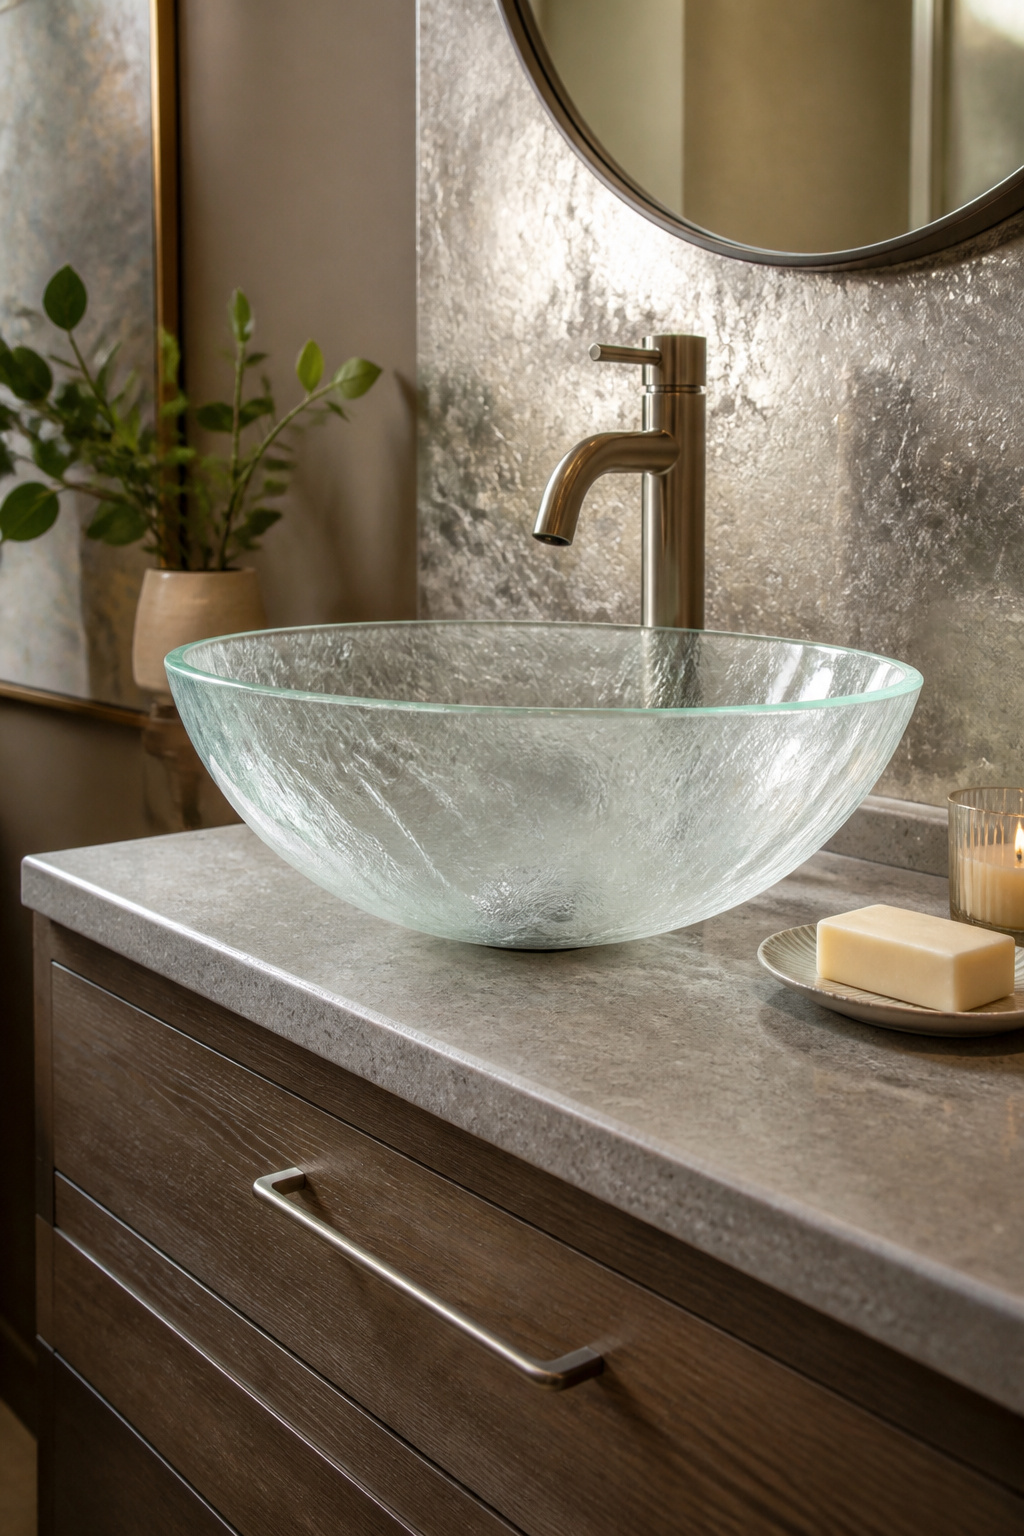
A new sink can bring a fresh, updated feel to your bathroom without replacing the entire vanity or countertop. Depending on your bathroom cabinet, a sink can be pretty easy to pop out and replace, and you can purchase individual sinks or countertop-sink combos that make it a simple DIY.
Vessel sinks or undermount sinks each send a different signal. A vessel sink, like the etched glass one set against silver metallic leafed wallpaper, sits above the counter and reads as design-forward, almost like a piece you chose deliberately rather than inherited. An undermount sink disappears into the countertop and keeps the surface line clean.
The cabinet itself can stay exactly where it is, same paint, same hardware, and the whole unit still reads as modernized because the functional center, the part your eye goes to first, is now something you chose. I have not done this swap myself, but reading through makeovers where orange-y oak cabinets stayed put while the sink changed, the before-and-after still looks like a total transformation. The sink is where the morning actually happens, so that is where the eye settles.
9. Add a Backsplash
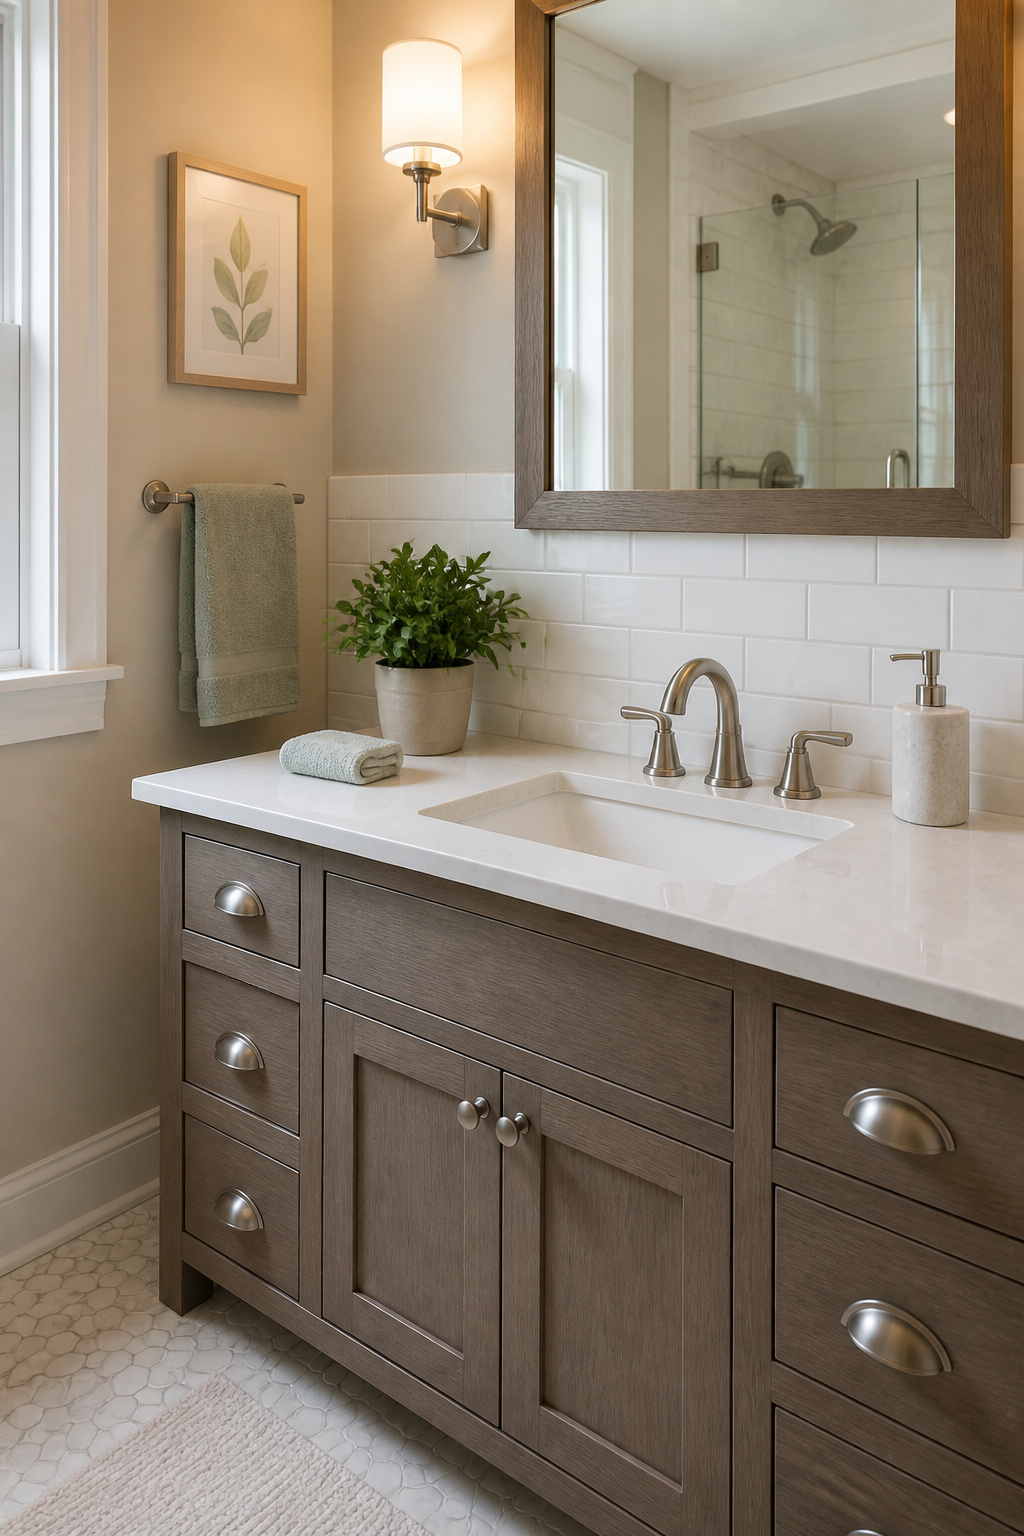
A backsplash does two jobs at once: it keeps water off the wall behind your sink and gives the vanity a boundary that looks intentional rather than leftover. The wall there takes splashes every day, and paint alone eventually stains or bubbles at the edge. Tile gives that zone a surface that wipes clean and, more importantly, a texture that frames the whole vanity area.
Peel-and-stick tile runs about $2–$5 per square foot and installs without grout, which is worth considering if you are renting or testing a look. For something permanent, zellige, subway, or a small mosaic each give a different effect; zellige catches light unevenly, subway reads clean and classic, and mosaic lets you wrap a pattern around corners. The actual installation, thinset and grout and all, is straightforward but specific to the tile you choose. Tile-specific tutorials from manufacturers or dedicated tiling channels will walk you through the wet saw and spacing better than a vanity overview ever could. I have watched enough of them to know that skipping the leveling stage is where most first-timers go wrong, and that mistake shows once the grout goes in.
10. Paint or Epoxy the Countertop
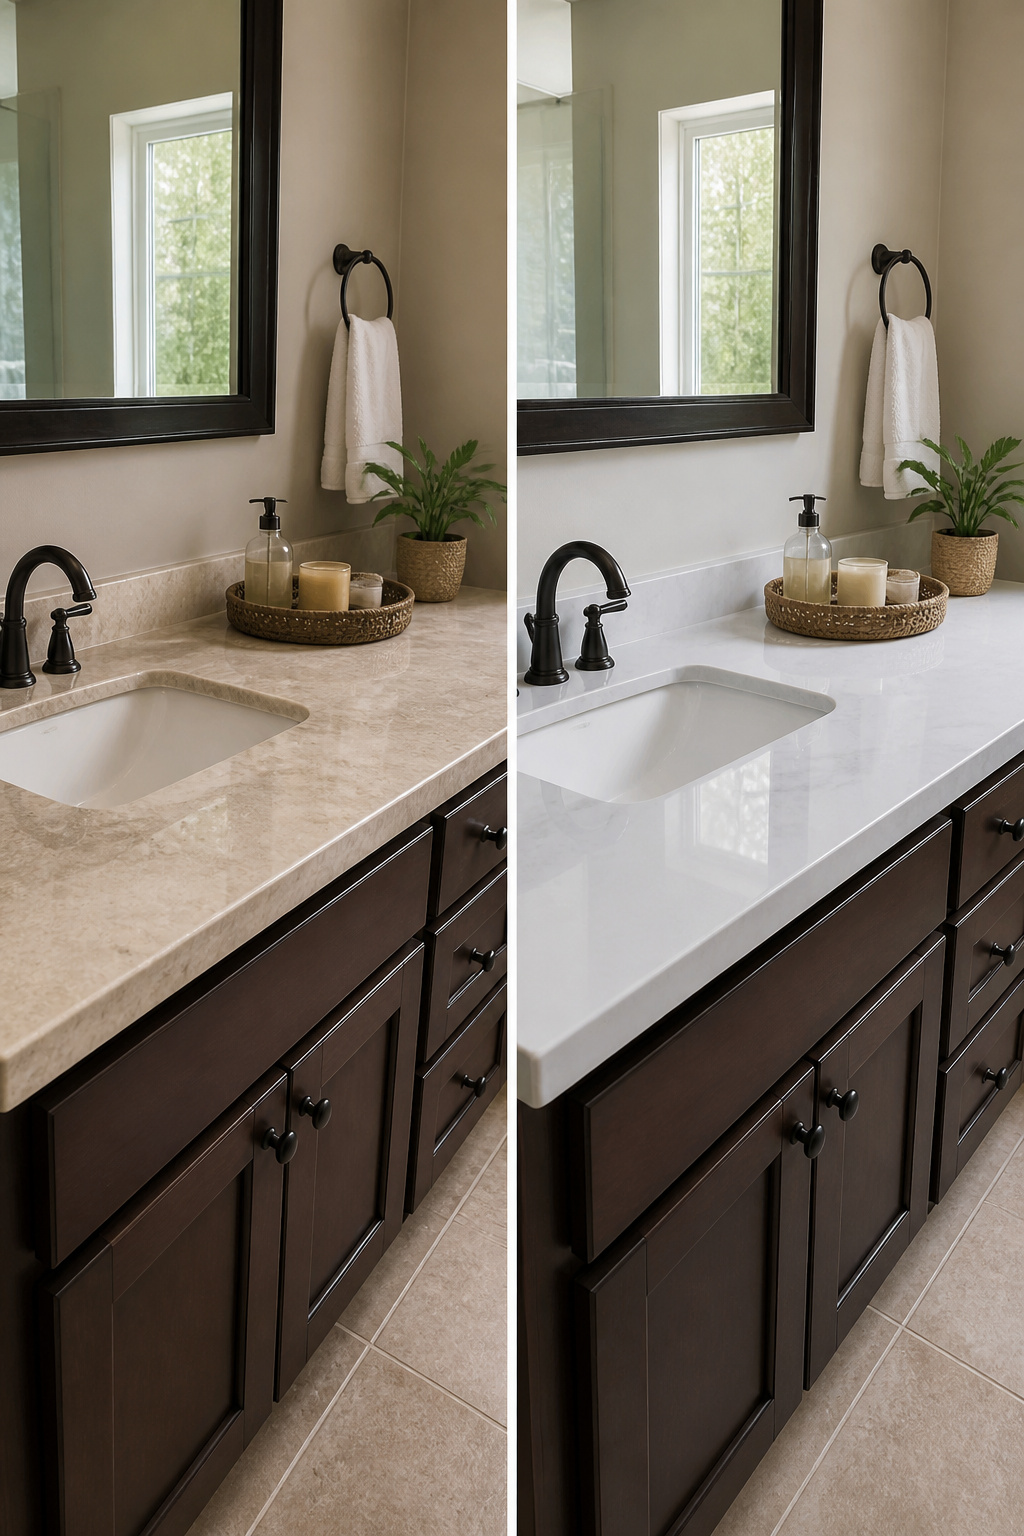
A painted or epoxied countertop works when the surface is dated but structurally sound, and when replacement would eat most of your budget. The line between smart refresh and false economy sits at visible damage. Water swelling, deep burns, or cracks that let moisture through mean paint or epoxy buys you months, not years.
For paint that holds up to daily bathroom use, Behr Urethane Alkyd Enamel gives the harder, more washable film standard latex lacks. Sources who have lived with it report the high-gloss finish resists mildew and cleans without marking, though bathroom humidity means two coats minimum and patience on dry time. The alkyd base levels better than waterborne on a surface that may not be perfectly flat.
Epoxy kits, often sold as marble-look systems, layer a thicker, glossier skin. They demand more prep and a steadier hand, and the finish is less forgiving of dust or temperature swings. The payoff is convincing depth if your vanity reads as stone rather than laminate.
Replace instead when the countertop is soft at the sink rim, when the substrate has swelled, or when your time has value and this is the only bathroom in daily use. Paint or epoxy is the weekend project for a spare bath or a rental you need presentable before next month.
11. Change the Faucet
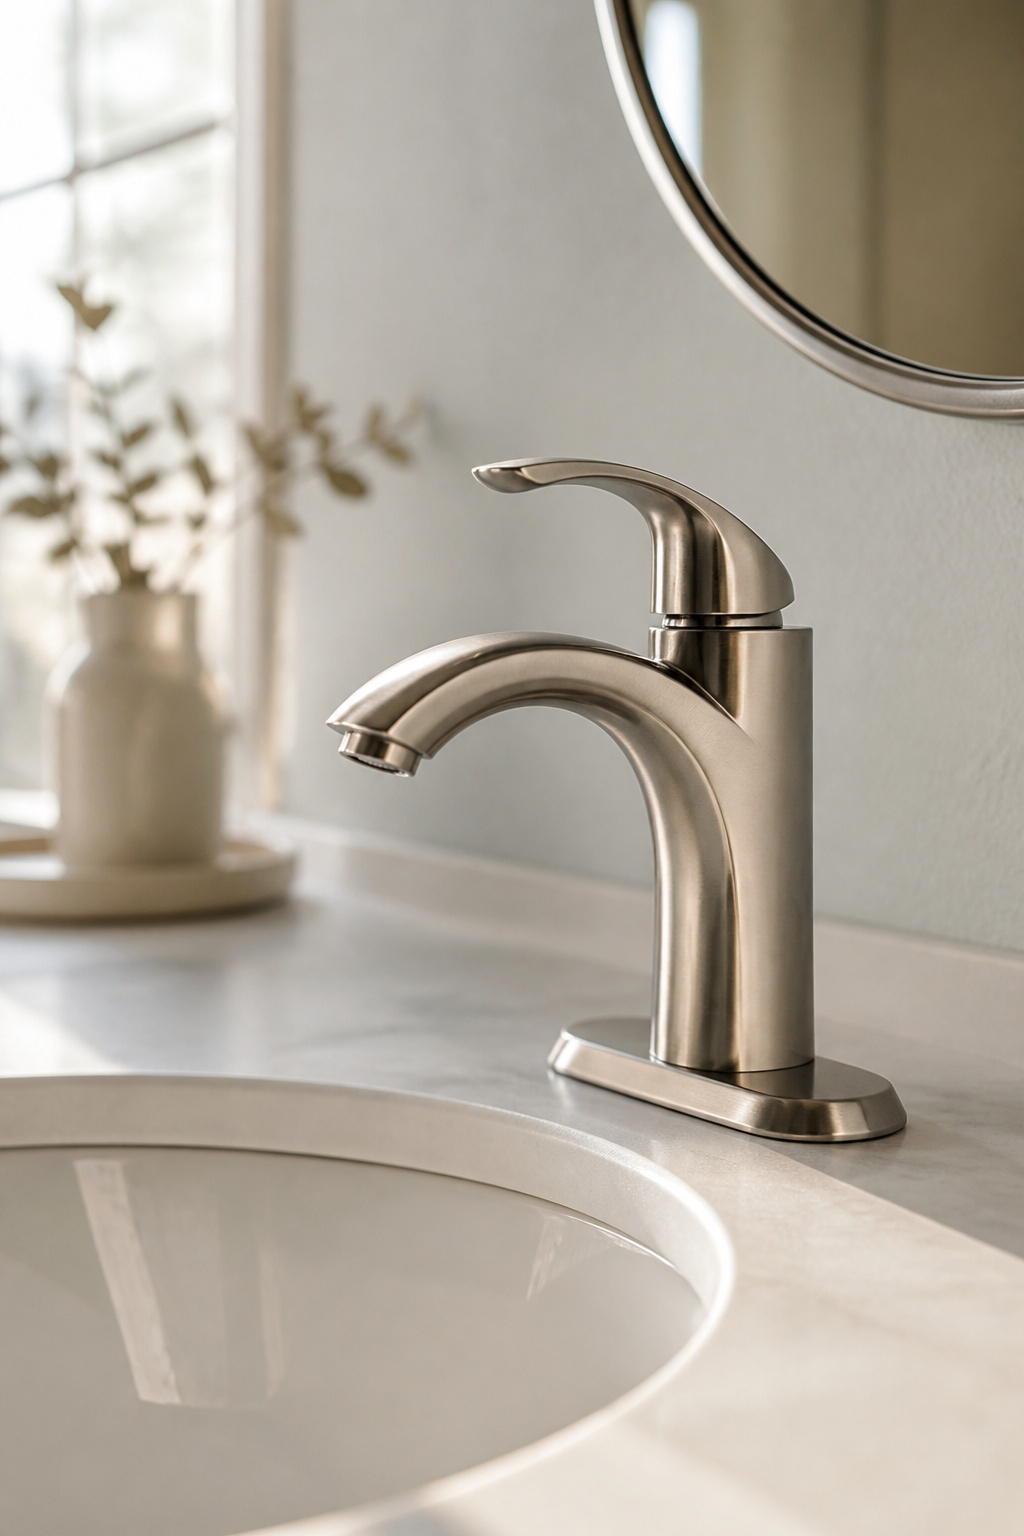
A modern faucet does more than stop drips. It is the detail that pulls a vanity together once paint and hardware are settled, and getting the finish wrong is the fastest way to make everything else look accidental.
Matte black, brushed nickel, and gold are the usual choices now, and each one sets a different rule for the rest of the room. The brass faucet I almost bought would have fought the brushed nickel pulls I had already installed on the drawers. That clash is what you notice first in a bathroom, not the tile or the mirror. The finish on the faucet has to repeat somewhere else, at least on the cabinet hardware, or the vanity looks like two projects that happened to share a counter.
Builder-grade brass or rusted chrome is what most vanities start with. Swapping it out takes an afternoon if the supply lines cooperate, and the result reads as intentional in a way that new paint alone never quite manages.
Budget Breakdown
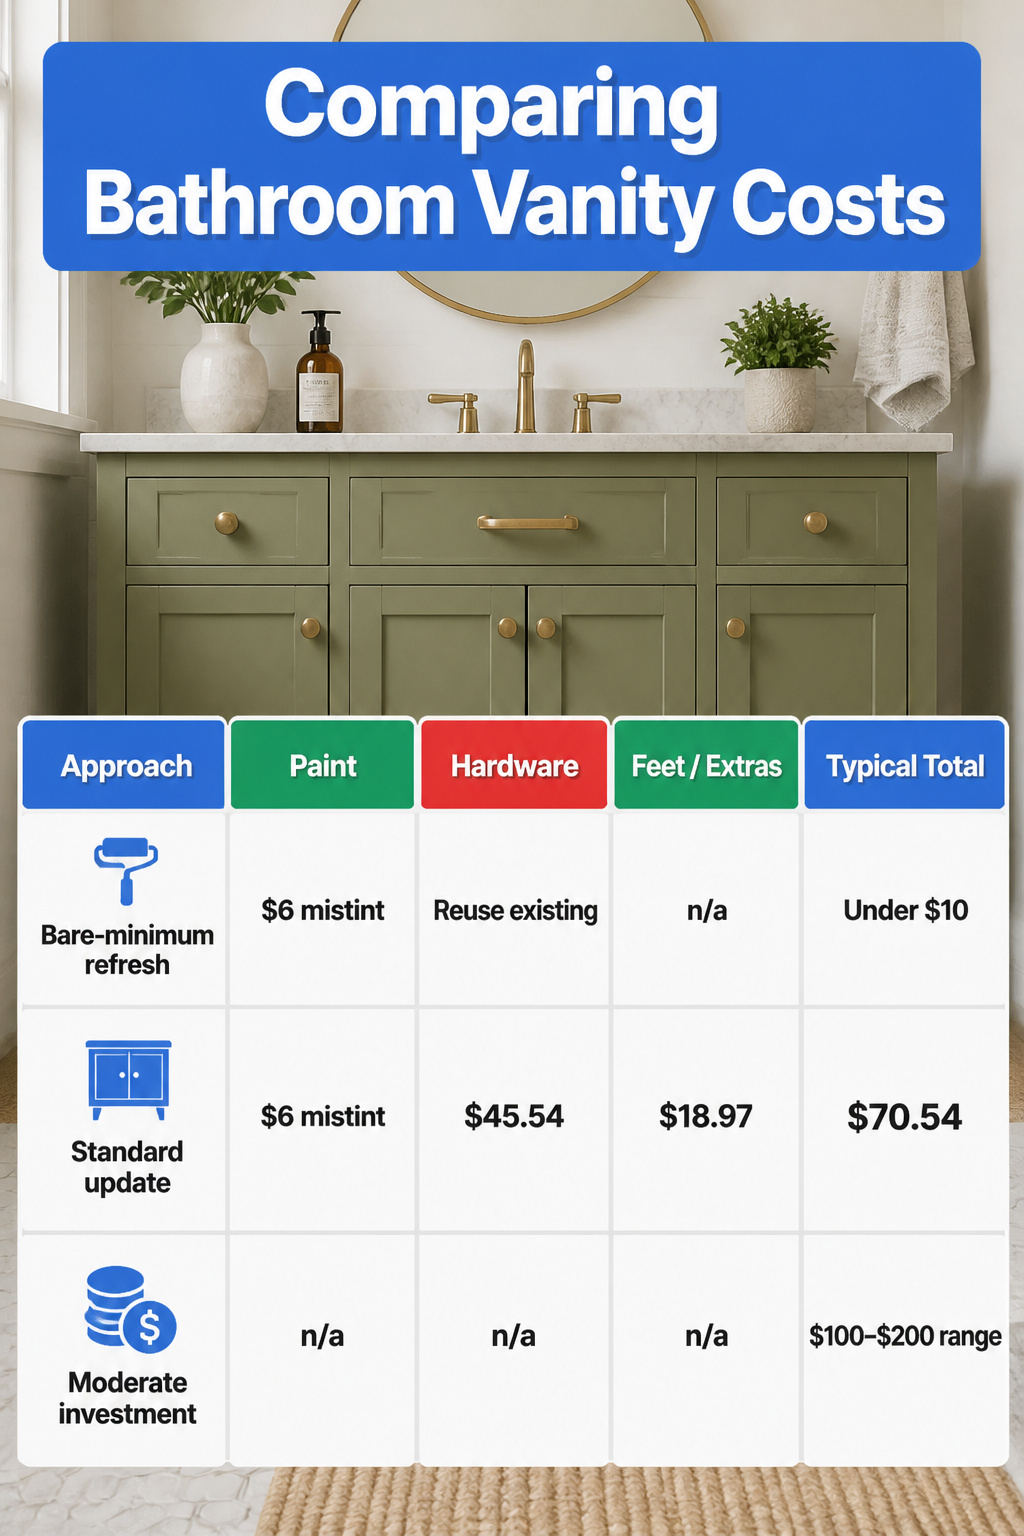
A bathroom vanity makeover can land almost anywhere on the cost spectrum. The project that stuck with me totaled $70.54, built from a $6 mistint of Sherwin-Williams "At Ease Soldier" in Satin Finish, $45.54 in knobs and pulls from Build.com, and $18.97 furniture feet to raise the cabinet off the floor. Paint and hardware eat most budgets, but a single mistint bucket keeps the whole thing under a takeout order.
| Approach | Paint | Hardware | Feet / Extras | Typical Total |
|---|---|---|---|---|
| Bare-minimum refresh | $6 mistint | Reuse existing | n/a | Under $10 |
| Standard update | $6 mistint | $45.54 | $18.97 | $70.54 |
| Moderate investment | n/a | n/a | n/a | $100–$200 range |
The gap between nearly free and moderate spend comes down to what you already own. Primer, brushes, rollers, and sandpaper from the garage drop the real number lower than the receipt shows. A renter or hesitant beginner should start with paint alone; the feet and hardware only matter once the color proves the idea works.
Prep Steps That Save the Project
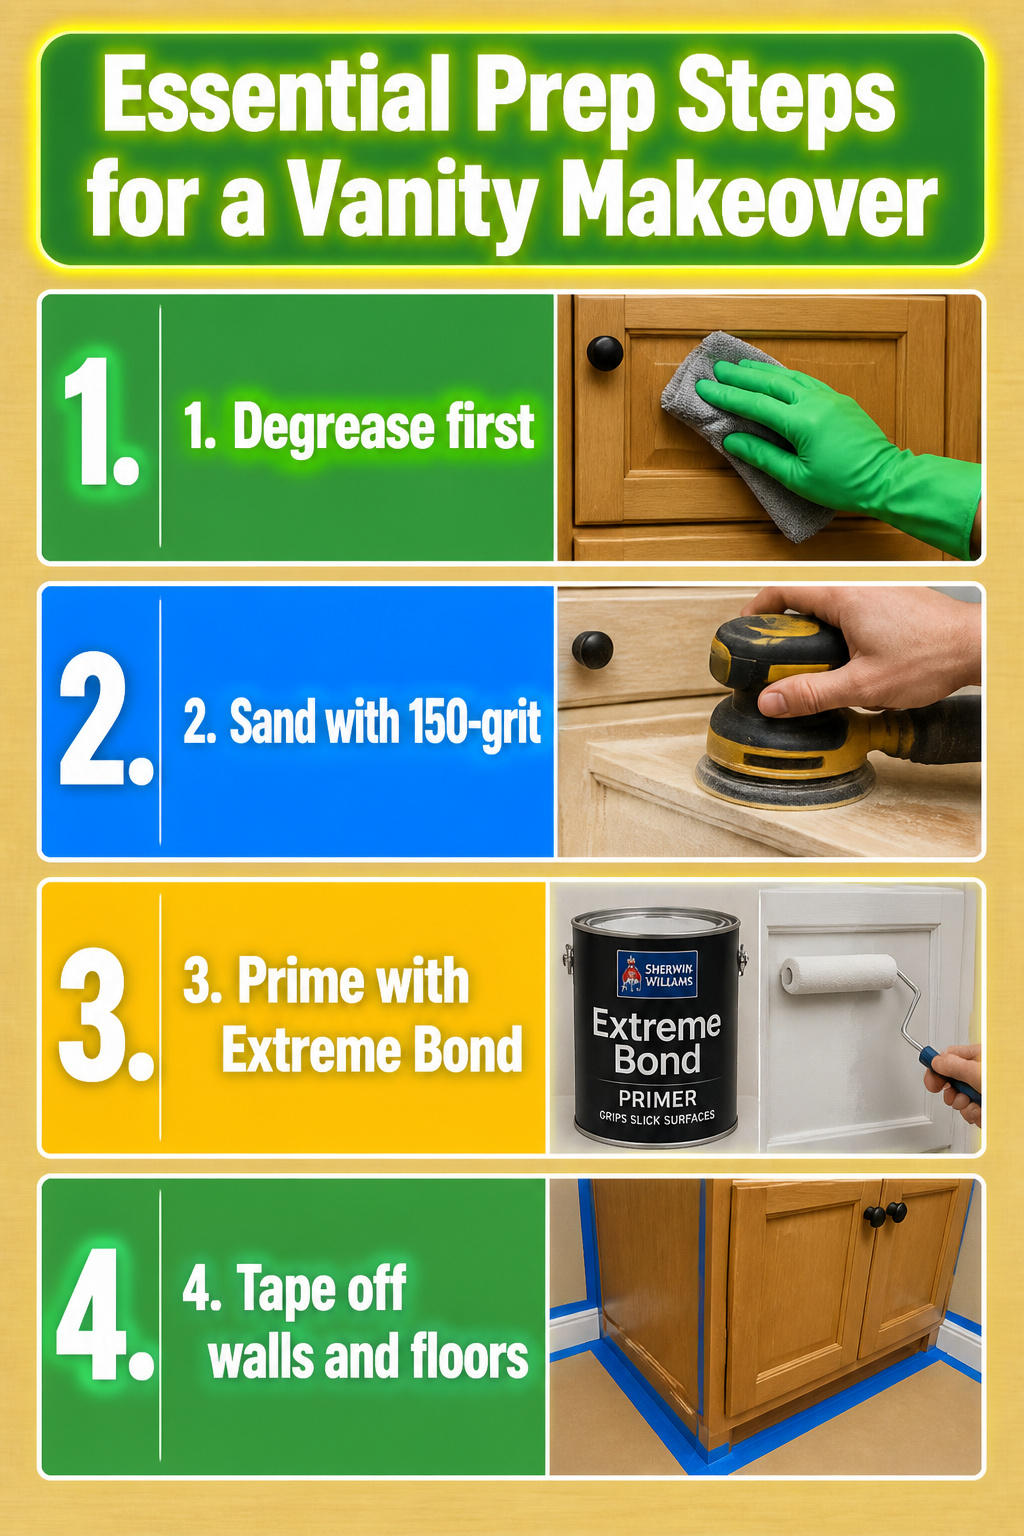
- Degrease first, because bathroom vanities collect more skin oil and hair product than you expect. I use TSP substitute on a rag, working the corners where the door meets the frame.
- Sand with 150-grit paper just to rough the surface, not strip it. A palm sander keeps this quick. Vacuum the dust, then wipe again; paint over dust and you will feel every grain for years.
- Prime with Sherwin Williams Extreme Bond Primer. The can says it grips slick surfaces without sanding, but I sand anyway on a vanity that sees daily use. Two coats of primer beats one coat and a redo.
- Tape off walls and floors before you open the primer. The ten minutes here saves an hour of edge work later, especially where the cabinet side meets the baseboard.
Color Choices That Last

Deep greens and midnight blues are showing up everywhere this year, but the question of what actually lasts depends on how you define "last." A bold vanity color makes a statement now, yet popular colors tend to change fast and may not endure. The safer play is natural wood tones like walnut or oak, or neutrals such as navy, charcoal, and taupe, which designers consistently point to as timeless. White and off-white work in any bathroom regardless of door style, and their appeal speaks for itself.
The 2024 US Houzz Bathroom Trends Study found wood is the new white for vanities, with gray and blue tying for third place. Darker greens, wood tones, and natural materials are making a resurgence, and keeping the vanity style classic allows more freedom in color and materials overall.
"Wood is the new white for vanities."
For my own vanity, I used Mediterranean SW 7617 Emerald in Semi-Gloss sheen, a deep green that reads almost black in low light. The semi-gloss finish holds up against daily water contact better than flat or eggshell would. If you are torn between trendy and timeless, paint the walls the bold color and keep the vanity in something you will not need to repaint when tastes shift.
Hardware Finishes That Work
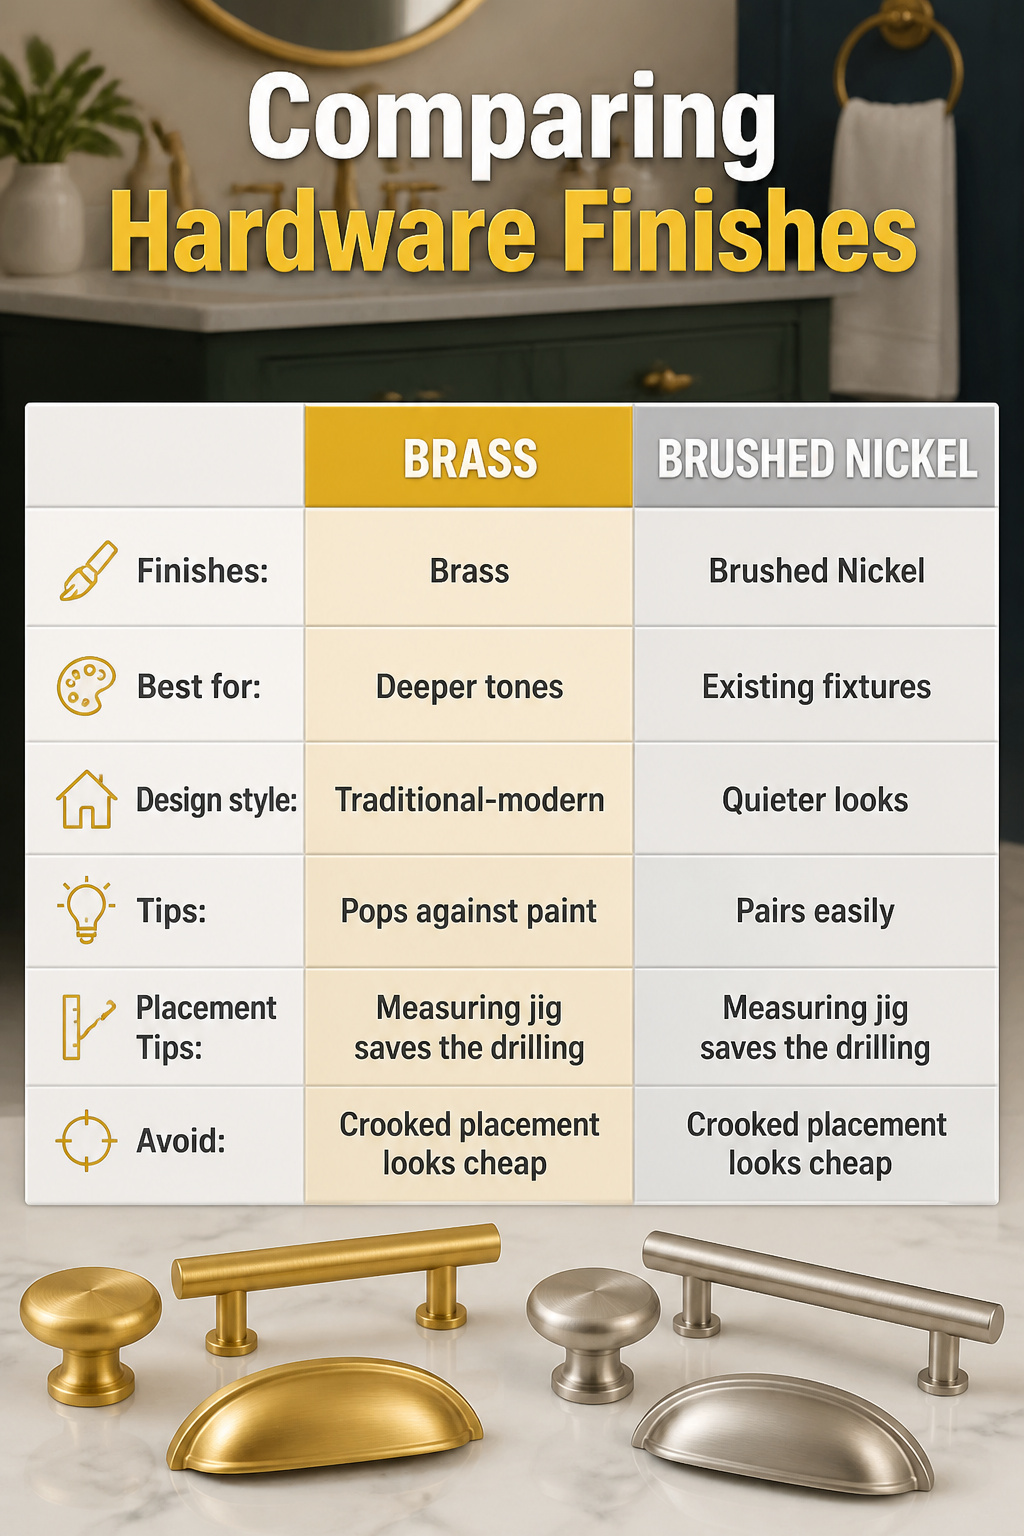
Brass and brushed nickel are the two finishes that keep showing up in bathroom vanity makeover ideas that actually get finished. Match your hardware to your faucet, or at least stay in the same temperature family, warm with warm or cool with cool. A brushed brass knob against a brushed nickel faucet reads like a mistake even if each piece looked fine alone.
Brass works best when you want something that pops against paint, especially deeper greens or navy. It leans traditional-modern, the kind of blend that shows up in cottage-style makeovers. Brushed nickel stays quieter and pairs more easily with existing fixtures if you are not replacing the faucet this weekend.
Matte black is the third option you will see on the shelf, but it runs cold. Skip it unless you already love it, because "it is trending" is a bad reason to live with hardware that feels off in a small room.
Placement is where projects stall. A measuring jig saves the drilling, and the marriage. Eyeballing works until the third hole is a sixteenth off and the pull sits crooked for the next ten years. New hardware is the cheapest change on this list, but crooked placement makes the whole vanity look cheap.
Frequently Asked Questions
What can I use instead of a bathroom vanity?
A vintage dresser or credenza works well as a bathroom vanity replacement. You will need to cut for drain lines, seal the wood against humidity, and brace it for the countertop weight. The payoff is carved details and brass hardware that no stock vanity matches, plus storage shaped to what you actually keep in the bathroom. Check that the drawer runs do not sit exactly where the P-trap needs to go before you start.
What color bathroom vanity is timeless?
Natural wood tones like walnut or oak stay timeless, as do neutral paints such as navy, charcoal, and taupe. White and off-white suit any bathroom regardless of door style. Bold colors make a statement now but shift fast, so if you want flexibility, paint the walls bright and keep the vanity in something that lasts.
What are the most popular colors for bathroom vanities?
Wood is the new white for vanities, according to the 2024 US Houzz Bathroom Trends Study, with gray and blue tying for third place. Darker greens, wood tones, and natural materials are making a strong comeback this year.





