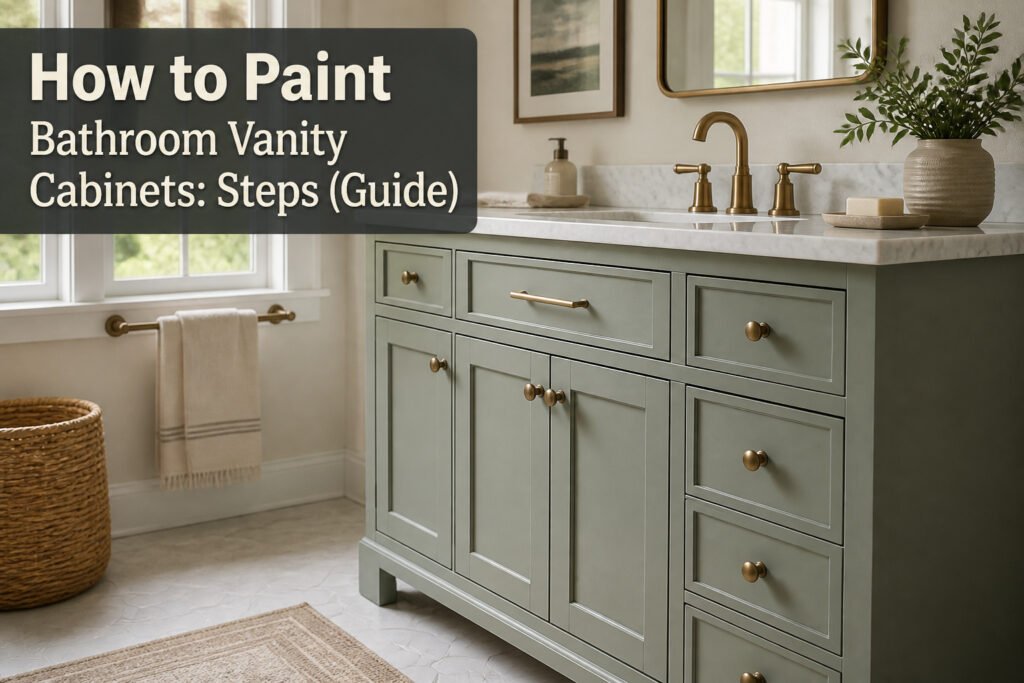
A painted vanity that opens and closes without sticking takes about three days of actual work and a full week of waiting for the final coat to cure. Most failures come from rushing that last part, not from the painting itself.
The real condition that changes your approach is whether the existing finish is glossy or damaged. A factory polyurethane coat in decent shape lets you skip sanding entirely if you use the right bonding primer. On the other hand, water damage or grease buildup still demands 120-grit paper and a shellac-based primer like Zinsser BIN, denatured alcohol cleanup and all.
1. Remove Hardware and Doors

The screwdriver comes out before the paint ever does. Cabinet doors, drawer fronts, false drawer fronts if your vanity has them, hinges, knobs, pulls — everything detaches from the frame. A few of the guides I read call this the step people want to skip, and they are right that I thought about it. Painting around hardware means cleaning paint off hardware later, and the finish never sits as clean along the edges.
Label the back of each door and drawer with its location: upper left, lower center, wherever it lives. A strip of painter’s tape and a Sharpie takes thirty seconds and saves the puzzle of mismatched hinge holes at reassembly. Screws and small hardware go into a sealed plastic bag stored inside the vanity itself, so nothing walks off between now and then. Some makers photograph the layout before anything moves; I find a phone picture of the original setup settles most arguments about which hinge went where.
2. Clean Surfaces
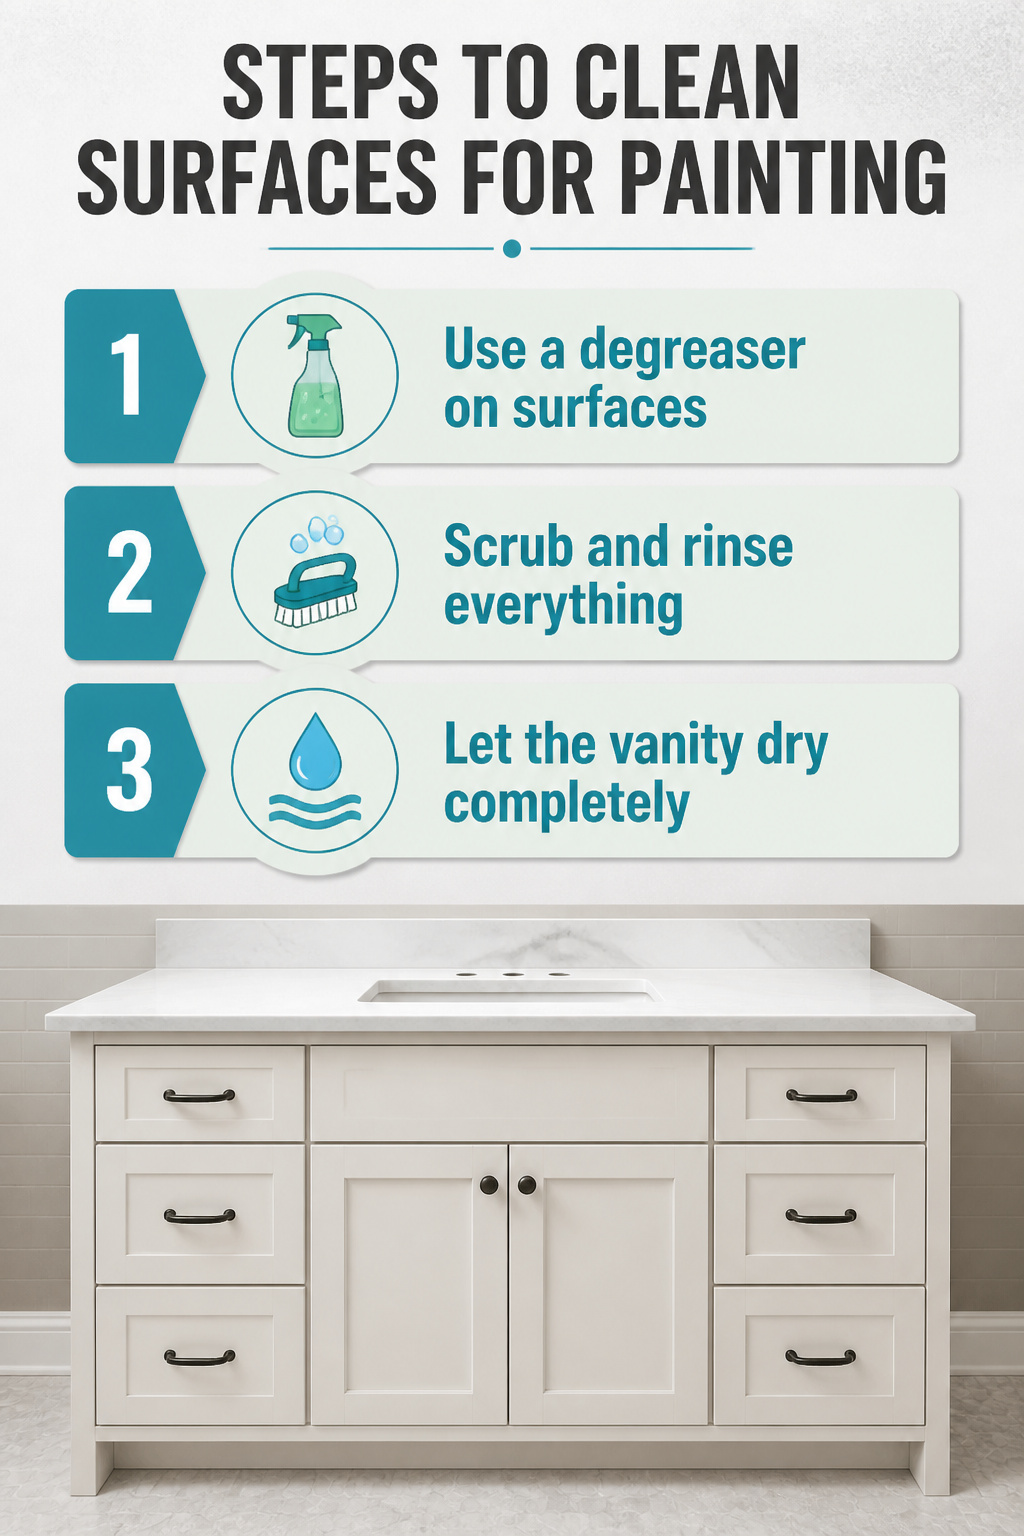
- Use a degreaser or TSP substitute on every surface you plan to paint, including doors and drawer fronts. Trisodium phosphate cuts through soap scum, hairspray residue, and whatever else builds up in a bathroom; if you go with a no-rinse TSP substitute, you will still want eye protection and gloves either way.
- Scrub with the solution first, then rinse everything with clean water. Some manufacturers call for a second rinse with fresh water and a clean sponge to get the surface completely free of contaminants.
- Let the vanity dry fully before you touch sandpaper to it. Paint and primer will not adhere properly over damp wood or lingering cleaner film, so the extra wait time here is what separates a finish that lasts from one that peels inside a year.
3. Sand Surfaces

120-grit sandpaper takes off the factory clear coat fast, but the 220-grit follow-up is what actually preps the surface for primer. I learned that distinction the hard way after skipping the finer pass once and watching the primer gum up in ridges.
Two approaches work here, and the vanity you started with decides which one wins. A shiny factory finish or uneven old paint needs the two-step: 120-grit to cut the gloss, then 220-grit to smooth. A previously painted surface in decent shape, or a small vanity with a two-year-old factory coat, can get by with a single light pass of 220-grit. The goal is never bare wood. Scuff until the surface looks dull, feels slightly rough to the fingernail, and the glossy layer is broken.
Sand with the wood grain, not across it, and don’t lean on the corners of the sanding block or you’ll leave visible gouges the paint will telegraph. A vacuum pulls the bulk of dust off cabinets and floor; a damp microfiber towel finishes the job. Let every surface dry before primer touches it, or the moisture traps under the coat and bubbles later.
4. Fill Holes and Imperfections

Old hardware holes and nicks in the vanity face are easy to ignore once the doors are off, but primer will not hide them. A $5 tube of wood filler covers both scratches and old knob holes, and the finger-sized dab pressed into each opening is faster than finding the putty knife. Let it mound slightly above the surface; sanding flat is simpler than coming back for a second round because you skimped.
Dry time varies by product, so the label is worth the thirty seconds. Once it is hard, knock the excess down with 220-grit paper until the patch is level with the surrounding wood. Some holes, especially the deeper ones from previous hardware, drink the first application and still show a slight dimple. A second thin skim after the first sanding fixes that.
Work over a drop cloth. The fine dust from filler and wood together travels farther than you expect, and the vacuum hose catches most of it before it drifts into the hallway.
5. Prime

A bonding primer is what stands between your paint job and the peeling, chipping regret that shows up six months later. I start every cabinet project with this step, because paint on its own grips slick bathroom surfaces about as well as tape on dust.
Three kinds cover the situations you’re likely to face:
- Shellac-based primers like Zinsser BIN block stains and wood tannins from bleeding through, especially on cabinets with visible knots or previous water damage. The smell is aggressive, so crack a window and expect to wash brushes with denatured alcohol rather than soap and water.
- Oil-based options still earn their keep for stubborn surfaces, though cleanup means mineral spirits and longer dry times.
- Waterborne bonding primers like STIX or Extreme Bond Primer are what I reach for most often on pre-finished vanities. Extreme Bond Primer in particular claims adhesion strong enough that full sanding may not be necessary on clean, paintable surfaces, which saves an afternoon if your existing finish is intact but glossy.
Brush the primer into edges and recesses first, then roll flat surfaces with a ¼-inch nap roller for the smoothest result. Let it dry two to three hours before you even think about paint; I have stacked doors too early and paid for it with touch-ups.
6. Paint

A 2-inch angled brush works the edges and recesses; a 4-inch foam roller lays the paint flat across the door and drawer faces. Load the brush lightly, drag it along the inside panel seams first, then roll the broad surfaces before the brushed areas skin over. The first coat will look thin and slightly streaky. That is normal.
Let it dry to the touch, usually a few hours, then sand lightly with 220-grit paper, wipe off the dust, and repeat. Two coats is the minimum; three is rarely necessary but worth having on hand.
Waterborne alkyd paints level out as they dry and cure hard enough for daily wiping without a separate topcoat. The three that come up consistently: Sherwin-Williams Emerald Urethane Trim Enamel, Benjamin Moore Advance, and Valspar Cabinet & Furniture Paint. All three are low-VOC, so the bathroom stays usable while you work. I have read painters split between them; Emerald and Advance self-level aggressively and can sag if the coat is too heavy, while Valspar tolerates a slightly thicker application. Semi-gloss or satin both wash clean; satin hides the unevenness of a hand-rolled finish a little better.
Leave the final coat overnight before reinstalling hardware. The surface feels dry in hours, full cure takes days.
7. Reassemble

Paint that feels dry to your touch in a few hours is still weeks away from being truly done. Wait at least three days, and preferably a full week, before you put anything back together. The solvent needs time to fully evaporate from the pigment, leaving only the hardened coating behind. Rush this and your cabinet doors or drawers can stick, peel, or bond shut.
When the wait is over, reattach your hardware first if you are using new pulls or knobs; drill any fresh holes before the doors go up. Then hang each door and slide each drawer back to its original spot. Tilt-out trays, pull-out shelves, and hamper-style centers all go back now too. The vanity looks finished the moment everything closes cleanly, and it stays that way because the paint underneath actually cured.
Paint Types Compared
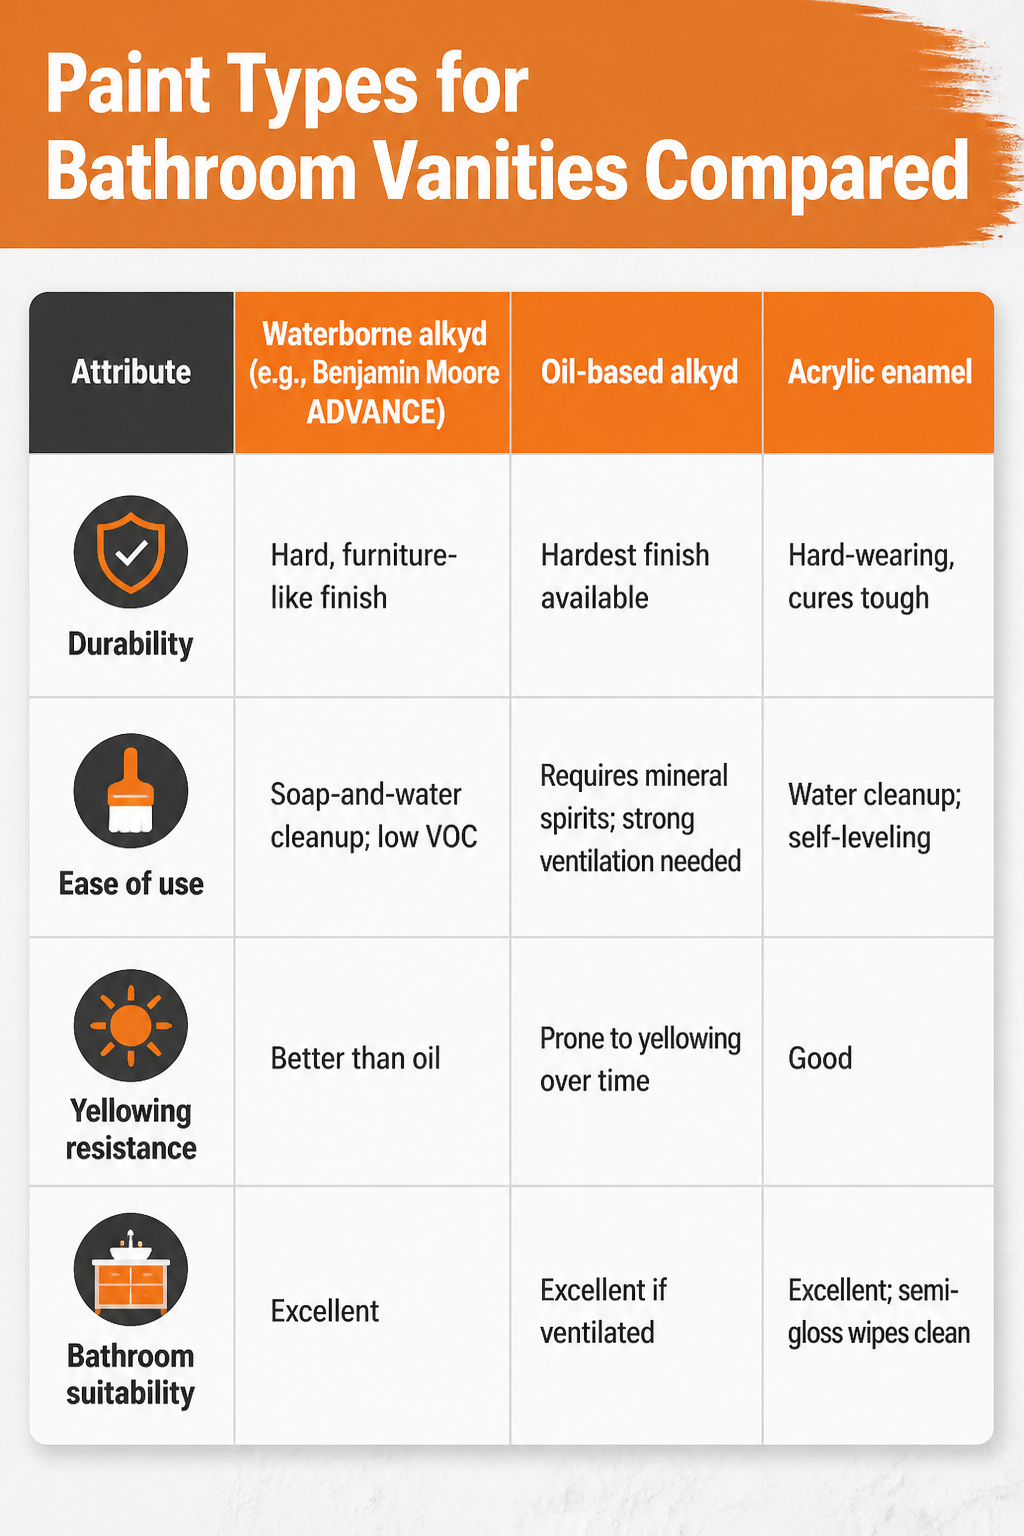
Waterborne alkyd has closed most of the gap with oil-based paint for bathroom cabinets. The solvent fumes and mineral-spirits cleanup of oil still give it the hardest, most durable finish, which is why pros sometimes spec it for built-from-scratch kitchens. In a bathroom vanity refresh, though, the tradeoffs tilt toward newer chemistry.
| Attribute | Waterborne alkyd (e.g., Benjamin Moore ADVANCE) | Oil-based alkyd | Acrylic enamel |
|---|---|---|---|
| Durability | Hard, furniture-like finish | Hardest finish available | Hard-wearing, cures tough |
| Ease of use | Soap-and-water cleanup; low VOC | Requires mineral spirits; strong ventilation needed | Water cleanup; self-leveling |
| Yellowing resistance | Better than oil | Prone to yellowing over time | Good |
| Bathroom suitability | Excellent | Excellent if ventilated | Excellent; semi-gloss wipes clean |
The best paint for a bathroom vanity is a waterborne alkyd paint like ADVANCE®, which offers a smooth, furniture-like finish.
That "furniture-like" quality matters because vanities take knocks from hair dryers, cleaning bottles, and daily moisture. Sherwin Williams Emerald Urethane Trim Enamel, another water-based option, self-levels hard enough that some painters use it for doors and trim too. I would skip oil unless the cabinets are staying in place and I could run a fan to the outdoors for hours, since a respirator is non-negotiable with those fumes in a small bathroom. For an afternoon project, waterborne alkyd or acrylic enamel gets the durability without the ventilation headache.
Tools and Materials

The right brushes and rollers make the difference between a vanity that looks repainted and one that looks finished. I keep two angled sash brushes on hand, a 2½-inch and a 1½-inch, for cutting in around edges and laying paint into the detail work without dragging it onto the wall. A 4-inch roller with cover handles the flat panels fast, and a small foam roller works well for the primer coat if you want to minimize texture.
Painter’s tape goes along the countertop, walls, and floor where the vanity meets them. Press it down evenly and run a damp rag over the edge to seal it. Drop cloths catch the drips; sanding blocks, both medium-grit at 120 to 150 and fine-grit at 220, rough up the old finish and then smooth between coats. A degreaser and damp cloths clean off the soap scum and dust that stop paint from sticking. Wood filler patches any nail holes or dents before you start, and a screwdriver pulls the hardware so it stays clean. Vacuum and a microfiber towel handle the sanding dust. Primer matters too, a bonding primer if the surface is glossy or laminate.
Primers Compared

Bathroom vanities sit at the intersection of two problems for primer: slick factory finishes that reject paint, and steam that tests how well that paint hangs on once it is there. The three primers that keep surfacing for this job solve those problems differently.
| Zinsser BIN Shellac Primer | INSL-X STIX Waterborne Bonding Primer | Sherwin-Williams Extreme Bond Primer | |
|---|---|---|---|
| Base | Shellac | Acrylic waterborne | n/a |
| Best for | Minimizing brush marks; flexible topcoat choice (oil or water-based paint) | Maximum adhesion to glossy or hard-to-stick surfaces | Bonding to hard-to-stick surfaces without full sanding |
| Dry time | n/a | n/a | 2–3 hours |
| Sanding required | n/a | n/a | May not be necessary on clean, paintable surfaces |
Shellac-based primer like BIN dries fast and levels out brush marks better than the alternatives, which matters on flat cabinet panels where every stroke shows. The tradeoff is the smell and the cleanup; you are working with denatured alcohol, not soap and water. STIX and Extreme Bond both let you skip that, and Extreme Bond specifically removes the sanding step from prep on surfaces that are already clean and sound. That saved me a weekend afternoon once on a vanity that was in good shape but had a factory polyurethane coat that nothing else would bite into.
The choice comes down to how bad your surface is and how much odor you can ventilate. Slick, glossy, or questionable adhesion: STIX or Extreme Bond. Already sanded or willing to sand, and want the smoothest possible base for either oil or latex paint on top: shellac.
No-Sanding Methods

A few brands now sell cabinet coatings that promise to stick without sanding first. Rust-Oleum’s Cabinet Transformations kit is the one I keep seeing in hardware stores, and it claims you can skip both sanding and priming. That sounds like a weekend saver if your shoulders already ache from other projects.
The catch is what these products work on and what they do not. A vanity with a factory finish in decent shape is a fair candidate. Grease buildup, water damage, or any surface that peels when you pick at it will still need proper prep, kit or no kit. The bond depends on clean, intact existing paint or varnish.
Traditional sanding still wins for two situations. First, any damaged or glossy surface needs the mechanical tooth that only abrasion provides. Second, if you are switching from a dark cabinet to white or pale gray, the no-sand kits may not block bleed-through the way a dedicated primer over scuffed wood will.
The real tradeoff is time versus risk. Skipping sanding saves maybe two hours on a single vanity. Getting three months of chipped paint because the coating failed costs a full redo. For a rental or a bathroom you plan to sell in a year, the kit makes sense. For the vanity you stare at every morning, sanding to 220 grit and priming separately is the safer bet.
Frequently Asked Questions
What is the best paint for bathroom cabinets?
Waterborne alkyd paint is the best choice for bathroom cabinets. Products like Benjamin Moore ADVANCE, Sherwin-Williams Emerald Urethane Trim Enamel, and Valspar Cabinet & Furniture Paint cure to a hard, furniture-like finish that stands up to daily moisture and wiping. These paints are low-VOC, so you can keep the bathroom usable while you work, and they level out as they dry to minimize brush or roller marks.
Do I need to sand my cabinets before painting?
Light sanding is recommended for most bathroom vanities. Scuff glossy factory finishes with 120-grit paper first, then smooth with 220-grit; surfaces already in decent shape may only need a single pass of 220-grit. The goal is a dull, slightly rough surface, not bare wood. Some bonding primers like Sherwin-Williams Extreme Bond Primer may let you skip sanding on clean, intact surfaces, though traditional prep remains the safer route for damaged finishes or dark-to-light color changes.
How long should I wait before reassembling my cabinets?
Wait at least three days, and preferably a full week, before reinstalling doors, drawers, and hardware. Paint feels dry to the touch within hours, but the solvent needs time to fully evaporate so the coating can harden completely. Rushing this step risks doors sticking, peeling, or bonding shut. Full cure continues for days beyond that, so avoid placing objects on the painted surfaces during the first week if possible.





