
A diy basement makeover on a budget can run anywhere from under $100 for sealed paint to just under $3,000 for a full DIY finish, and the single factor that decides which path is yours is moisture. Skip the block sealer and nothing else you install will survive the year. I watched a neighbor learn that after their new drywall grew mold behind the baseboards six months in, a $100 sealer the only thing standing between their finish and a total redo.
1. Paint the Walls
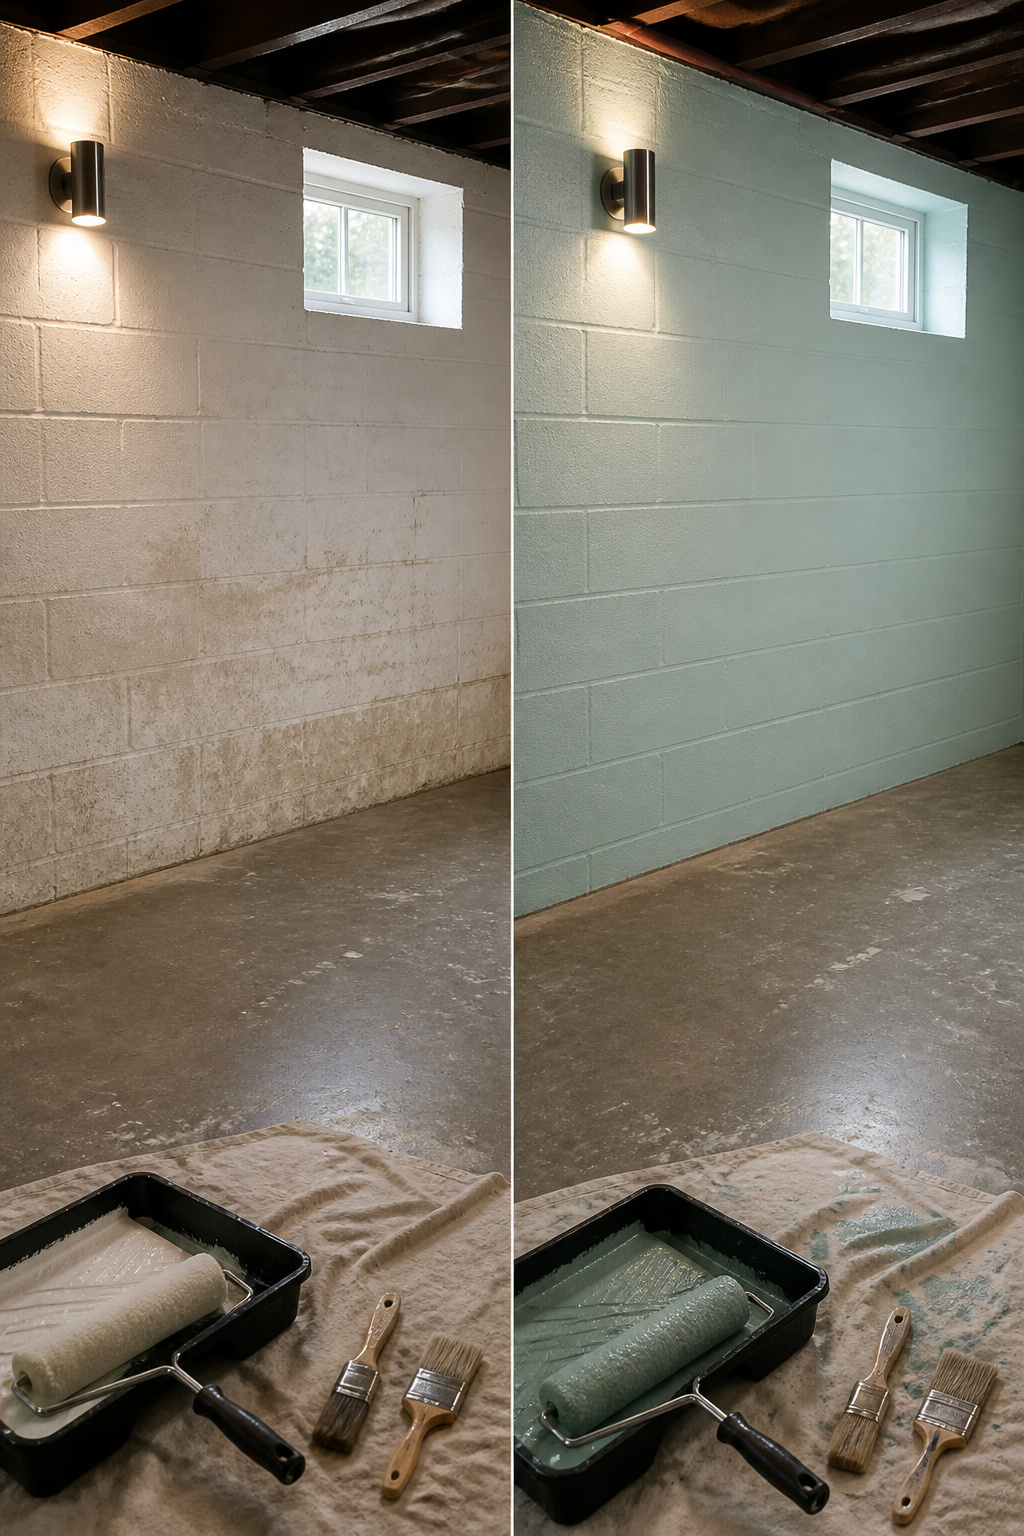
Block sealer goes on first, no exceptions. The walls may look dry, but paint traps what moisture is already there, and a year from now you’ll be stripping bubbled latex and starting over. I learned that timeline the hard way on a garage project, and basements are worse.
The sealer runs about $100 and behaves like sandy paint, speckling off the roller onto anything you didn’t cover. It seals the porous block so the finish coat can actually bond. Once that’s cured, Sherwin Williams or HGTV Home lines carry moisture-resistant formulas that hold up against the damp air down there.
Paint and supplies land around $120 for a typical basement. The return is immediate, walls that were gray cave suddenly read as actual living space. Lighter colors bounce back what little natural light you have; even a coastal tone like Lullaby reads brighter than bare concrete.
Skip the sealer and you’re not saving money, you’re just prepaying for do-over labor.
2. Upgrade the Flooring

Carpet tiles hit a sweet spot for a cold basement that needs to feel finished without a four-figure outlay. Shaw’s Floorigami line, which runs about $700 for 324 square feet, arrives with adhesive backing that peels and sticks; you cut pieces for odd corners and add glue only where the strip runs short. The real advantage surfaces two years in, when one stained tile lifts out and a replacement from your spare box drops in.
Luxury vinyl tile costs more upfront but saves on labor, since it locks together without mortar and shrugs off the moisture that ruins standard laminate. For basements that flood, skip the floating floor entirely and paint the concrete with epoxy; it handles kids, dogs, and spilled juice without warping.
Moisture control decides which path works. Any floating floor meant for below-grade use needs a vapor barrier backing, preferably the molded plastic waffle type that raises the tiles slightly and lets air circulate underneath. Without that gap, trapped humidity turns subflooring into a breeding ground for mold. If your basement takes on water regularly, epoxy on bare concrete is the only sensible play.
3. Add Lighting
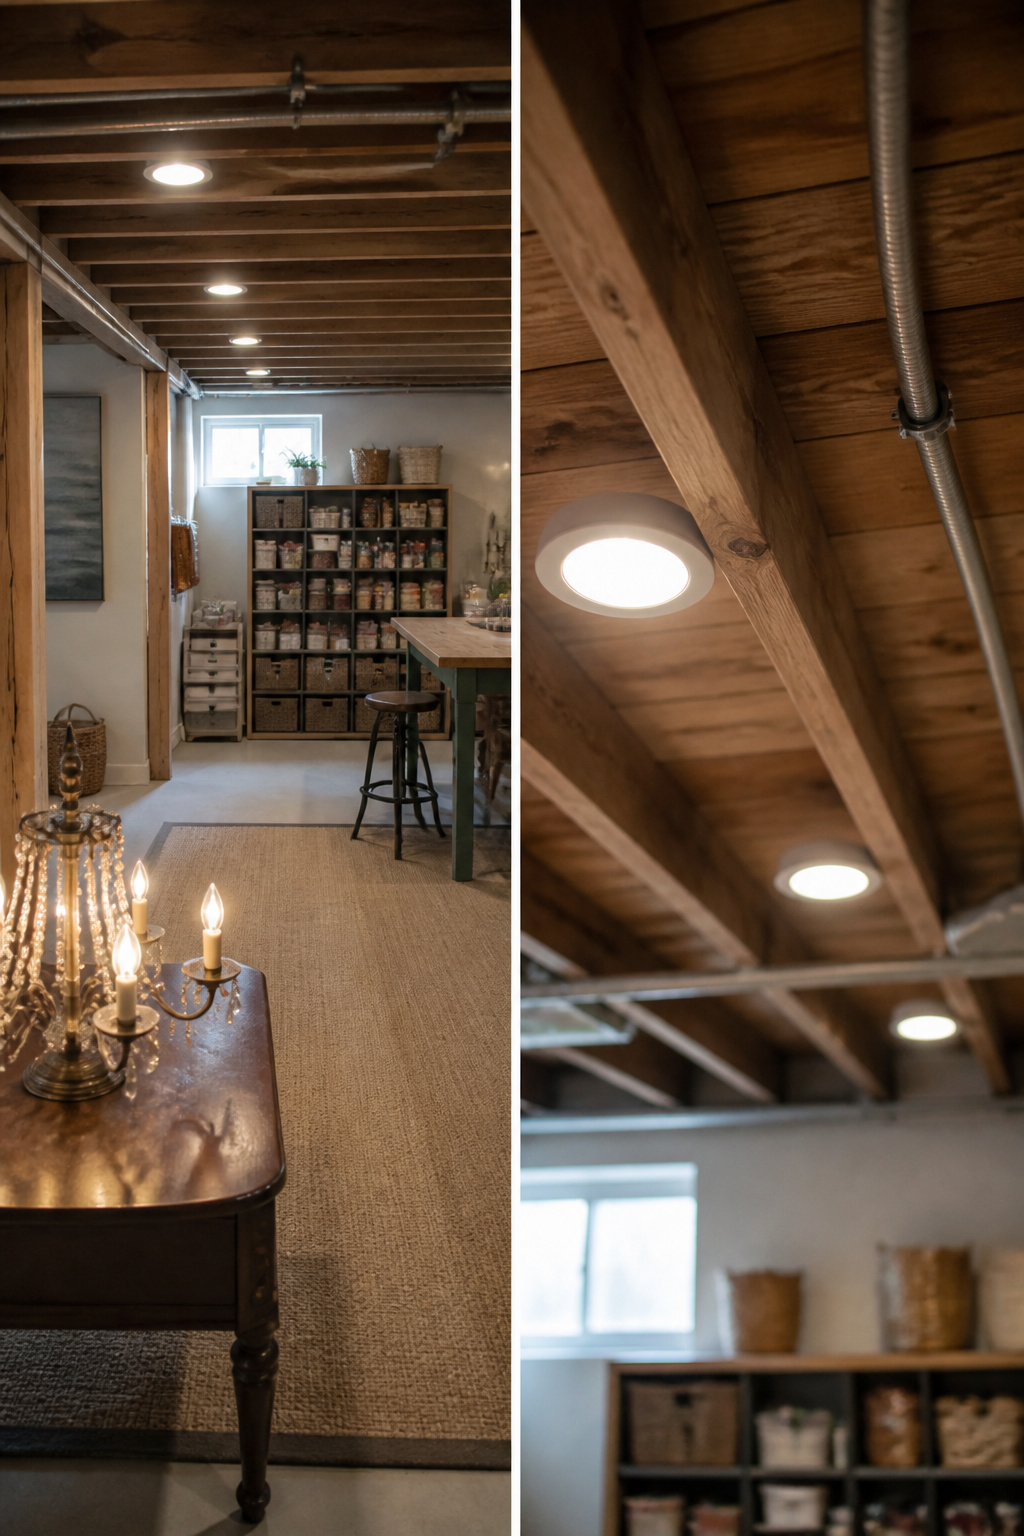
Pull-chain lights in a basement wear you down fast. I learned that the first time I flipped a switch upstairs and nothing happened downstairs because the chain had snapped inside the fixture again.
Recessed can lights between the joists fix that for good. An electrician should run the new circuits and tie them into your panel, especially if you are adding switches that split zones between a finished room and a storage area. Roughing in the wiring yourself is one thing; panel work is where the fire risk lives. Once the circuits are live, installing the fixtures and slipping in dimmable LED retrofits is afternoon work you can handle. The materials ran about $100 when I priced it out for my own space.
If exposed joists are part of the look, leave the conduit visible and lean into it. Outdoor-rated fixtures can cost less than interior equivalents and read as intentional against raw ceiling. A vintage chandelier dropped over a table works the same trick, turning unfinished structure into contrast that feels designed rather than stopped short.
4. Create Distinct Zones
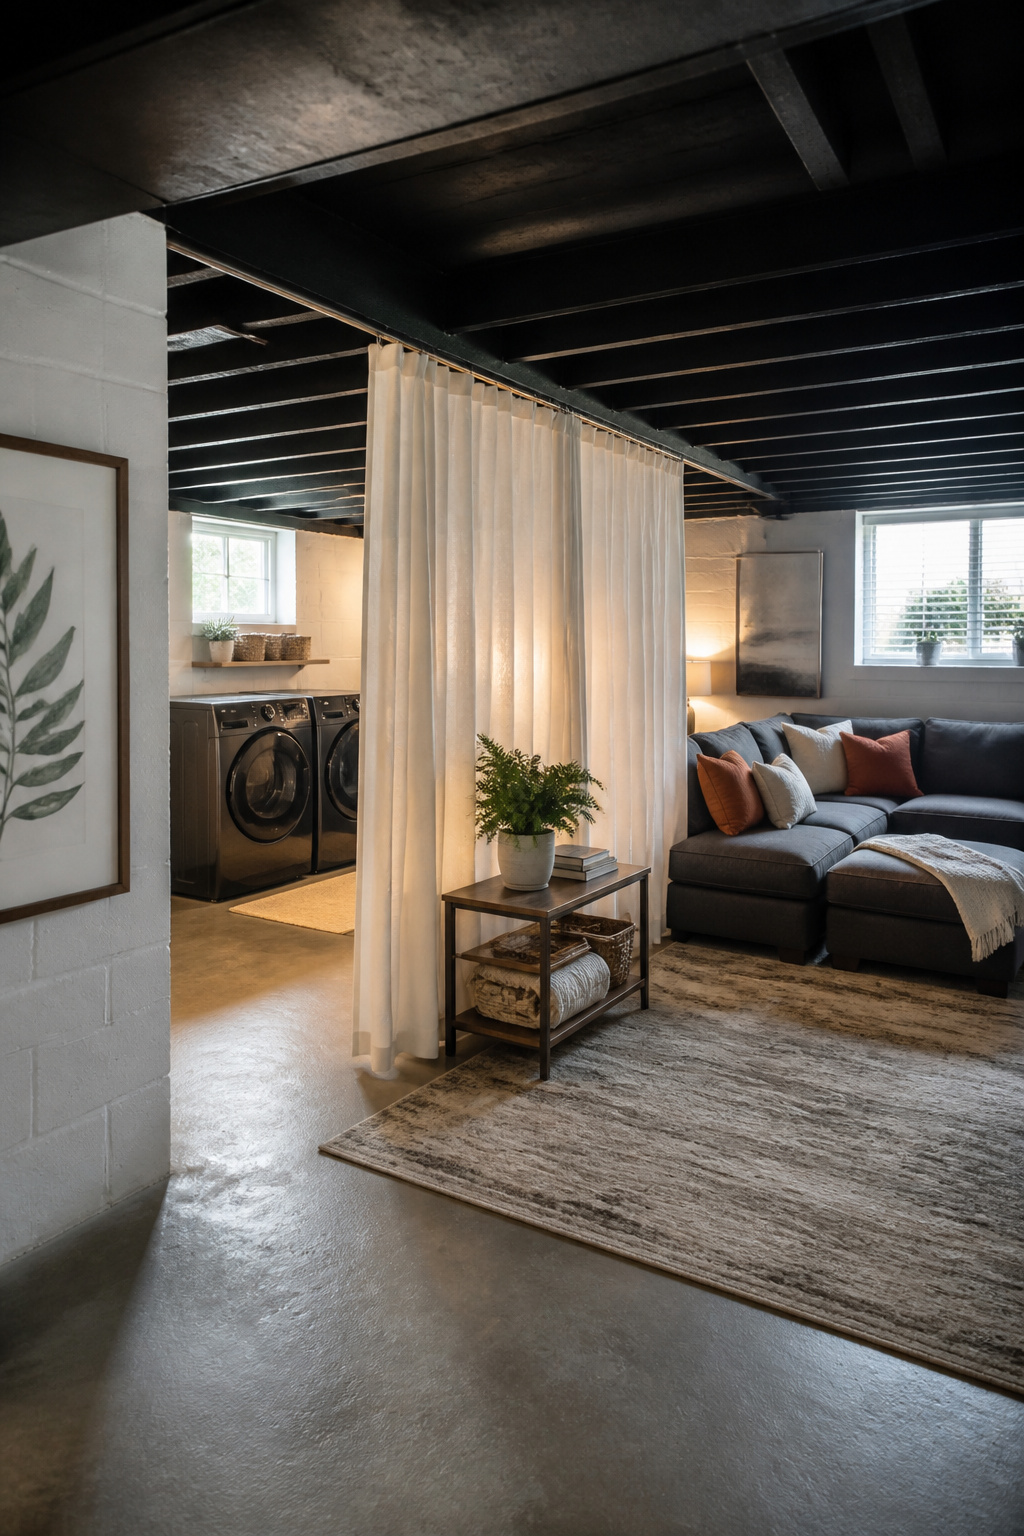
A wide open basement is just a concrete box until the space starts answering to different parts of your day. The ceiling-height curtain track is the cheapest way to make that happen without picking up a stud finder. I ran one across the middle of my last basement to split the laundry corner from the TV side, and the difference was immediate. The fabric deadens sound a little, and the soft texture keeps the room from reading like a storage unit.
Folding wooden screens or a sliding barn door do the same zoning job if curtains feel too temporary. The real mistake is hanging fabric anywhere near the furnace or water heater. Leave plenty of clearance there, or skip that wall entirely and curtain off the storage shelves instead. A guest bed tucked behind ceiling-height drapes beats explaining why your in-laws are sleeping next to the water softener.
5. Hide Mechanicals
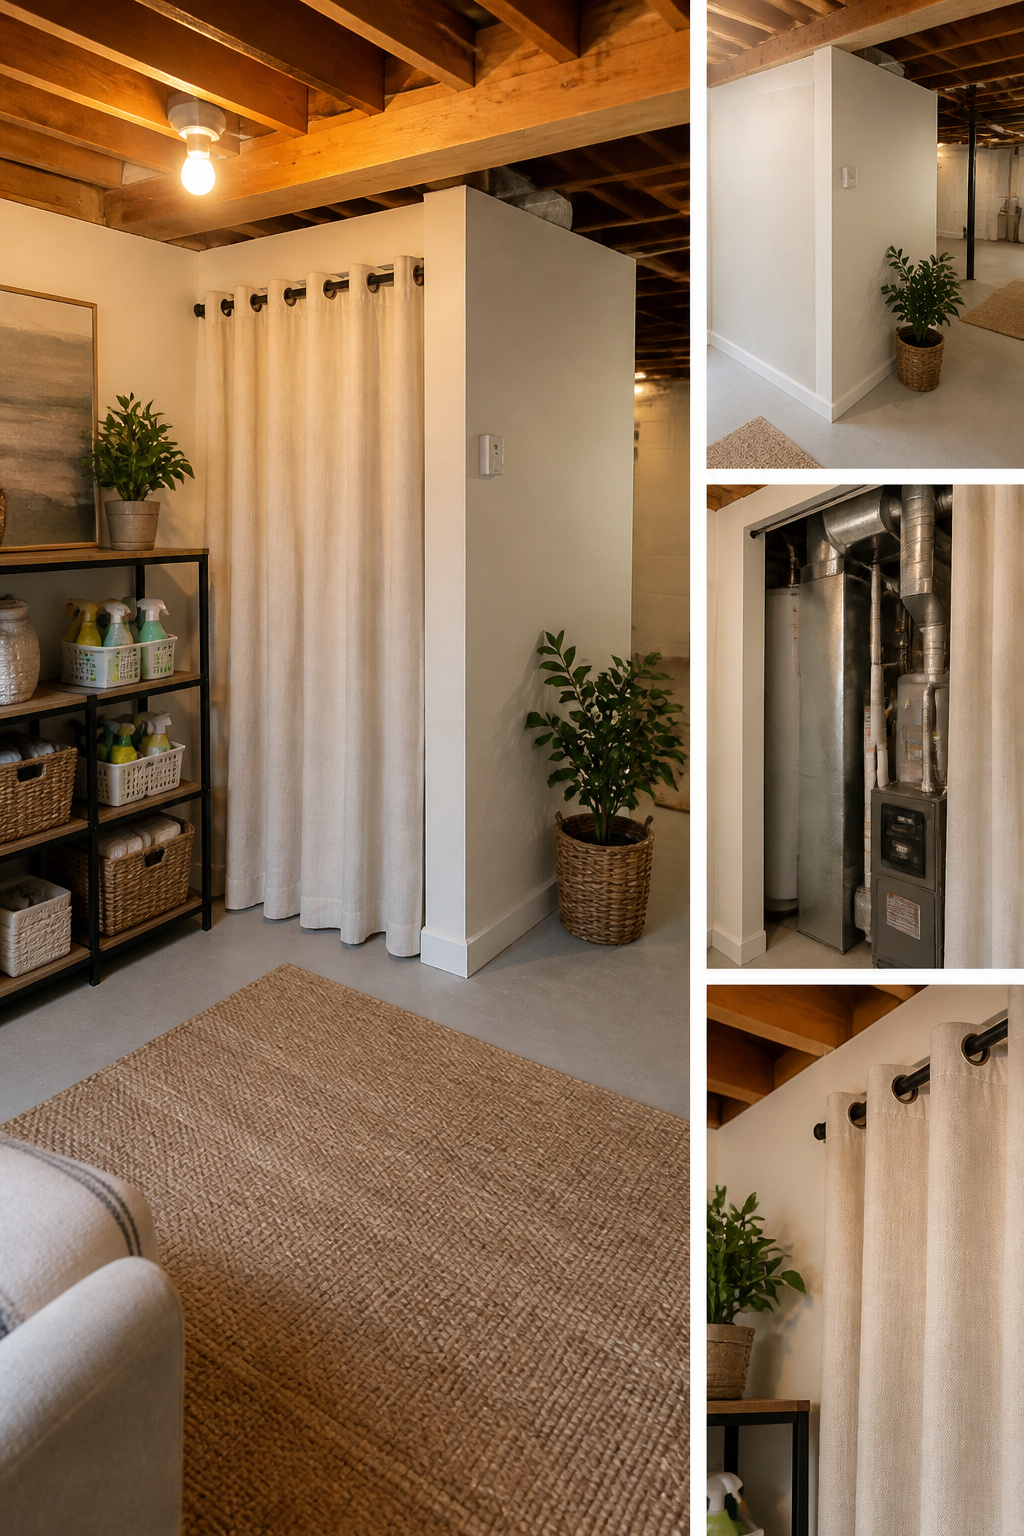
Nothing drags a basement down faster than a tangle of ductwork, pipes, and the furnace looming in the corner. Framing walls to box them in takes a weekend and about $300 in lumber, with studs running 16 inches on center to keep drywall flat and straight. Add R5 insulation at roughly $150 and 36 sheets of mold-resistant drywall for $350, and the mechanicals disappear behind clean lines you can paint or finish however you want.
Curtains cost far less and work fine for hiding a water heater or laundry corner, provided you leave enough clearance that fabric never crowds anything producing heat or combustion. They soften the space, too, which drywall alone rarely does. The catch is zoning: a full wall lets you mount shelves or a TV later, while curtains only hide what is behind them. For a furnace or gas lines, framing and firestopping is the safer call, and in many municipalities that work requires inspection regardless.
6. Incorporate Storage
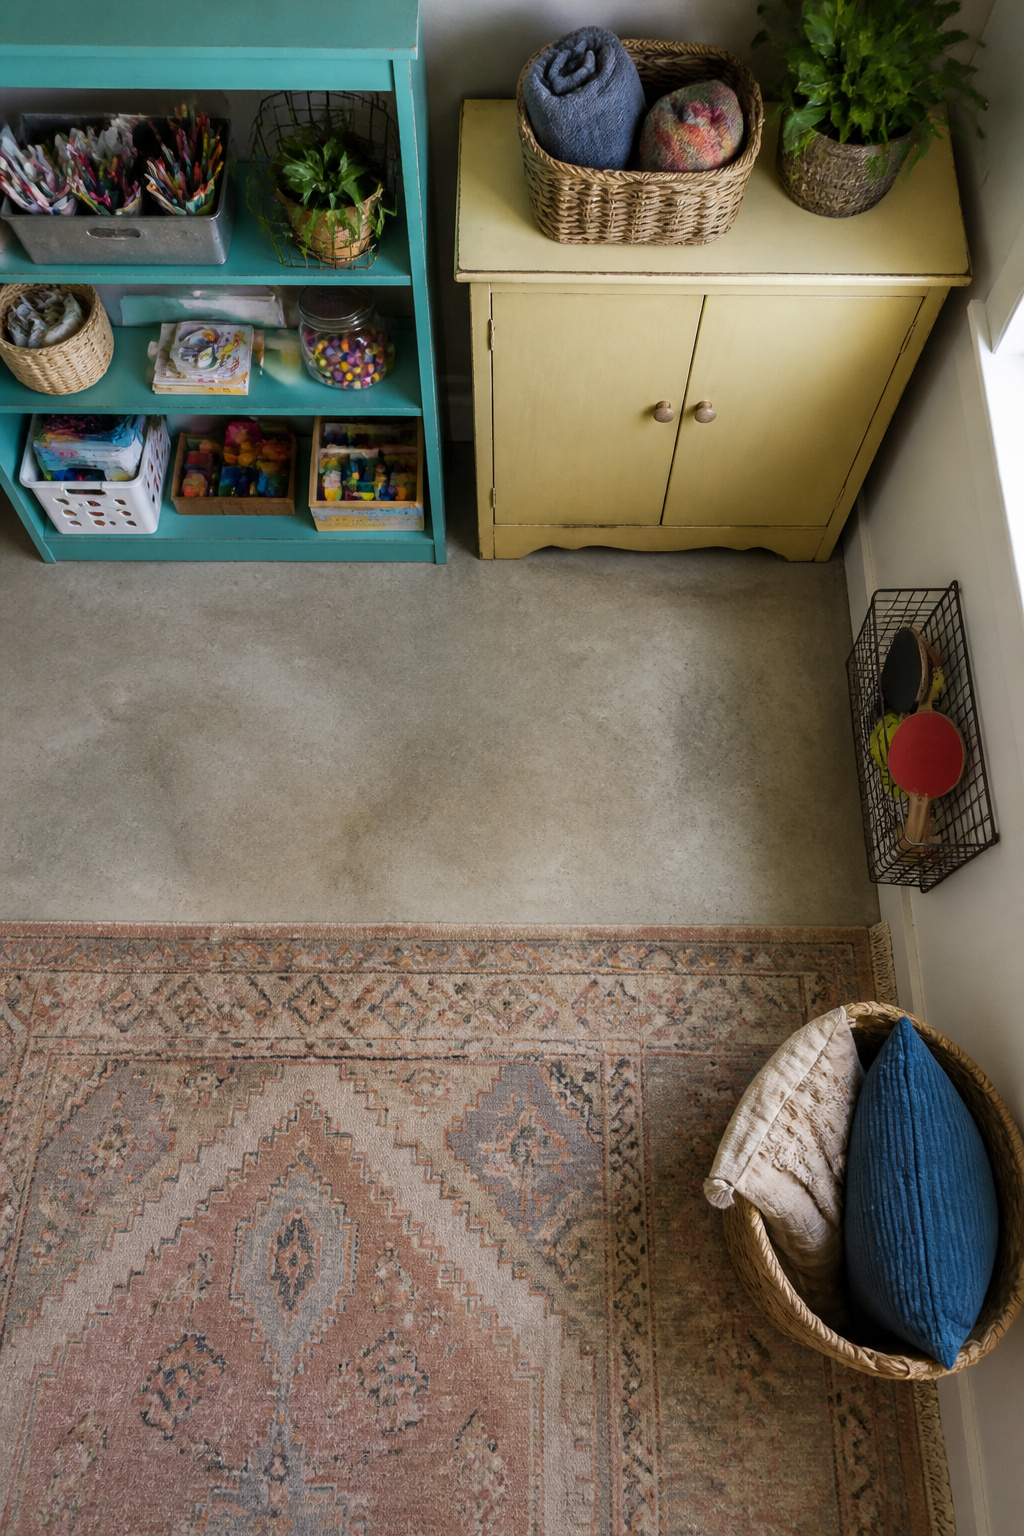
Storage turns a basement from a drop zone into a room you actually use. I have watched too many half-finished basements drown in Rubbermaid tubs because nobody built a place for the stuff to live.
Thrifted shelves or cabinets cost a fraction of boxed units from the big stores, and a mismatched pair painted the same color reads intentional, not accidental. One homeowner I read about closed in a storage closet with drywall and suddenly had a place to roll toys out of sight. Another hung a wire basket for ping pong gear and reclaimed the floor. The rolling cart trick works for craft supplies: roll it out when the kids want to make a mess, roll it back when they do not.
A cubby system you already own, moved down from a bedroom that outgrew it, handles Legos and board games without a new purchase. The concrete lamp someone made from a thrift store find, inspired by a Pottery Barn design, proves the decor can pull double duty: it stores nothing, but it reminds you the basement is a room, not a warehouse.
7. Install a Wet Bar
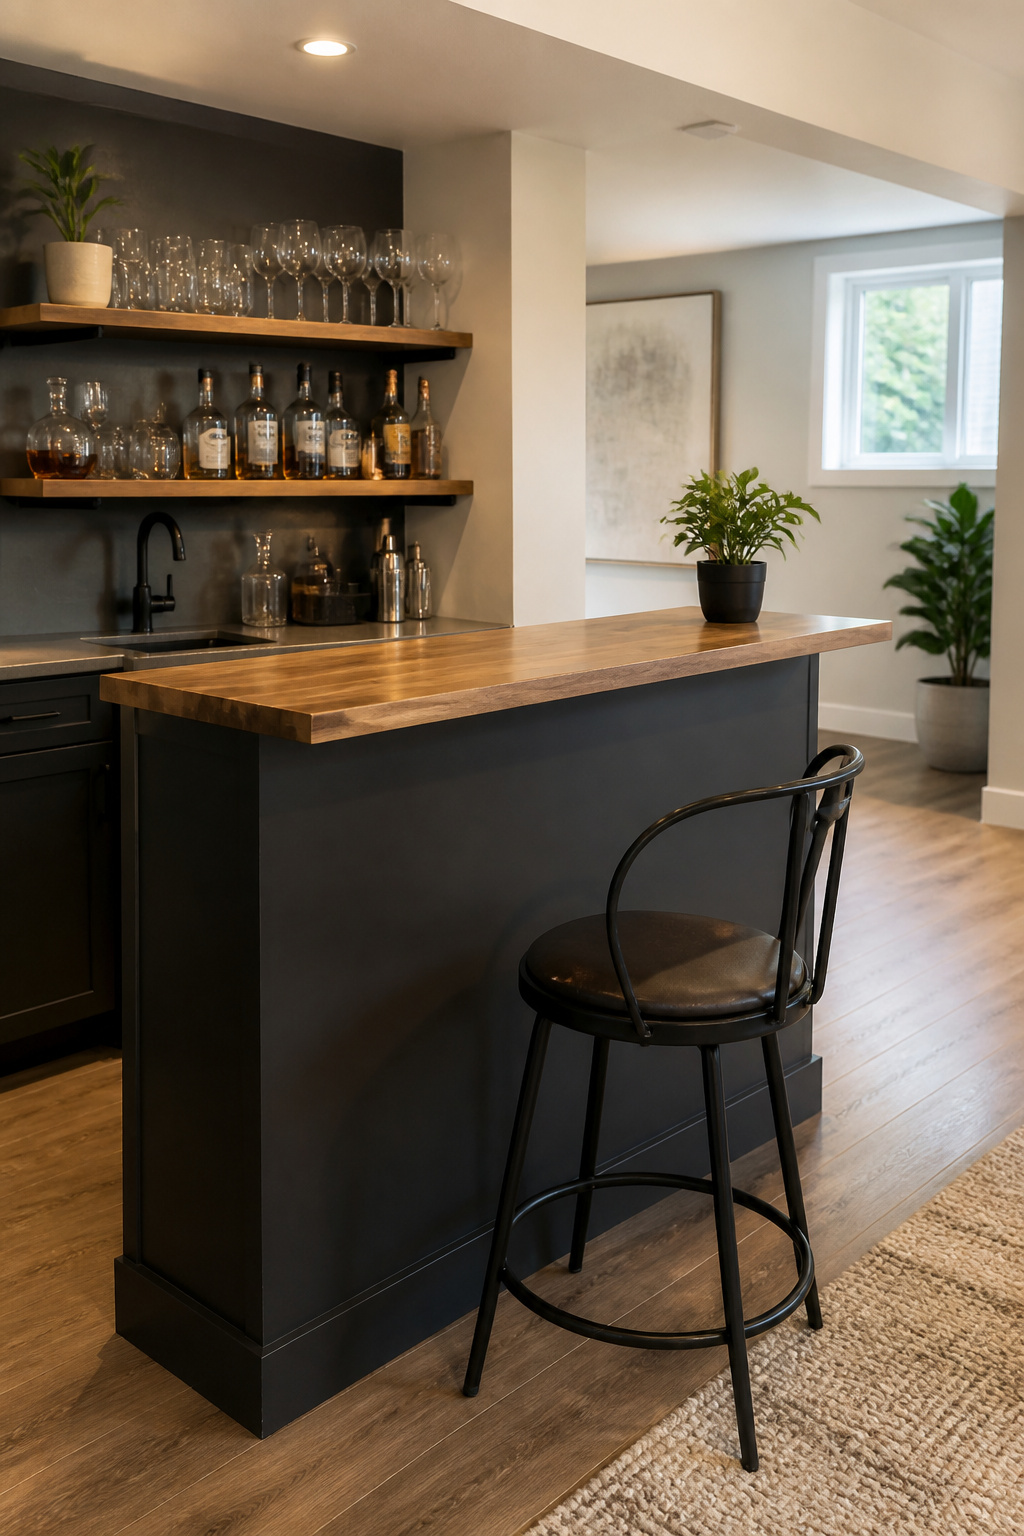
A wet bar turns an unused corner into the room people actually gather in. I built the cabinet box from three-quarter-inch pine plywood, left the plumbing rough-in to a licensed plumber, and topped it with a maple butcher block counter from Lumber Liquidators that ran about $150. The slab arrived unfinished, so I sanded to 220 and sealed with satin varnish. Water rings will find it otherwise.
Painting the base cost another $120 in primer and Sherwin Williams Urbane Bronze, a color that reads industrial without going full man-cave. The oak cabinets I started with were free salvaged pieces, but the principle holds even with new stock from a home center: paint and hardware do more for the look than the price tag of the box underneath.
Start with one area instead of the full space… Put the savings toward a feature that adds real resale appeal, like a wet bar.
— Geico
This matters because a basement finished in zones lets you spend where it shows. The bar is that zone.
8. Use Area Rugs

Concrete floors pull heat out of a room faster than any wall you paint, and in a basement that cold travels straight up through your feet. A large area rug is the cheapest way to reverse that without touching the slab. The pad and fibers trap air, warm the surface, and give the space the kind of texture that reads as finished living area rather than storage zone.
Sound matters down there too. Without a drop ceiling to catch it, every footstep and voice bounces hard off concrete and drywall. A rug with some pile to it soaks up enough of that echo to let two people hold a conversation without leaning in.
Two ways to play this. A thick tufted rug in a deep nap feels incredible upstairs, but against a bare basement floor it traps moisture, holds mildew, and turns musty faster than you’d guess. The better move is an indoor-outdoor rug rated for water resistance. The last decade of outdoor-living design means these come in colors and patterns that look at home next to a sofa, not just a patio table, and the materials shed water and resist mold.
A decent-quality large rug runs $500–$1,000. That is not small money, but it is still less than a quarter of what subfloor and carpet would cost, and it defines a seating area or workspace without a single stud or permit. Lay it down, roll it up if the space needs to change. That flexibility is what budget makeovers actually run on.
9. Update Doors and Hardware
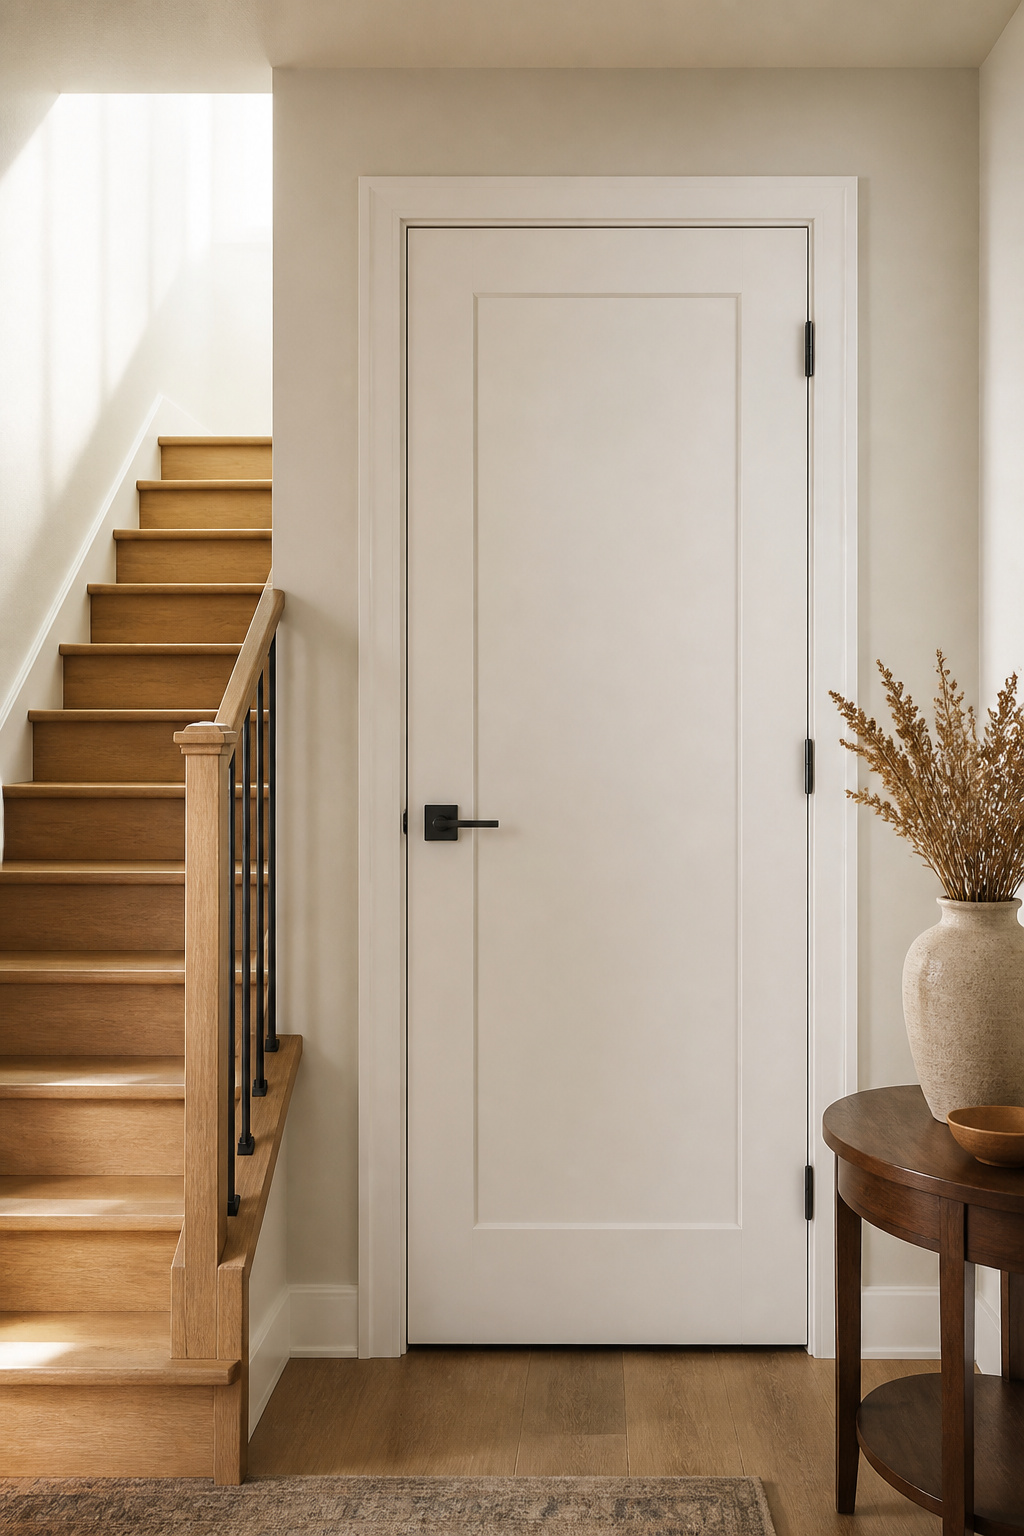
Swapping out basement doors and hardware lands in that sweet spot where a single afternoon produces a visible change. Hollow-core slabs and brass knobs from the seventies drag the whole room backward. Solid core prehung doors feel different the moment you swing one; the weight alone reads as finished space. If the budget only stretches to one door, make it the one at the bottom of the stairs.
Hardware is cheaper still. Small knobs from the big-box aisle, paired with modern hinges, pull a painted door into this decade. I have walked past a freshly painted basement door and not registered it until the third trip downstairs; the old brass knob was what my eye kept catching.
For an exterior basement door, daylight matters more than most people think. A full-light door changes how the space feels every hour you are in it. Fiberglass or steel holds up below grade where solid wood will eventually rot; if there is glass, double-pane construction is the floor, not the upgrade. The damp air down there is patient, and it wins against the wrong material.
Moisture Control First

Block sealer goes on before paint, before flooring, before anything else that looks like progress. I learned this the hard way watching a neighbor’s new drywall grow fur behind the baseboards six months after their "finished" basement went in. The sealer itself runs about $100 for a typical basement and behaves like sandy paint that speckles off the roller onto every nearby surface. It seals the block, which is the only job that matters here.
If the walls are dry, caulk cracks with block-grade caulk, roll two coats of sealer, and move on. If they are not dry, a French drain and a dehumidifier together solve most moisture problems, and calling a waterproofing specialist beats pretending the problem will wait. Rigid insulation at R5 and 1 inch thick glues directly to sealed block for around $150; tape the joins so cold air stays out. The temperature difference is noticeable even before half the basement is covered.
A vapor barrier over concrete floors belongs in this same first pass, not as an afterthought before tile or carpet. Skipping it turns a weekend project into a mold remediation.
What Costs What
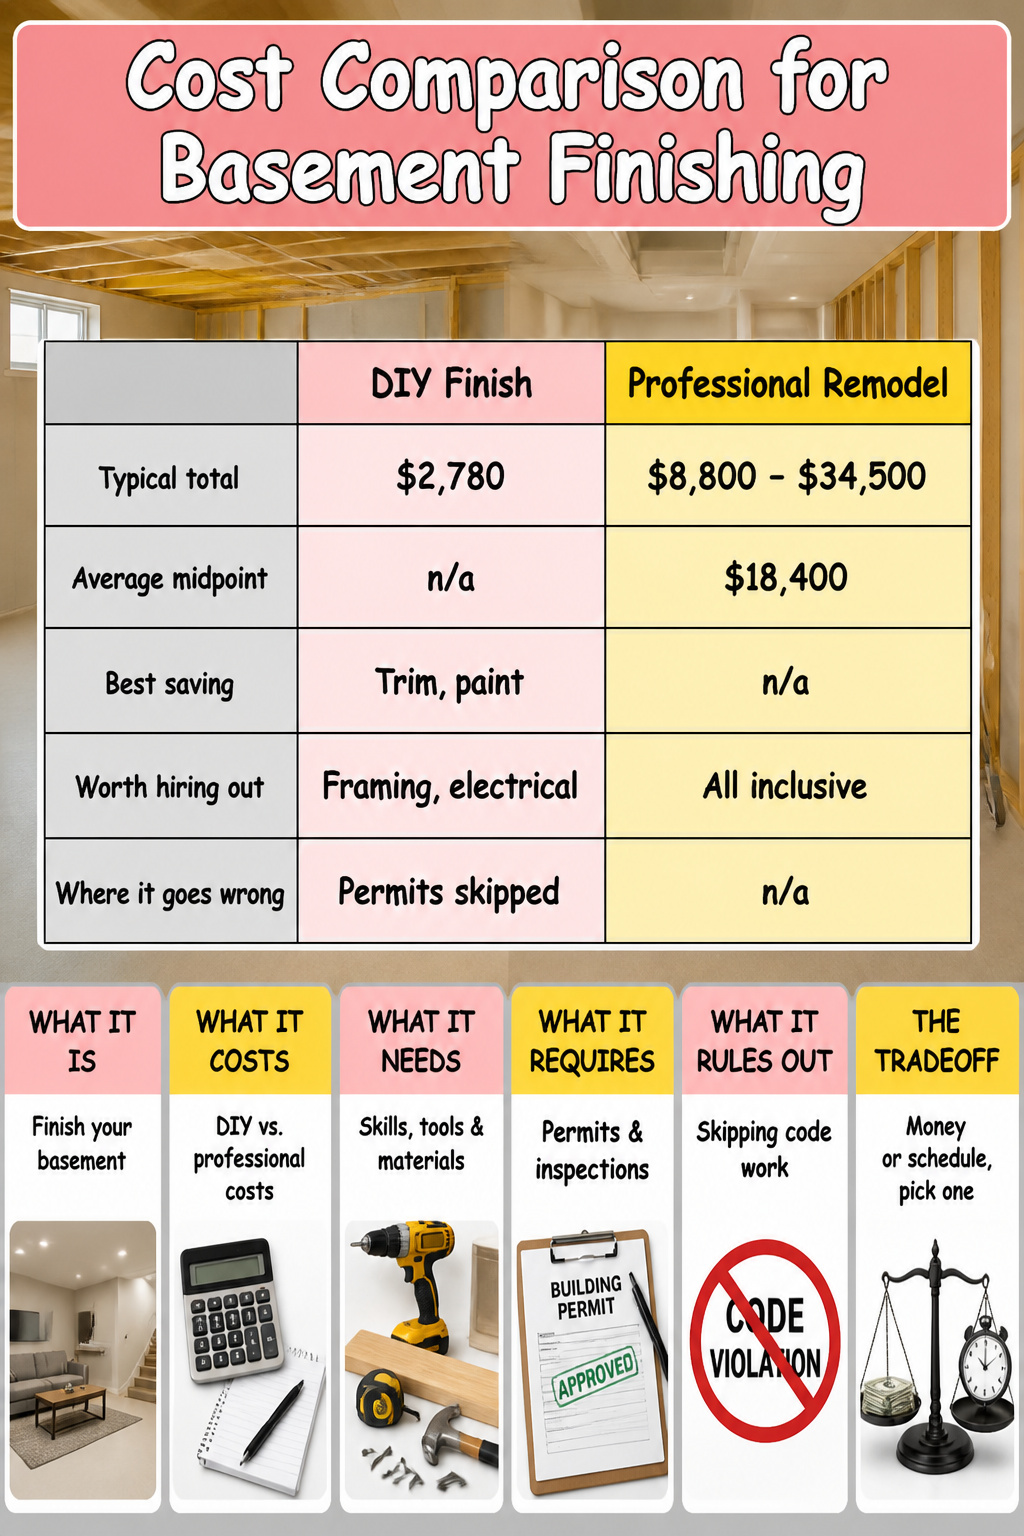
A finished basement from a contractor averages $18,400, with most homeowners seeing quotes between $8,800 and $34,500 depending on square footage and finishes. My own DIY finish came in at $2,780, which is the number that still surprises me when I say it out loud. The gap is not pocket change; it is a kitchen remodel, a used car, two years of groceries.
Where that saving actually lives: trim, doors, paint, and flooring are yours to handle without permits or inspections. The professional quote bundles those same tasks at labor rates that run $65–$135 per square foot in higher-cost states like Massachusetts, New York, and California.
Where I would not cut the corner: framing, electrical, HVAC, plumbing, and anything involving combustion air or firestopping. Those require permits and municipal inspection in most locations, and the rescue calls start when homeowners skip that step and get stuck mid-project. The permit fee stings once. The redo after a failed inspection stings worse.
| DIY Finish | Professional Remodel | |
|---|---|---|
| Typical total | $2,780 | $8,800 – $34,500 |
| Average midpoint | n/a | $18,400 |
| Best saving | Trim, paint, flooring, doors | n/a |
| Worth hiring out | Framing, electrical, HVAC, plumbing | All inclusive |
| Where it goes wrong | Permits skipped on code-required work | n/a |
My four-to-five-month timeline was slower than any crew would have moved, but spread across weekends it never demanded time I did not have. The tradeoff is real: money or schedule, pick one.
DIY or Call Someone

Painting a basement wall or clicking flooring into place rarely needs a permit. Those are the tasks most of us can handle with the tools already in the garage. Storage builds, trim, door swaps, and basic hardware changes fall into the same bucket: if it does not touch wires, pipes, or ducts, the risk stays low and the savings stay real.
The line appears the moment you reach anything inspected by a municipality. Framing, electrical, HVAC work, and plumbing all carry that requirement in many locations, and the related calculations for combustion air or firestopping are easy to underestimate. One basement rescue specialist notes that the call usually comes after someone started without permits and got stuck. The $50-per-vent figure you sometimes see for HVAC duct adjustments is almost always better left to someone who carries the right license.
Your local building department sets the exact rules, and they vary enough that a phone call beats any online list. Check what triggers inspection in your jurisdiction before the first stud goes up.
Design Direction
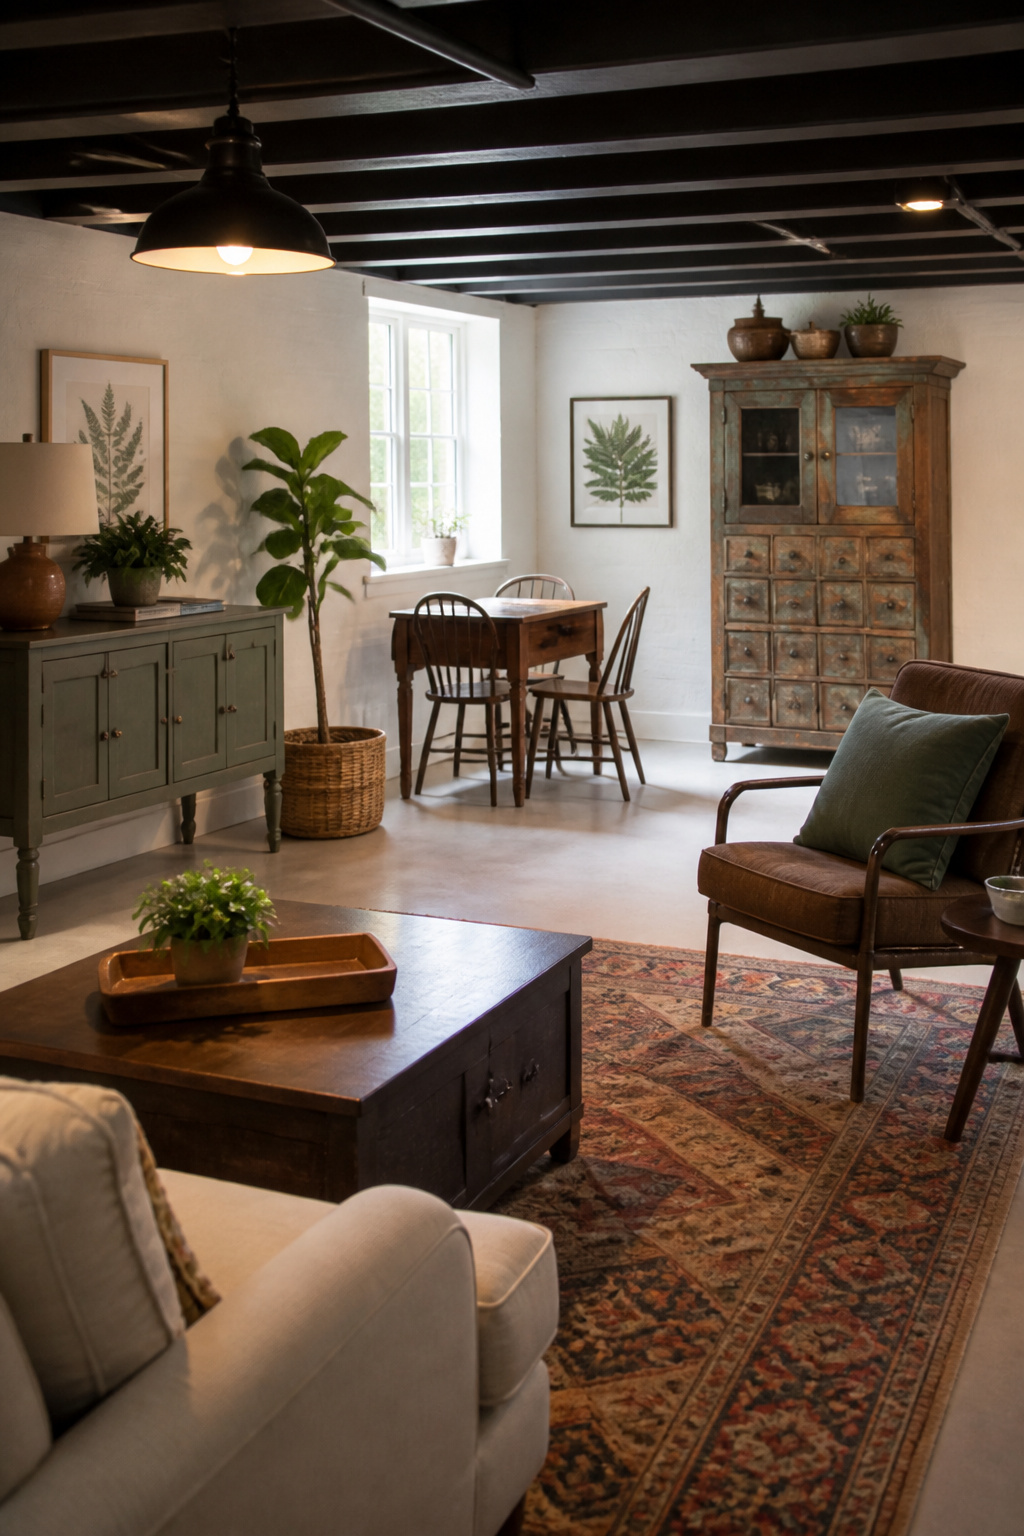
Basements collect whatever the rest of the house rejects, which makes them the perfect place to start from function instead of fantasy. Before buying a single can of paint, I walk the space and name what actually happens down there: movie nights, Lego storage, the treadmill I swear I’ll use. Once that list exists, the design has a job to do.
The cheapest style comes from treating thrifted pieces as raw material, not finished decor. A lamp with the wrong finish becomes the right one with leftover spray paint. Salvaged solid-core doors, trimmed to clear new carpet, swing better than most hollow slabs sold today. A $0 oak cabinet set gets sanded, primed with Zinsser B-I-N, and painted in Sherwin Williams Urbane Bronze for an industrial warmth that pairs with a Maple butcher block counter from Lumber Liquidators. The total for that paint and supplies ran about $120; the butcher block added another $150.
Color works the same way. Sherwin Williams Sea Glass on walls reads as intentional choice rather than leftover decision. For high-traffic family space, their Infinity line repels stains and resists the scuff marks that basements collect fastest.
The carpet pad matters more than the carpet itself. A quality pad rated for concrete basements makes even a budget carpet feel plush underfoot, and that installation with materials ran $980 in the project I studied most closely.
Frequently Asked Questions
What is the best flooring for a basement?
Carpet tiles, luxury vinyl tile, and epoxy paint each work for different moisture conditions. Carpet tiles with adhesive backing let you swap out single stained pieces; luxury vinyl tile locks together without mortar and handles damp air better than standard laminate. If your basement floods regularly, epoxy on bare concrete is the only sensible choice, since it shrugs off water without warping.
How do I waterproof my basement?
Start with block sealer at about $100 for a typical basement, applied before any paint or flooring goes down. Caulk cracks with block-grade caulk, roll two coats of sealer, and add a vapor barrier over concrete floors in the same pass. If walls are not dry, a French drain plus dehumidifier solves most problems, and a waterproofing specialist beats hoping the moisture waits.
How much does it cost to finish a basement?
A professional remodel averages $18,400, with most quotes falling between $8,800 and $34,500 depending on square footage and finishes. A DIY finish can run as low as $2,780. The gap comes from handling your own trim, paint, flooring, and doors while hiring out framing, electrical, HVAC, and plumbing to licensed pros.
Can I do the work myself?
Painting walls, clicking flooring into place, building storage, swapping doors, and changing hardware are all fair game for DIY. The line appears at anything inspected by your municipality: framing, electrical, HVAC, and plumbing need permits and proper licensing in most locations, and skipping that step is where rescue calls start.
What paint should I use for my basement?
Block sealer goes on first, no exceptions, at roughly $100 for a typical basement. Once cured, Sherwin Williams or HGTV Home lines carry moisture-resistant formulas that bond properly to sealed block and hold up against damp air. Lighter colors bounce back what little natural light reaches the space.





